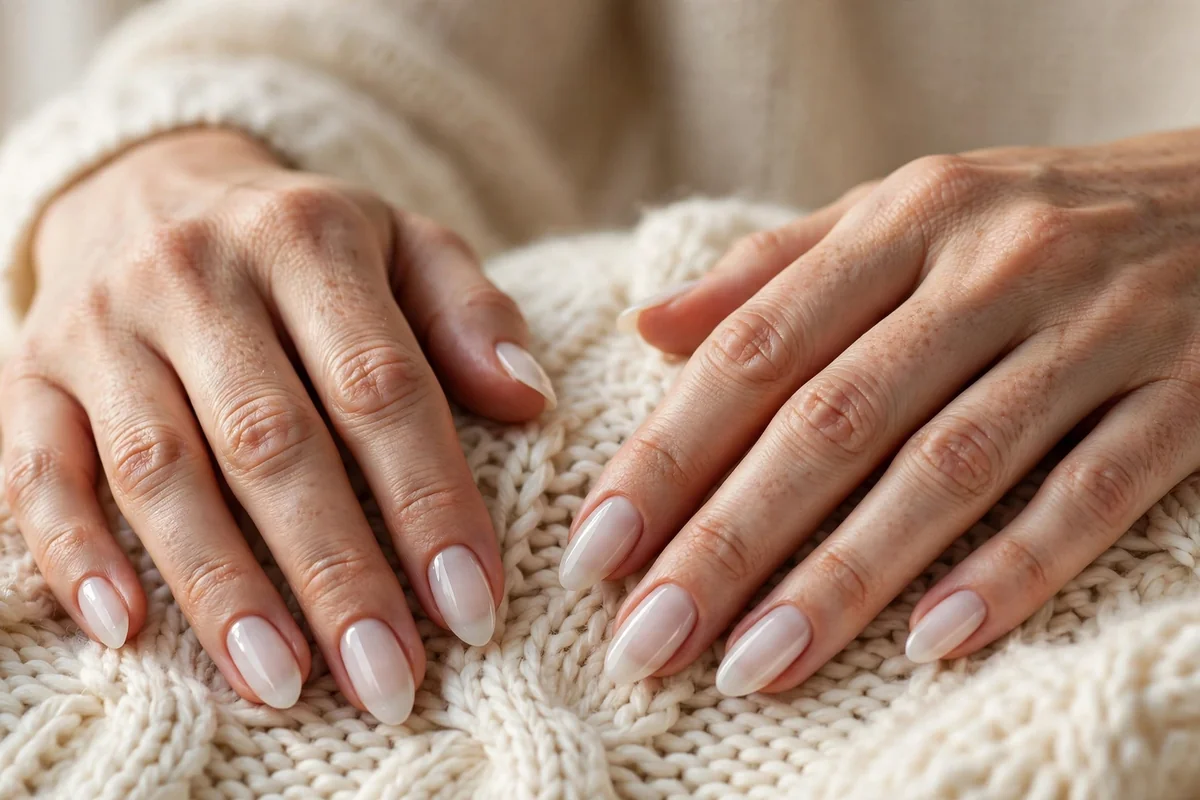
Milky almond nails are fall’s quiet answer to the season’s darker manicure moods. Instead of deep burgundy or chocolate, this look keeps things soft: a sheer wash of milky white over a tapered almond shape. The result reads clean, expensive, and calm, and it flatters nearly every skin tone because the translucency lets your natural nail show through. This collection stays true to that sheer, milky idea while giving it real range, from a barely-there wash and pearl glaze to marble, tortoiseshell, and mocha tips that nod to autumn without going dark. Each design works on medium to long almond nails.
1. The Classic Sheer Milky Almond
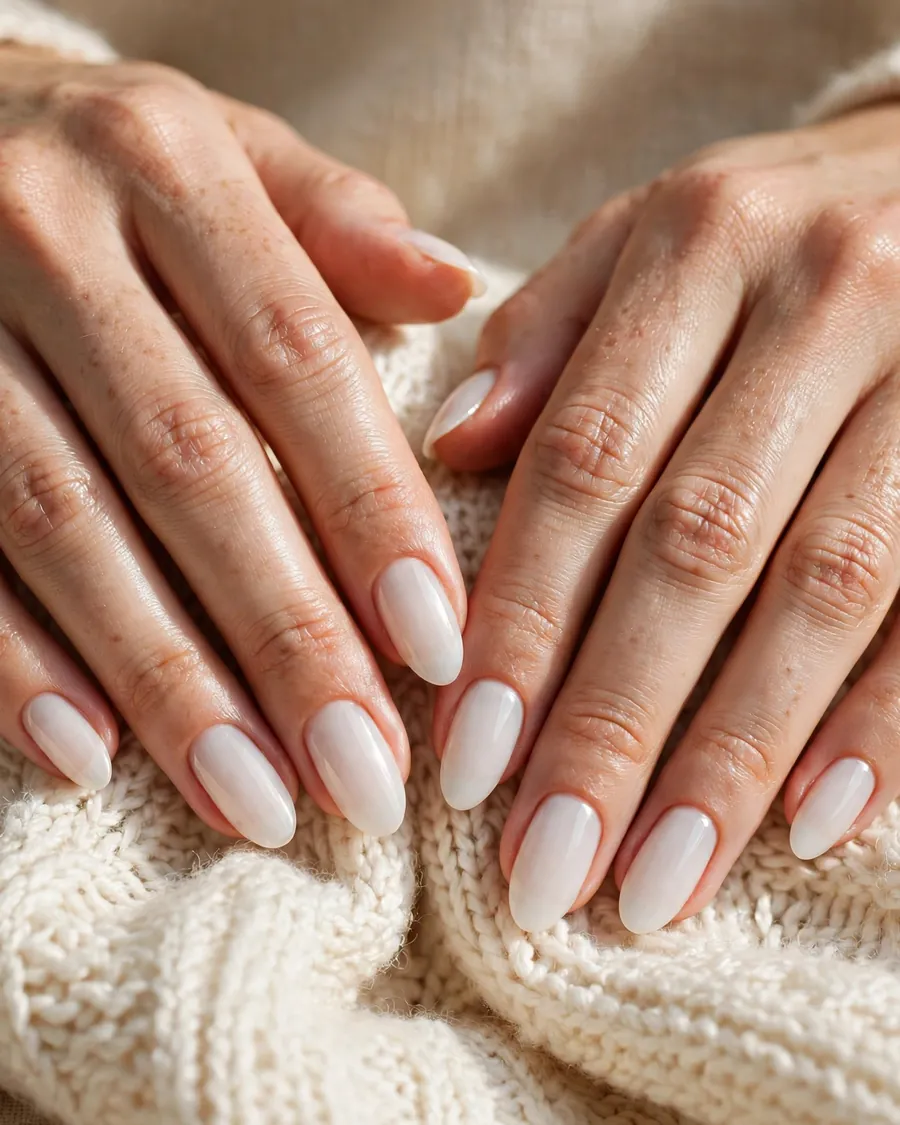
The classic sheer milky almond is the look that started the whole obsession, and it earns its place first because it does the most with the least. Two or three thin coats of milky white sheer polish over an almond shape create a translucent veil — never opaque or chalky — that evens out the nail bed. The almond taper narrows the sides and draws the eye to a rounded point, making fingers look longer even at a modest length. This is the design for a manicure that goes with everything, from a camel coat to a silk slip dress, without competing with your rings. If your nails are weak, a sheer milky builder gel — The Gel Bottle’s BIAB in Milky — adds strength under the color. At home, OPI’s Funny Bunny or Essie’s Marshmallow over a ridge-filling base gives the same glassy veil. Keep coats thin and let each dry fully, or layers turn cloudy.
2. Milky Pink Almond Glow
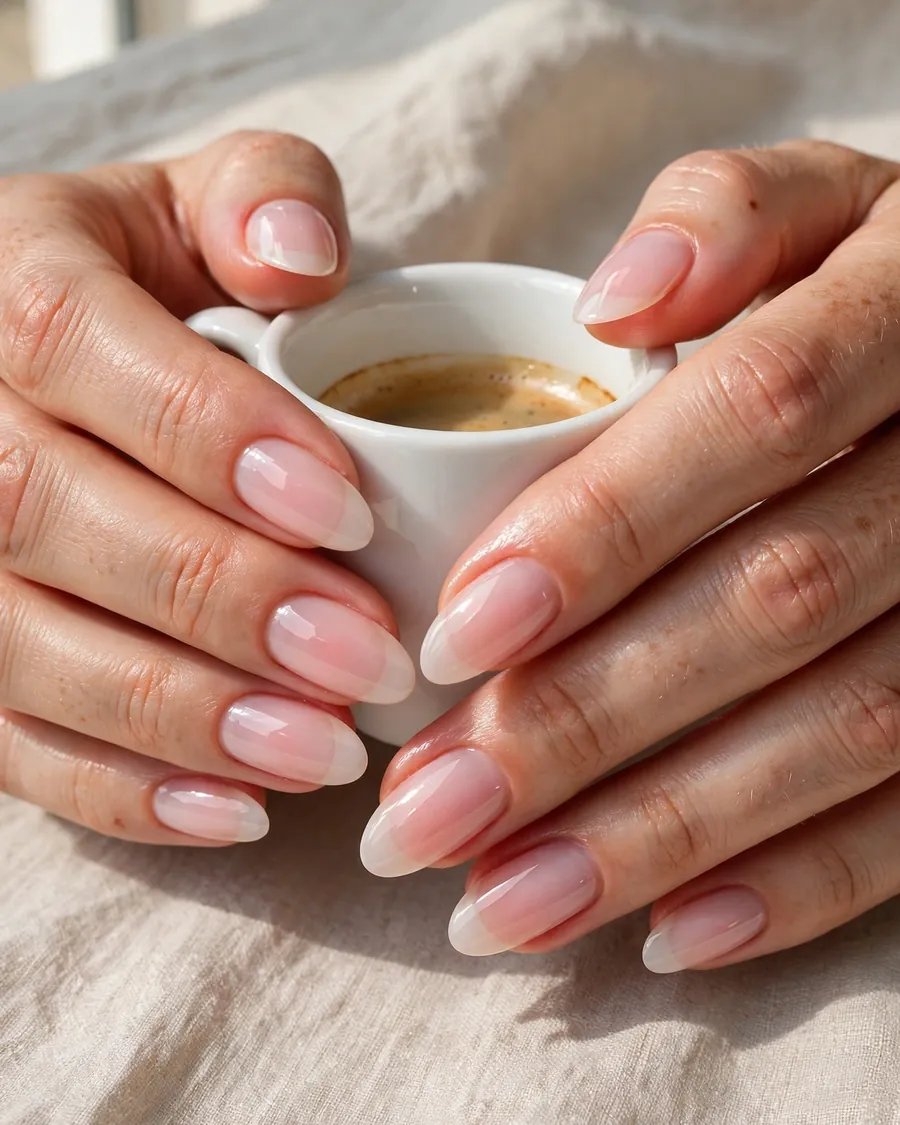
A drop of pink changes milky nails completely. This version mixes the sheer white base with a whisper of blush, so the finished color reads like healthy nail beds warmed from within rather than polish sitting on top. The pink undertone suits cool and neutral skin tones, and it keeps the manicure from looking flat in autumn’s weaker daylight. The almond shape keeps the effect refined: the taper stops the pink reading cute or bubblegum, and the rounded point softens the whole hand. Ask for a milky pink builder gel, or layer OPI’s Bubble Bath under one coat of milky white to build the glow gradually. Regrowth blends in because the color is sheer, chips are barely noticeable, and the glow suits minimal styling. It is a strong pick for bridesmaids, office weeks, and anyone who wants hands that look cared for without announcing a manicure. In natural light, the pink glow reads as healthy nail rather than polish.
3. Milky Glaze Almond Nails
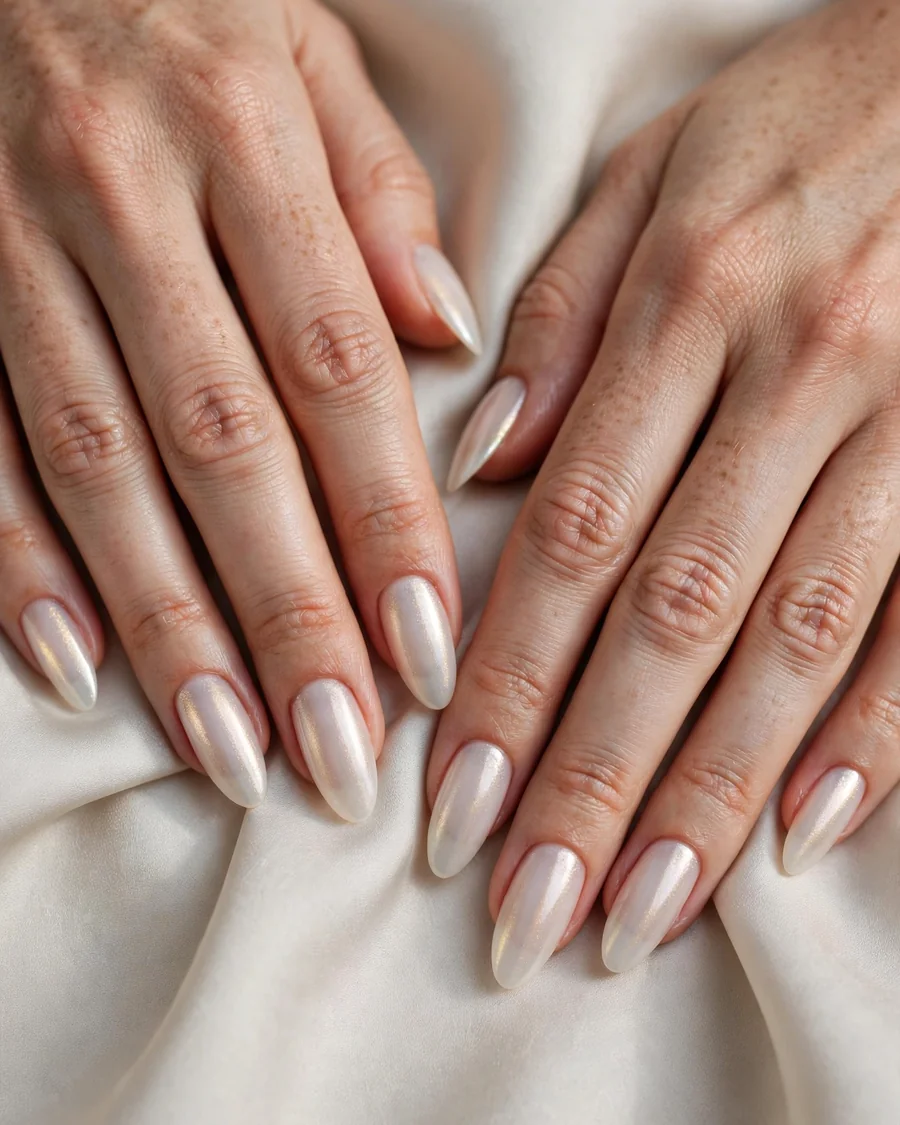
The milky glaze takes the sheer base and dusts it with a fine pearl chrome powder, giving the nails a lit-from-within shimmer that shifts between white and champagne as your hands move. Unlike a full chrome manicure, the effect here stays soft and milky — the glaze is a finish, not the main event — so nails still read as neutral rather than metallic. It is a salon favorite because chrome powder grips best over a no-wipe gel top coat, and it needs a smooth, ridge-free nail. Almond nails show the glaze beautifully, since the taper catches light along its curve. Ask for a sheer milky gel base, fine pearl chrome dusted softly over the tacky layer, and a glossy seal. A lighter chrome dusting keeps the finish daytime-appropriate; a heavier hand pushes it toward evening. Keep styling simple and let the shimmer carry the look; it photographs exceptionally well at fall weddings and dinners.
4. Soft White Milky French Tips
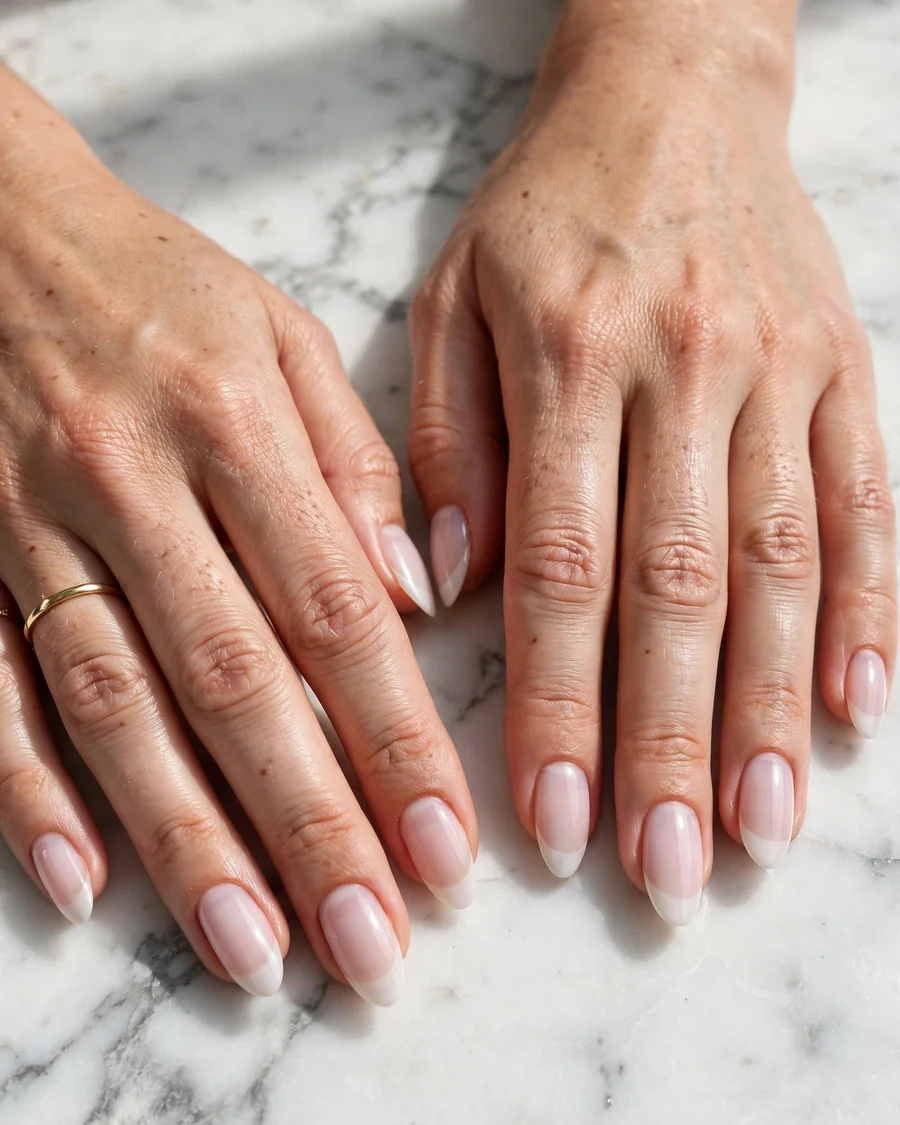
This is the French manicure softened for the milky era. Instead of a stark white tip over pink, a thin band of soft milky white traces the free edge over a sheer milky base, so the tip melts into the nail rather than sitting on top of it. The effect is gentler than the classic French, avoiding the harsh contrast that can make nails look short or costume-like. Proportion matters: the tip should follow the smile line and stay slim, roughly a fifth of the nail length, so the almond shape gently elongates the finger. It suits medium-length almond nails best, though a shorter almond keeps it practical every day. At the salon, ask for a sheer milky base with a soft white tip in the same soft family, not bright opaque white. At home, tip guides and a thin brush will get you there; a flat brush dipped in acetone cleans up the smile line.
5. Milky Almond Ombré Fade
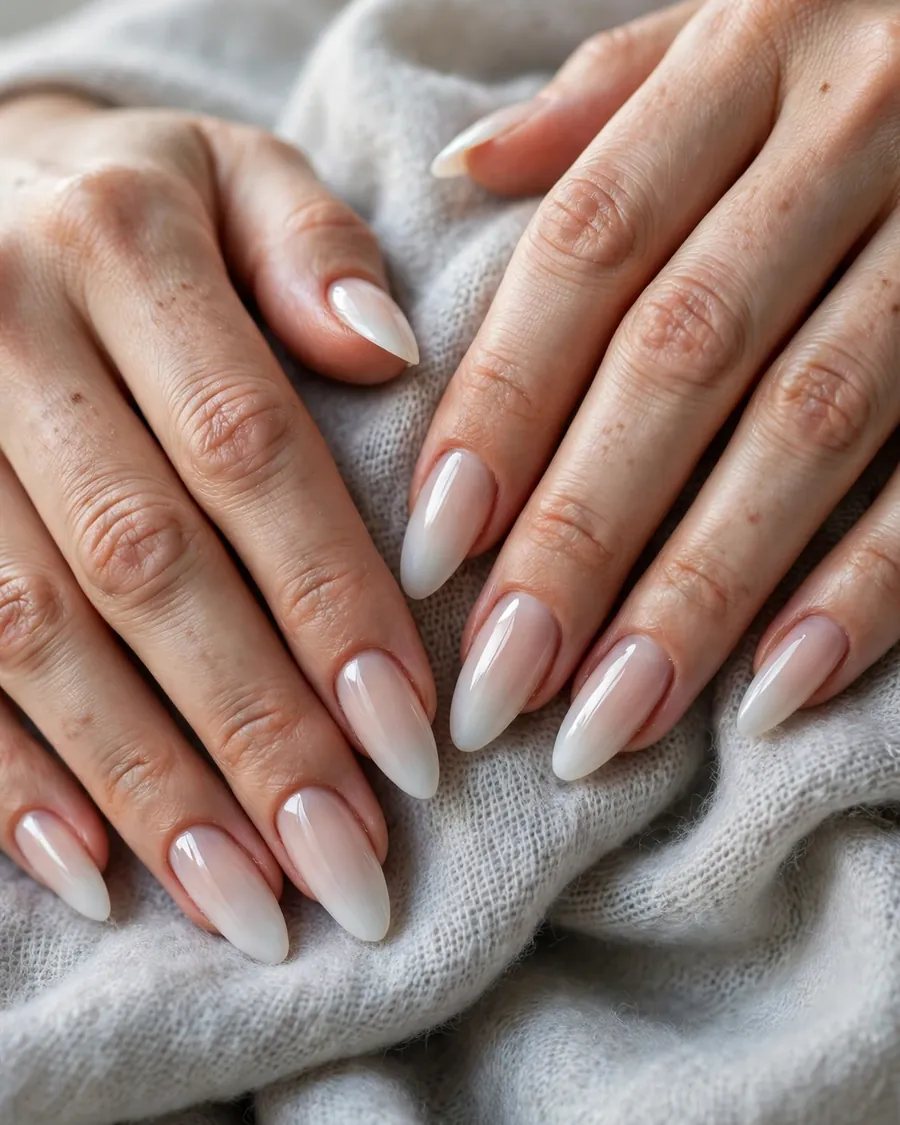
An ombré fade moves from a bare, natural-looking base near the cuticle to a denser milky white at the tip, giving depth without any hard lines. The gradient should be gradual — the milkiness gathers toward the free edge like frost settling on glass — which makes nails look longer and slimmer. It flatters medium and long almond nails, where the fade has room to travel, and it is one of the most forgiving options for regrowth, since the cuticle area starts out nearly bare. Salons sponge the gradient on, layering sheer milky polish over a nude base and sealing with gloss, which keeps the transition soft. For a DIY version, sponge milky white polish from the midpoint outward in thin layers over the sheer base, letting each layer dry first. The fade also disguises uneven nail beds, since the eye follows the soft gradient. Keep the white sheer so the fade stays soft and airy.
6. Milky Marble Almond Nails
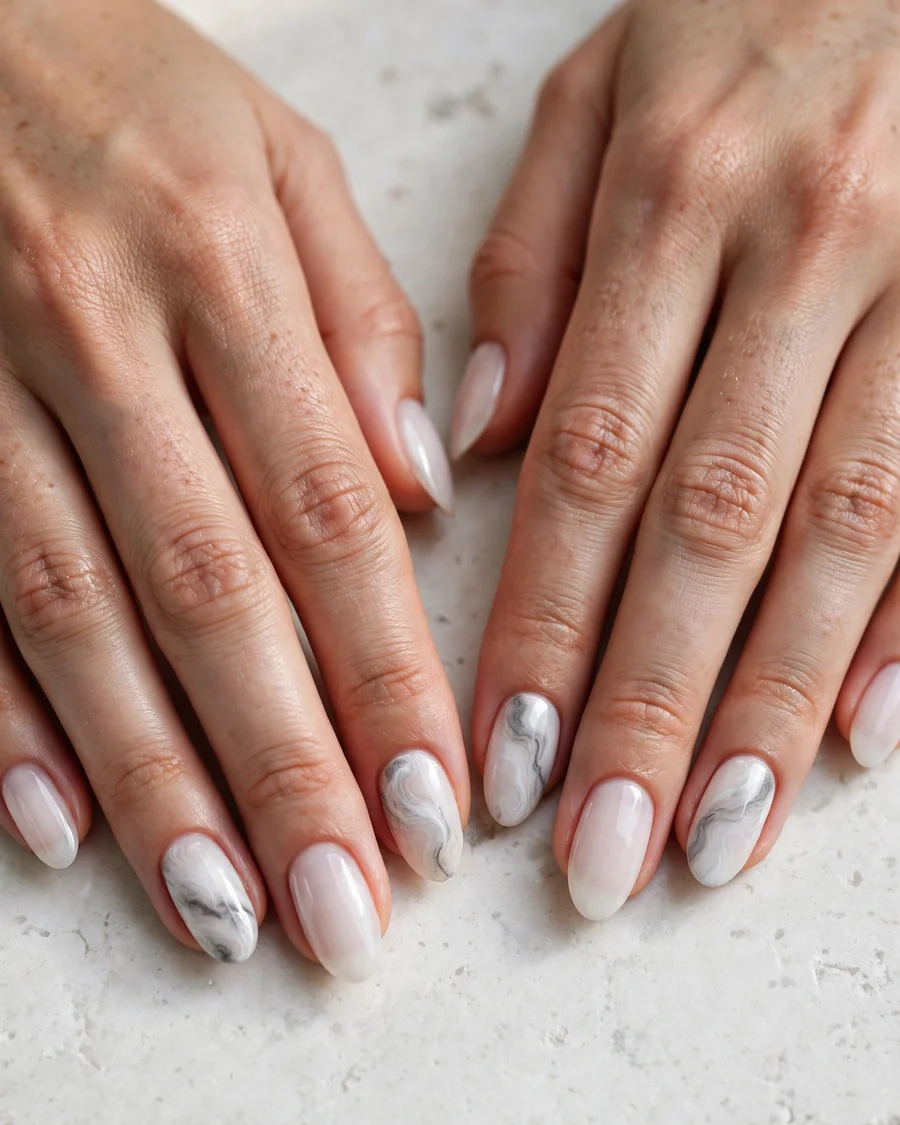
Marble swirls in milky white and soft gray bring movement to an otherwise quiet palette. Thin ribbons of white drift through a sheer milky base, mimicking natural stone, and no two nails need to match exactly — the variation is the point. This design works best as an accent: two or three marbled nails per hand, with the rest in a solid sheer milky shade, keeps it wearable rather than busy. Technicians drag a fine brush through wet polish, then seal with gloss so the swirls look fluid. At home, work one nail at a time while the base is still wet, and use a light hand — too much swirling muddies the colors into gray. The palette stays soft and neutral, suiting casual and formal settings alike, and the stone-like pattern gives the manicure an artistic edge without bright color. A matte top coat over marble gives a honed finish for a quieter take.
7. Matte Milky Almond
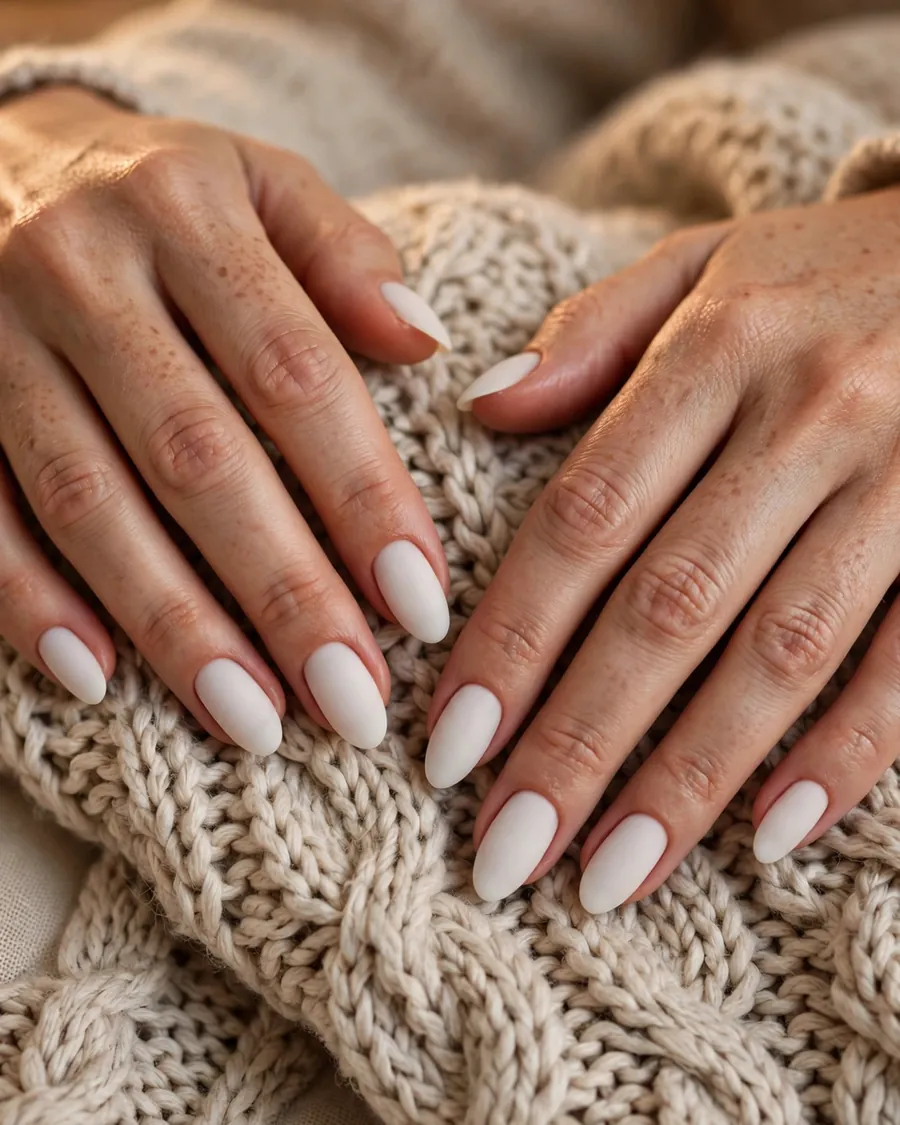
A matte top coat transforms milky nails into something velvety and soft, like frosted glass. Without shine, the milky white reads deeper and more muted, which makes this finish a favorite for everyday fall wear and for anyone who finds glossy nails too attention-grabbing. Matte finishes show chips and texture more readily, so prep matters: smooth the nail plate, use a ridge-filling base, and apply the matte top coat in one even layer. It suits medium almond nails and pairs beautifully with wool, leather, and chunky knits. One practical note — matte top coats can pick up color from denim or dark fabrics, so wipe nails with a damp cloth if you notice transfer. A fresh matte coat midweek revives the finish instantly, and with no shine to distract, the almond shape itself becomes the star. It also flatters hands that show veins or redness, since the muted white neither competes with skin tone.
8. Milky Almond with Gold Micro-Foil
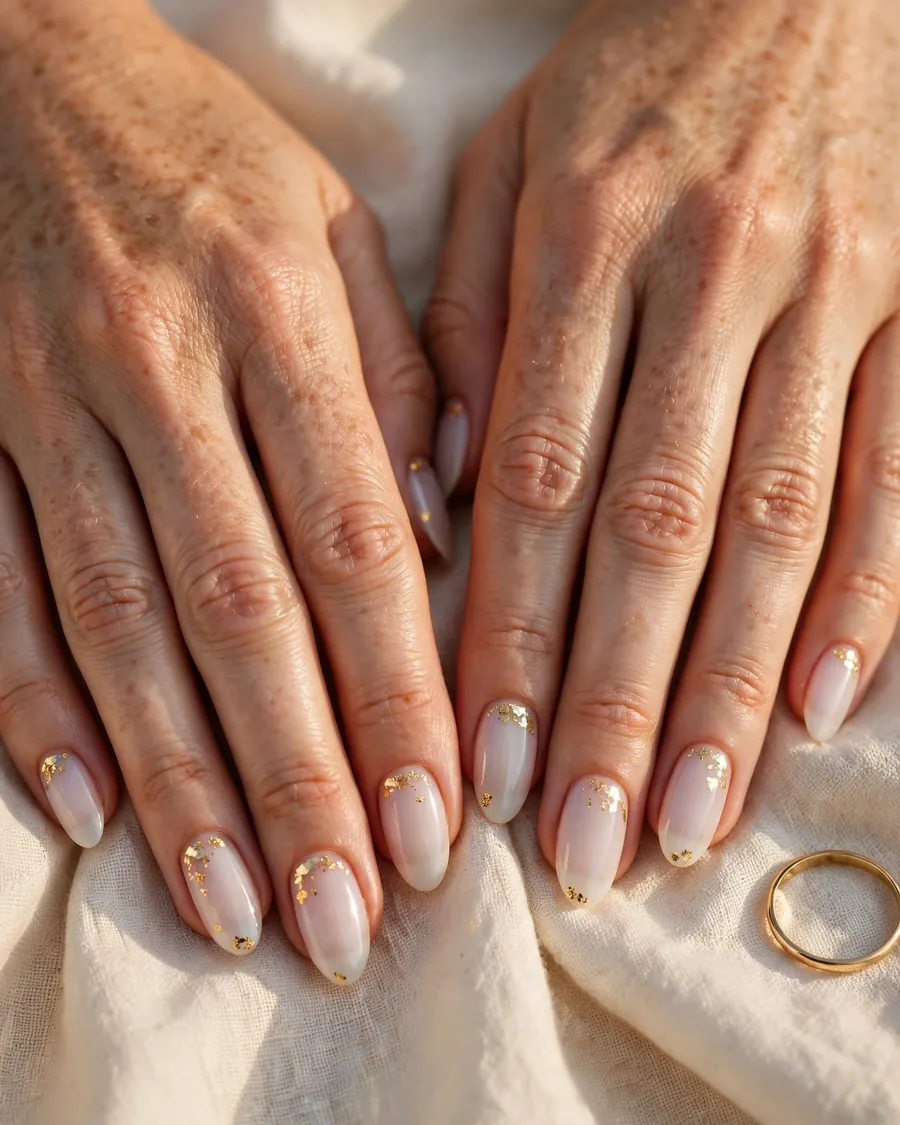
Tiny flecks of gold micro-foil scattered over a milky base turn a simple manicure into something quietly celebratory. The trick is restraint: three to five small flakes per nail, placed off-center near the cuticle or along one side, read as jewelry, while full coverage reads as costume. Gold foil works over sheer milky and milky pink bases, and a glossy top coat seals the flakes smooth so they survive a full two-week wear. It suits medium almond nails especially well, since the length gives the flakes room to breathe, and it flatters warm and neutral undertones. At the salon, ask for gold foil rather than chunky glitter — the irregular edges catch light more naturally. For DIY, use tweezers to place flakes onto a tacky second coat, then seal twice. It is an easy upgrade for fall gatherings that pairs naturally with gold rings. Keep the foil to two or three accent nails for the quietest version.
9. Milky Aura Almond Nails
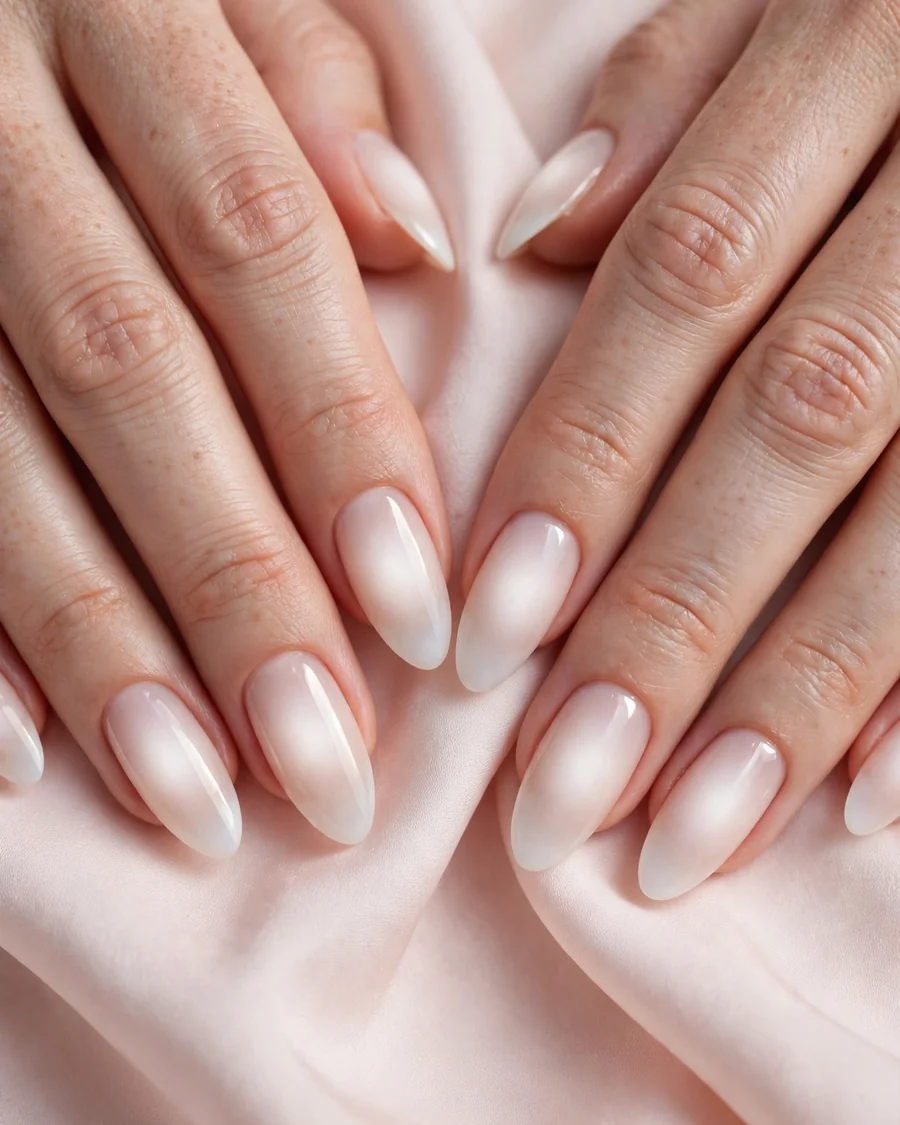
Aura nails place a soft halo of milky white at the center of each nail, fading out toward the edges like a warm glow. The effect is dreamy and modern — airbrushed rather than painted — and it keeps the overall impression light because the edges stay sheer. An airbrush tool or sponged pigment gives the smoothest blend, with the densest white gathered in the middle third. It looks best on medium to long almond nails, where the halo has room to bloom. Keep the white sheer and luminous rather than dense, or the aura turns into a solid blob. It photographs beautifully and suits anyone wanting nail art that feels current without motifs. Pair it with minimal jewelry so the glow stays the focus, and use a sheer nude base underneath so the halo never looks stark against the skin. Two aura accent nails with the rest plain milky keeps the look wearable daily.
10. Pearl-Studded Milky Almond
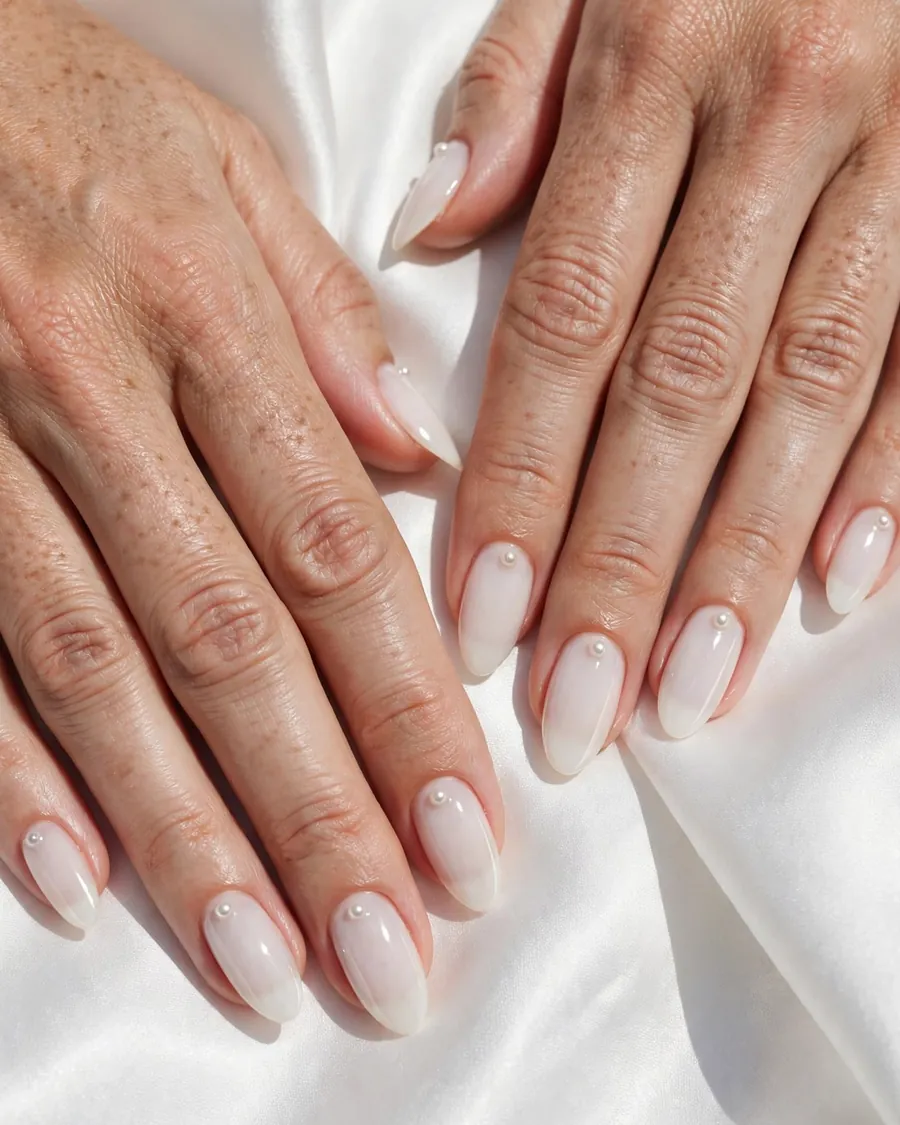
Small pearl studs are the jewelry-box version of milky nails. A single tiny pearl placed near the cuticle of each nail — or a small cluster on just the ring fingers — adds dimension and catches light without adding any color. The pearls should be small, no larger than a pinhead, set carefully into a drop of builder gel or nail glue so they sit flush and survive daily wear. It works best on medium to long almond nails, where the tapered shape frames the pearl like a setting frames a stone. Keep the milky base sheer so the pearls stay the focus, and skip other nail art. It is a natural choice for weddings and formal events, but a single pearl per nail is quiet enough for the office too. If you type all day, ask your technician to set pearls slightly off-center toward the sidewall, where they take much less keyboard impact.
11. Milky Almond with Tortoiseshell Accents
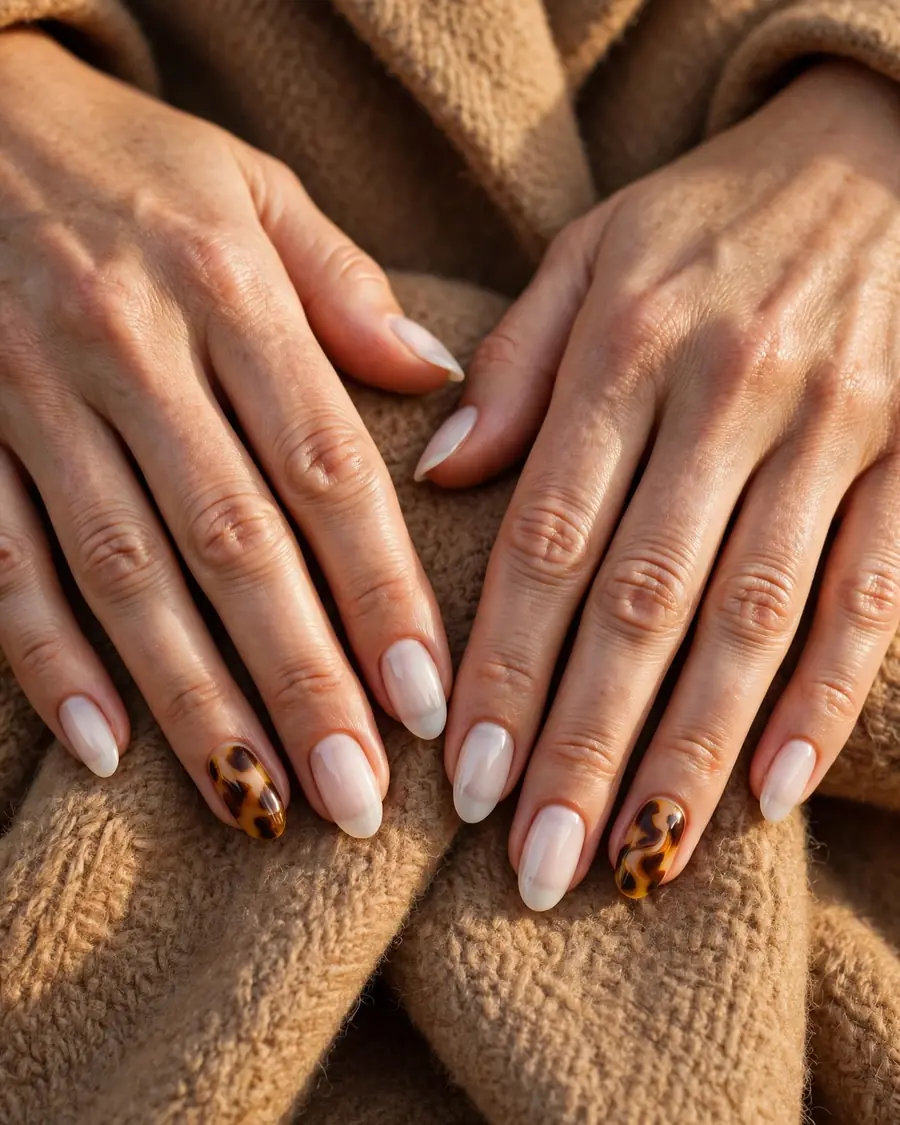
Tortoiseshell is fall’s signature pattern, and a single tortoiseshell accent nail per hand gives milky nails a warm, seasonal anchor without abandoning the sheer palette. The amber, caramel, and dark brown swirls sit beautifully against milky white neighbors, because the contrast is warm, not stark. Keep the pattern to the ring fingers and let the rest of the nails stay sheer milky, so the whole look stays balanced and wearable. Technicians build tortoiseshell by layering translucent amber and brown jelly polishes in irregular patches over a golden base, then sealing with gloss. Because the pattern is organic, it also hides small chips far better than a solid color. The effect reads expensive, warm, and a little vintage, and it pairs naturally with gold jewelry, camel coats, and leather accessories. If you love the warmth of fall color but are not ready for a full dark manicure, this is the compromise that still feels fully like autumn.
12. Milky Almond with Mocha Tips
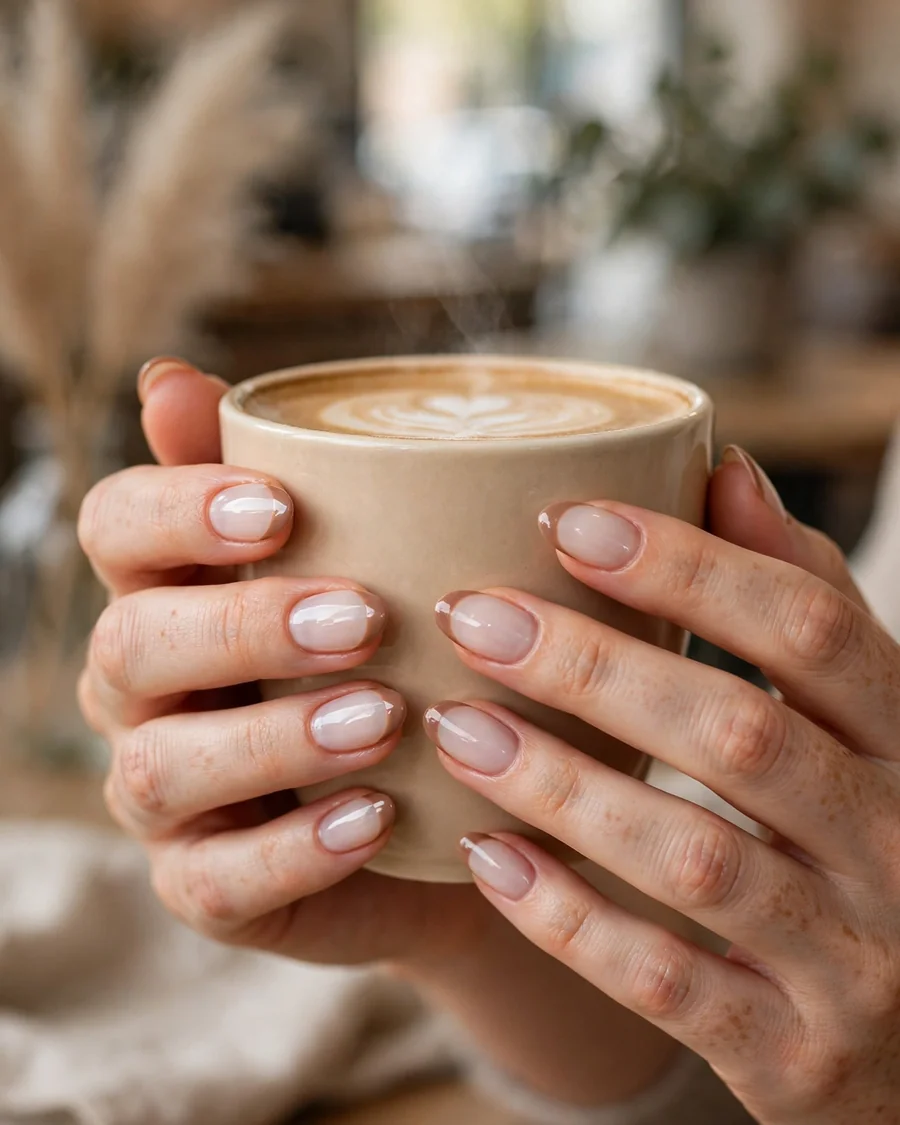
Mocha tips are the fall twist that keeps milky nails seasonal. A slim band of soft mocha brown traces the free edge over a sheer milky base, warming the whole manicure the way a shot of espresso warms milk. The brown should stay soft and creamy — think latte, not dark chocolate — so the tip melts into the milky base. It suits medium almond nails, where the tip has room to curve gracefully, and it flatters deeper skin tones especially well, since the mocha echoes warm undertones. At the salon, ask for a sheer milky base with a mocha tip in a creamy coffee shade, sealed with gloss. At home, use tip guides and a thin brush, then clean up the smile line with a flat brush dipped in acetone. It also grows out gracefully, since the milky base blurs the regrowth line. It pairs beautifully with brown leather boots, cream knits, and gold jewelry.
How to Apply Milky Almond Nails
Start with clean, shaped nails: push cuticles back, file the sides into a taper meeting in a soft rounded point, and buff. Short nails need a builder gel or BIAB overlay first — almond only reads once the nail extends past the fingertip. Apply a ridge-filling base, then two to three thin coats of milky sheer, letting each dry fully. Place foil art while the base is tacky; wait until dry for tips. Seal with a high-shine top coat, or matte for the velvet version, capping the free edge against chips. For a warmer fall step from milky, caramel nude nail designs continue the same soft palette, while raspberry jelly nail designs show sheer color in a bolder fruit tone.
Pro Tips for Milky Almond Nails
- Keep coats thin. Three thin coats beat two thick ones — thick coats turn milky sheers cloudy and streaky.
- Use builder gel or BIAB under the color if nails split or peel; the almond taper stresses the sidewalls.
- Protect the tone from yellowing with a UV-protective top coat, and avoid tanning beds and harsh dyes for 48 hours.
- Refresh the top coat every three to four days; milky sheers show dullness faster than opaque colors.
- Shape before painting. File the taper with the nail dry, stroking side to center — never saw back and forth.
Frequently Asked Questions
How long do milky almond nails last?
A gel or BIAB milky almond manicure lasts two to three weeks; regular polish lasts five to seven days. Milky sheers hide regrowth well.
Can I get almond nails if my nails are short?
Almond needs some length — the nail must extend just past the fingertip. If yours are very short, ask for a BIAB overlay or soft gel extensions first.
What is the difference between milky nails and white nails?
White nails use opaque polish that fully covers the nail. Milky nails use sheer, translucent white that lets your natural nail show through, creating a softer, glassier effect.
How do I ask my nail technician for milky almond nails?
Show a saved photo and say: “almond, medium length, sheer milky white — not opaque — glossy finish.” Mention builder gel if your nails are weak.
Final Thoughts
Milky almond nails ask so little and give so much: a sheer wash, a graceful taper, and a finish for nearly every outfit and occasion. Start with the classic sheer version, then branch into glaze, marble, or mocha tips. Save the designs that feel most like you, adapt them to your lifestyle, and let the almond shape do its quiet elongating work. The most wearable manicure is the one you stop thinking about — and milky almond is exactly that.