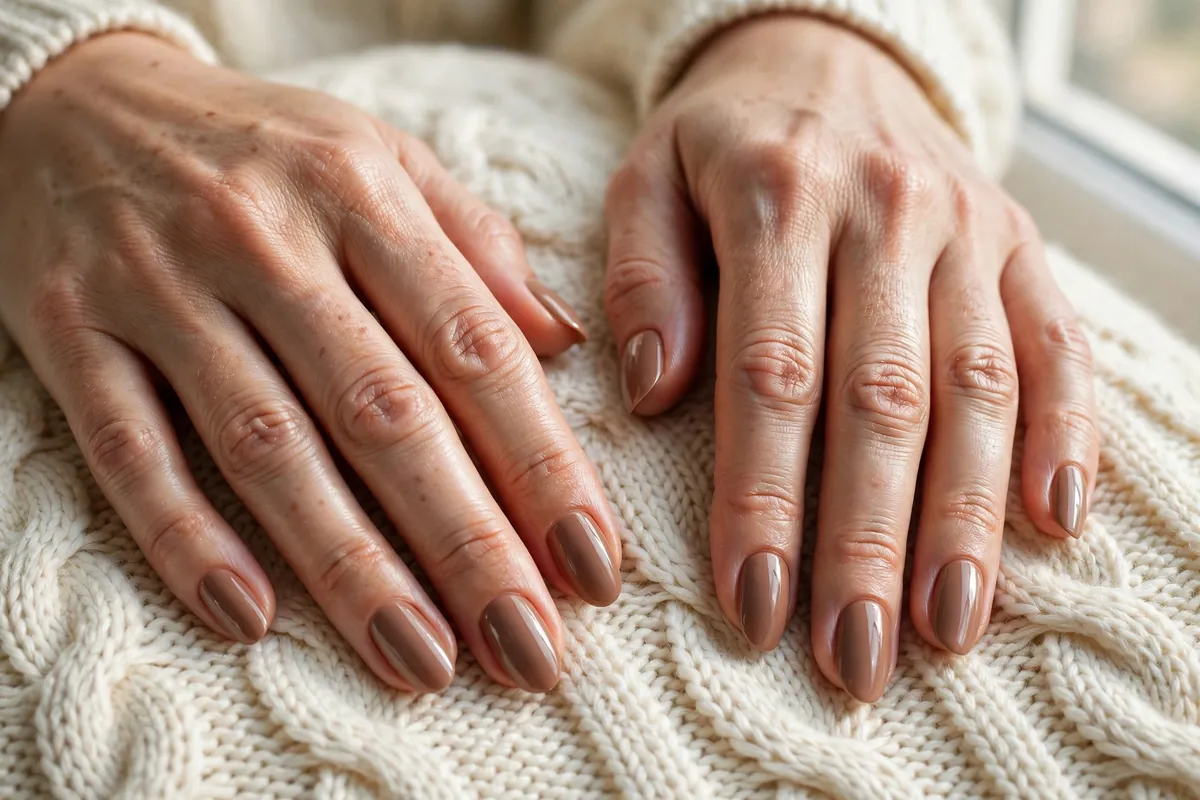
Mocha nails are having a real moment this fall, with good reason this season. The shade sits right between warm brown and soft taupe, which makes it flattering on almost every skin tone and easy to wear with the chunky knits, leather boots, and camel coats already filling fall closets. This collection moves past flat brown polish into the textures that make mocha feel current: chrome glazes, cat-eye shimmer, tortoiseshell, marble swirls, and quiet gold detail. Whether you want a low-key manicure for the office or something with a little more evening polish, there is a version here that fits.
1. Classic Creamy Mocha Crème
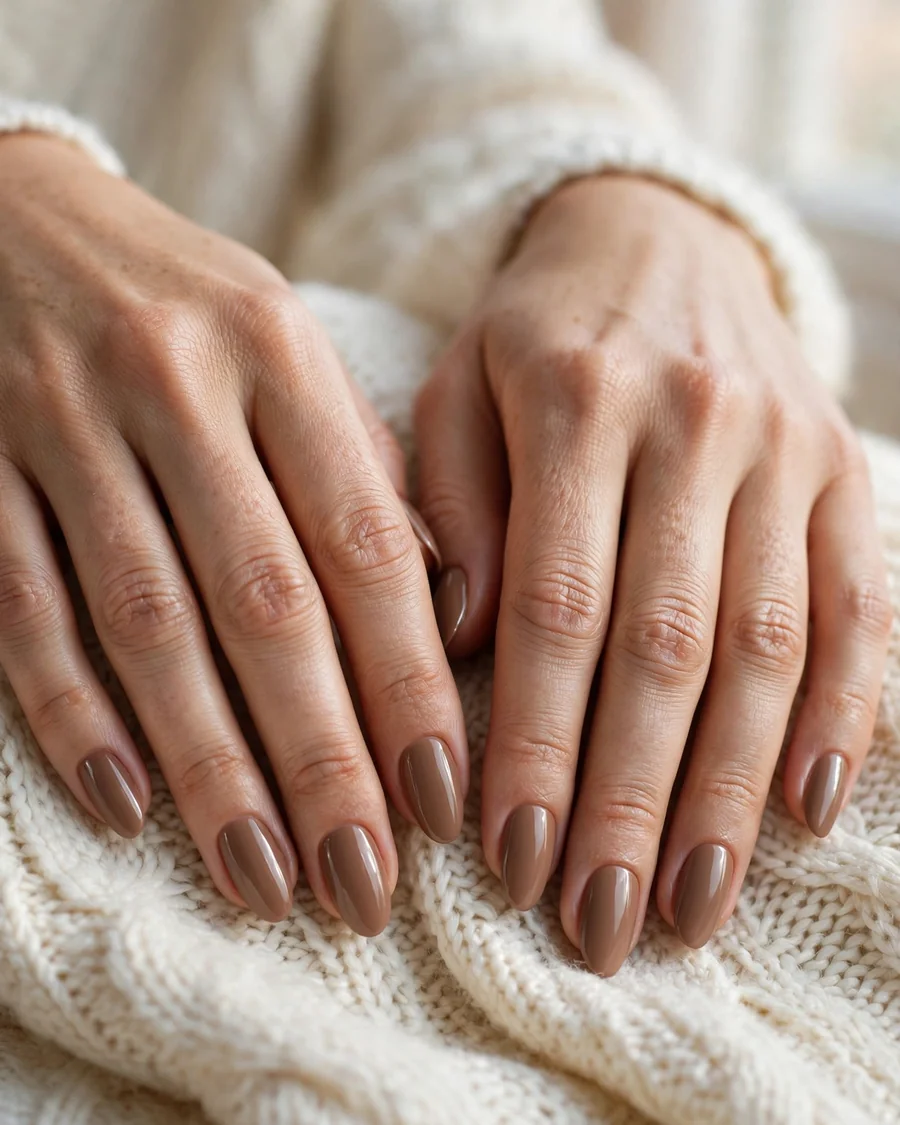
A creamy mocha crème is the foundation of the whole trend, and it earns its place first because it does the most work with the least effort. The color is a medium warm brown with a soft taupe undertone, opaque in two coats, with a glossy top coat that keeps it looking freshly done rather than flat. It reads polished without competing with rings, watches, or a busy outfit, which is why it works so well for everyday fall wear. On shorter nails, a rounded square shape keeps the look neat; on longer nails, an almond shape softens the brown and makes hands look longer. Ask for a true mocha rather than a gray taupe or a reddish chocolate, since that warm middle ground is what flatters most skin tones. For a salon finish at home, use a ridge-filling base coat, two thin coats of color, and a high-shine top coat, capping the free edge each time. If your skin has cool undertones, look for a mocha with a hint of mauve; warm undertones suit a slightly golden mocha.
2. Mocha French Tips with an Espresso Smile Line
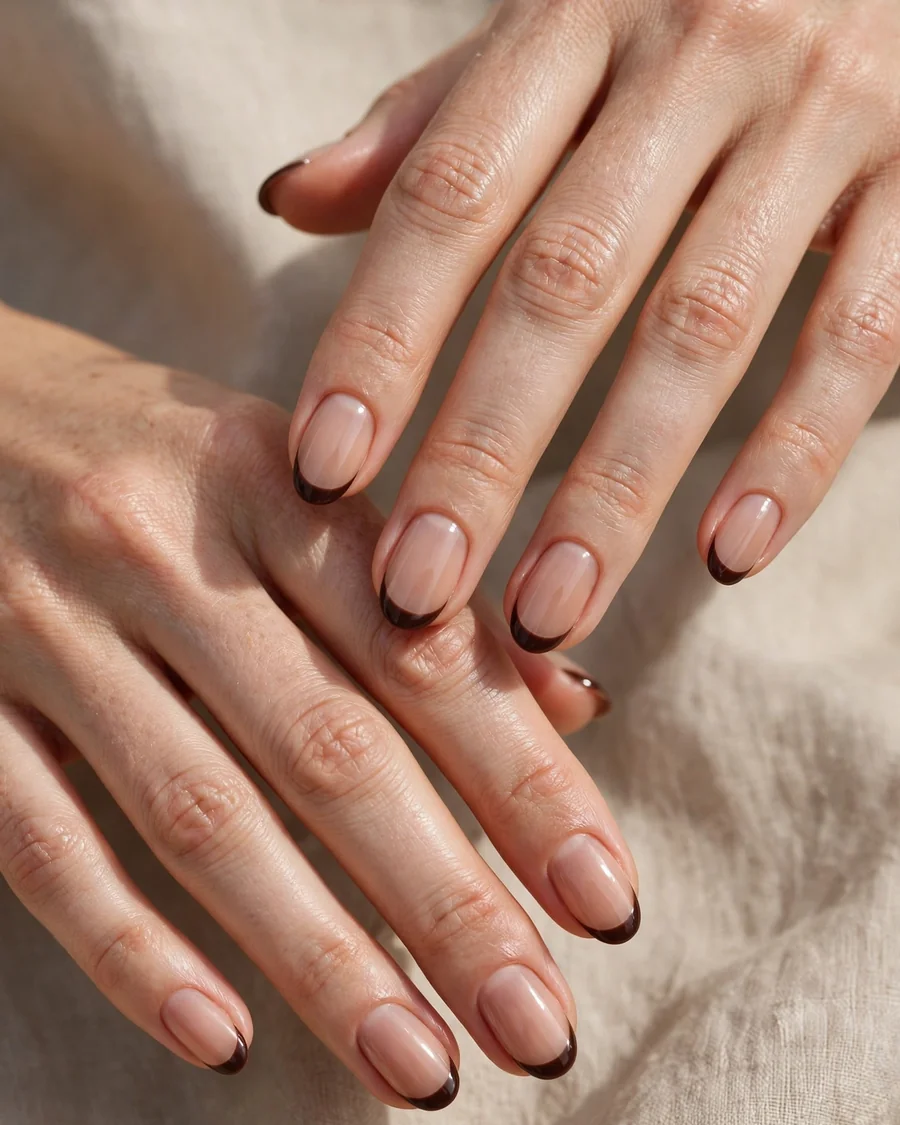
This design updates the classic French manicure by swapping white tips for a deep espresso line over a sheer mocha base. The base keeps the nail looking natural and healthy, while the darker tip adds definition and a clear fall feeling. The contrast is softer than a white French tip, so it suits work settings, weddings, and weekends alike, and it grows out gracefully because the base is close to the natural nail. A thin, curved smile line looks more current than a thick blocky tip, especially on almond or oval shapes. For extra refinement, ask your nail tech to keep the tip width consistent across all ten nails and to finish with a glossy top coat rather than matte, which keeps the espresso line crisp. At home, French guides or a steady hand with a striping brush both work, but the trick is to paint the tip in one smooth curve and clean up the edge with a flat brush dipped in acetone.
3. Mocha Chrome Glaze
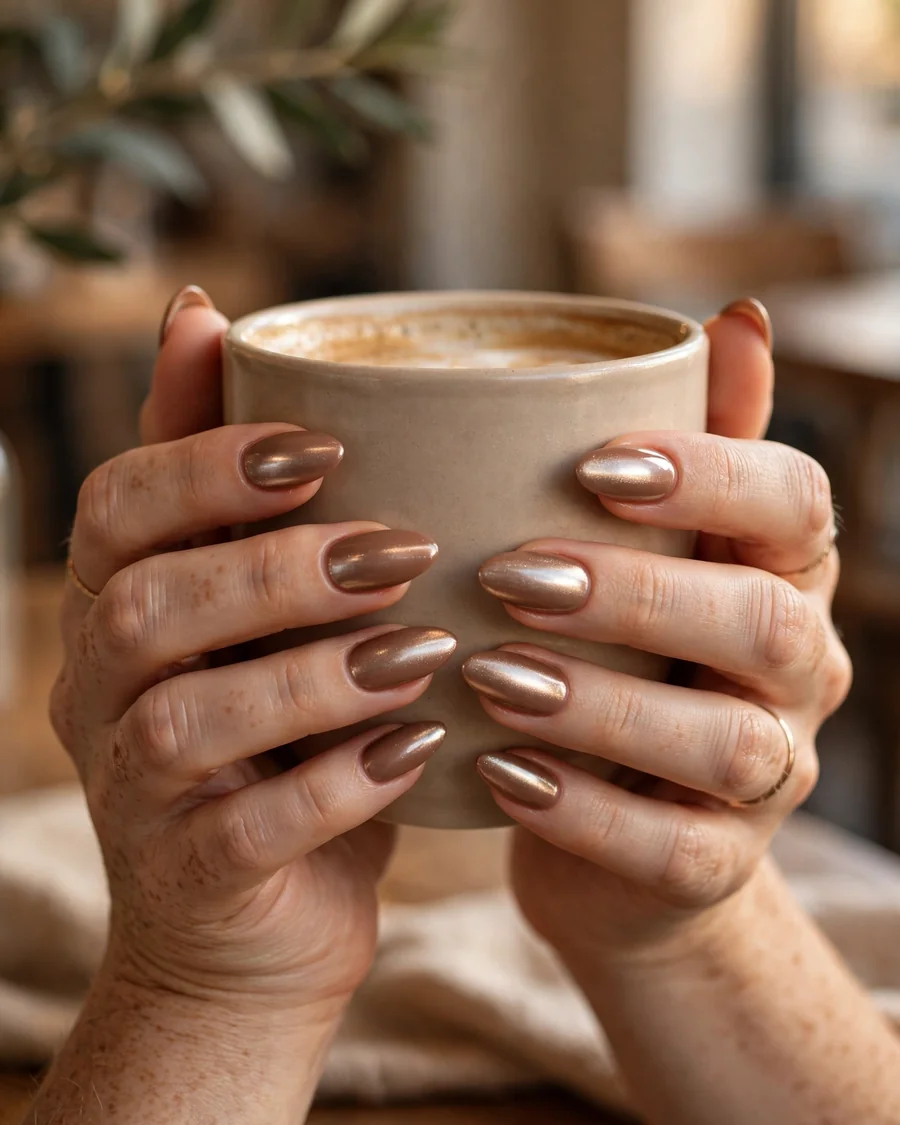
Mocha chrome takes the familiar glazed-donut finish and warms it up for fall. A mocha base is topped with a sheer champagne-brown chrome powder, which catches light as the hands move and gives the nails a soft, lit-from-within sheen rather than a harsh metallic glare. The effect is subtle in indoor light and more visible in sunlight, which makes it a good choice if you want something eye-catching without a bold color. It works best over a builder gel or gel polish base, since chrome powder needs a smooth, tacky-free surface and a no-wipe top coat to lock it in. Nail techs usually rub the powder in with a silicone applicator, then seal it twice so the chrome does not rub off at the tips. This finish suits medium to long nails best, because there is more surface for the chrome to shift across. This finish also flatters deeper skin tones beautifully, since the warm chrome glow echoes the brown base.
4. Mocha Cat-Eye Magnetic Polish
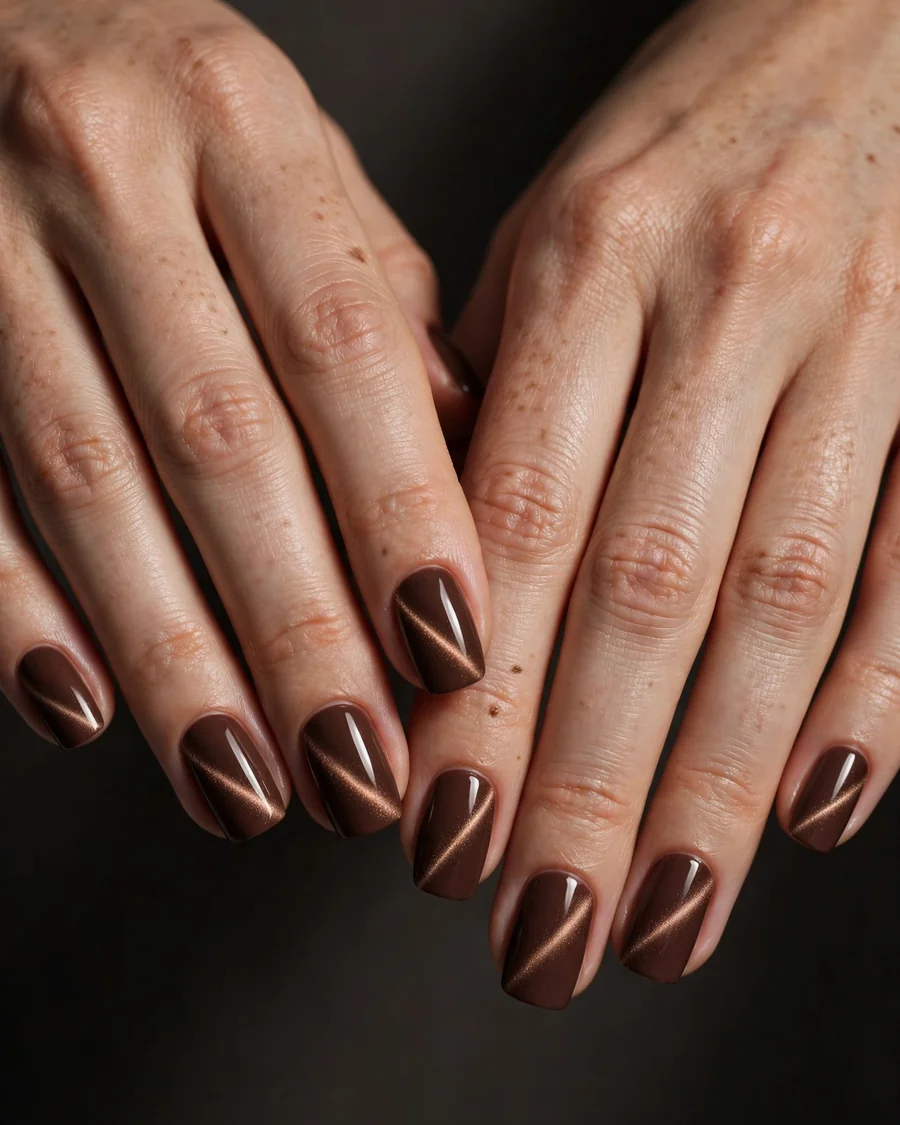
Magnetic cat-eye polish gives mocha nails a moving band of light that shifts as you tilt your hand. The polish contains fine metallic particles that a magnet pulls into a curved line or diagonal streak before curing, creating depth that flat polish cannot match. In a mocha shade, the effect looks like light passing through coffee, with a warm bronze glow at the center of each nail. This design is best done in gel, because the magnet must be held over wet polish and the look cured immediately to hold the pattern. Ask for a diagonal cat-eye on each nail rather than the same centered stripe everywhere, which looks more modern and less uniform. Shorter nails can carry this finish well, since the shimmer itself provides the interest. A glossy top coat deepens the dimension, while matte would flatten it. For the strongest effect, ask for the magnet to be held close and steady until the pattern sets.
5. Mocha and Caramel Marble Swirl
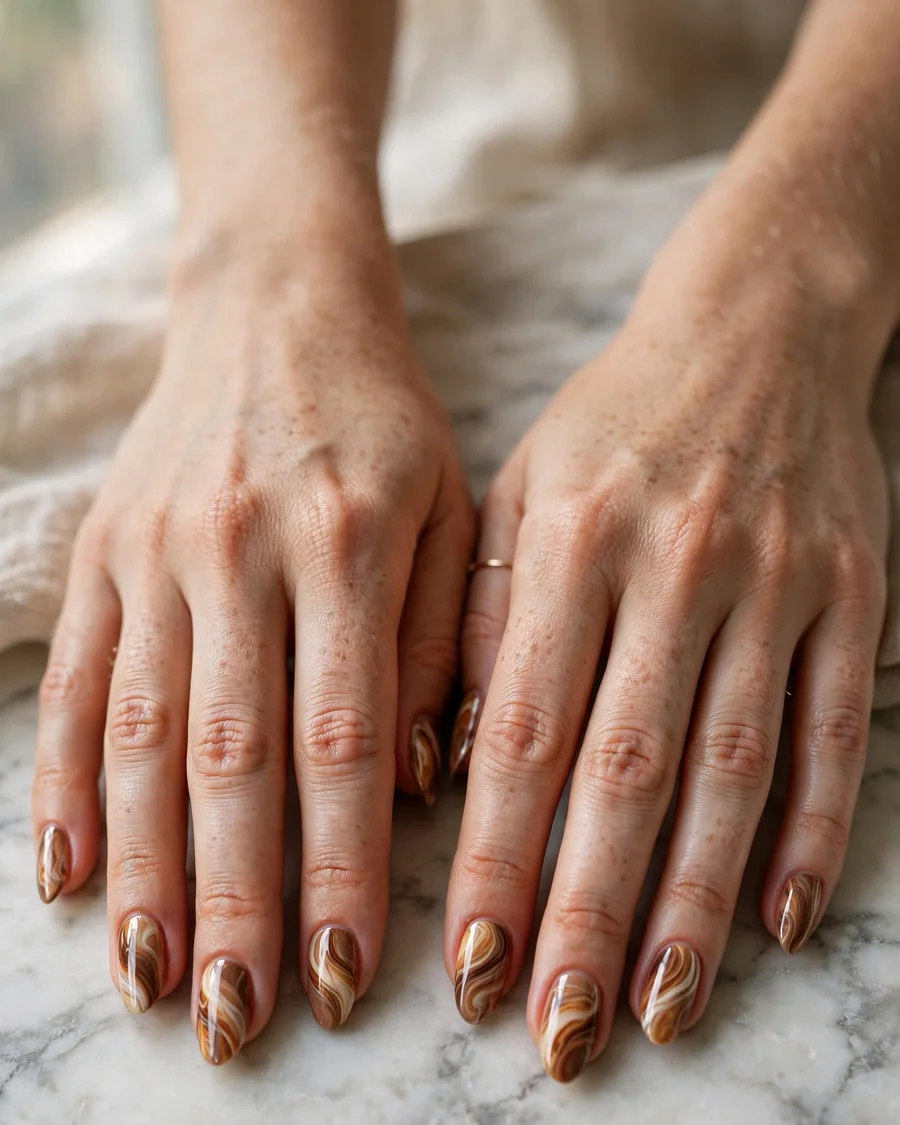
Marble swirl nails mix mocha with caramel and cream in soft, stone-like veins, and the result looks expensive without requiring nail art skills at home. The technique usually starts with a mocha base, then drops of caramel and cream polish are dragged through the wet surface with a thin brush or dotting tool to form organic swirls. No two nails look identical, which is part of the appeal, and the pattern hides minor chips better than a solid color. This design suits medium-length nails in almond or coffin shapes, where there is room for the swirl to spread. For a cleaner look, keep the marble on every nail but vary the intensity, with a few nails mostly mocha and others more heavily veined. In the salon, ask for a matte top coat on one hand if you want to test the stone effect, though glossy reads more like polished marble.
6. Matte Mocha with a Glossy French Edge
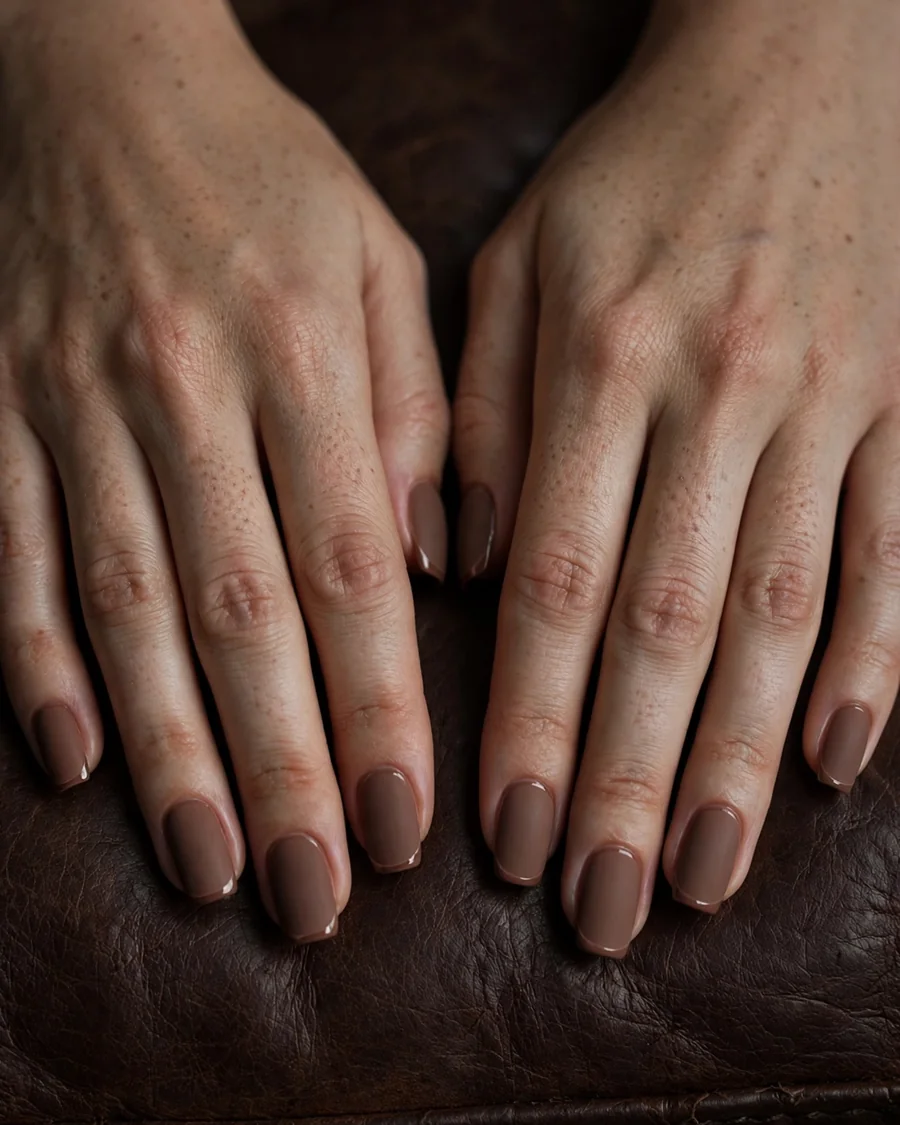
Matte and glossy finishes on the same nail create contrast without adding any new color, and this design proves how much finish alone can change a manicure. The nail is painted in a velvety matte mocha, then a thin glossy line traces the free edge like a French tip, catching light only at the very tip. The effect is quiet and tailored, closer to a well-cut blazer than to statement nail art, and it works beautifully for fall offices and evening dinners alike. Matte top coats show oils and wear more quickly than glossy ones, so carry a small matte top coat for touch-ups and avoid hand lotion directly on the nails for the first hour. Ask your tech to paint the glossy edge after the matte coat has fully dried, using a thin brush for a crisp border. If the glossy edge smudges, wipe it clean and repaint just that line before sealing.
7. Mocha Tortoiseshell Accents
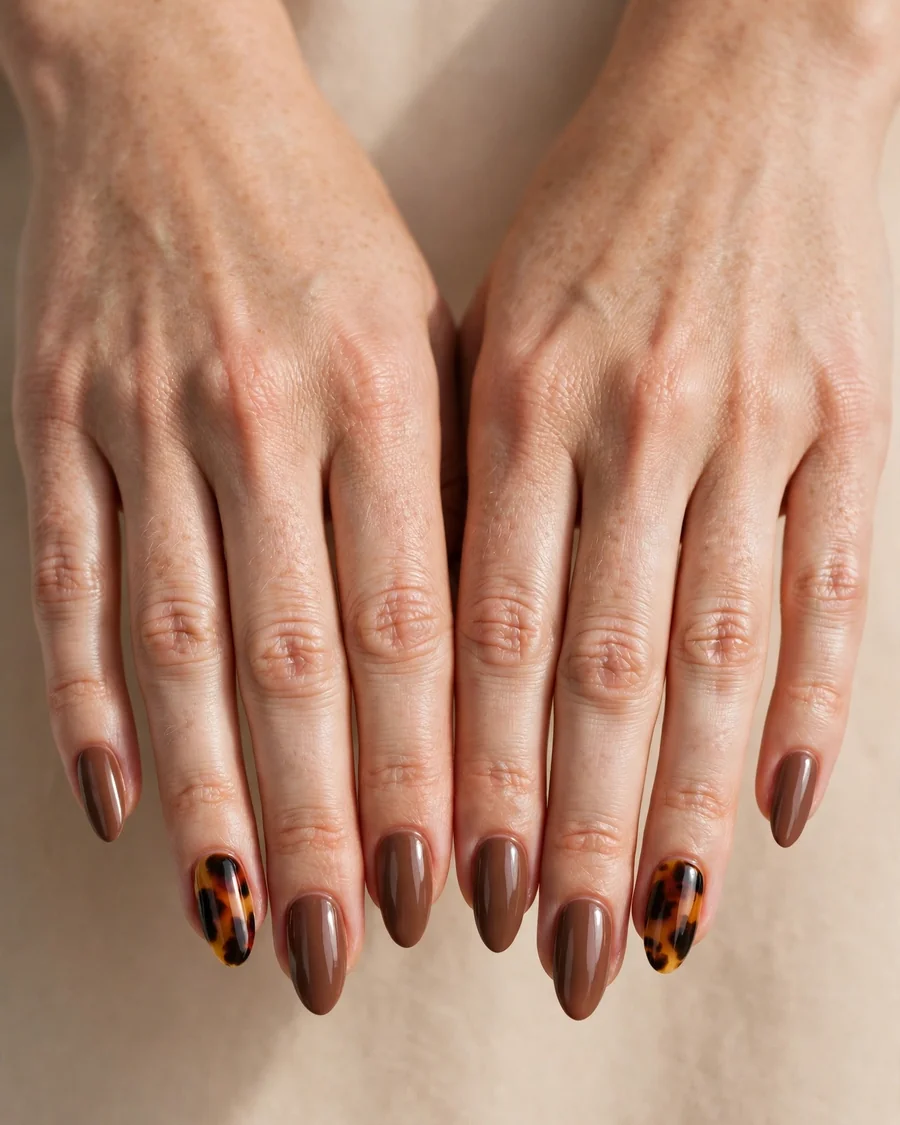
Tortoiseshell is a classic fall pattern, and pairing it with solid mocha nails keeps it wearable instead of costume-like. The accent nails are built in layers: a warm amber base, irregular blobs of deep brown and black, and a sheer mocha wash over the top to melt the patches together. The remaining nails stay in solid mocha, which grounds the pattern and keeps the overall manicure calm. This balance matters, because tortoiseshell on all ten nails can look busy, while two accents per hand feel intentional. Almond or oval shapes suit the organic pattern best, since sharp square corners fight the soft, natural blotches. If you love chocolate brown nail designs, tortoiseshell is a natural next step, because it uses the same warm brown family with added depth. In the salon, ask for a glossy top coat, which makes the layers look like real polished shell. Two thin top coats protect the layered pattern and give it a smooth, glass-like finish.
8. Mocha-to-Cream Ombré
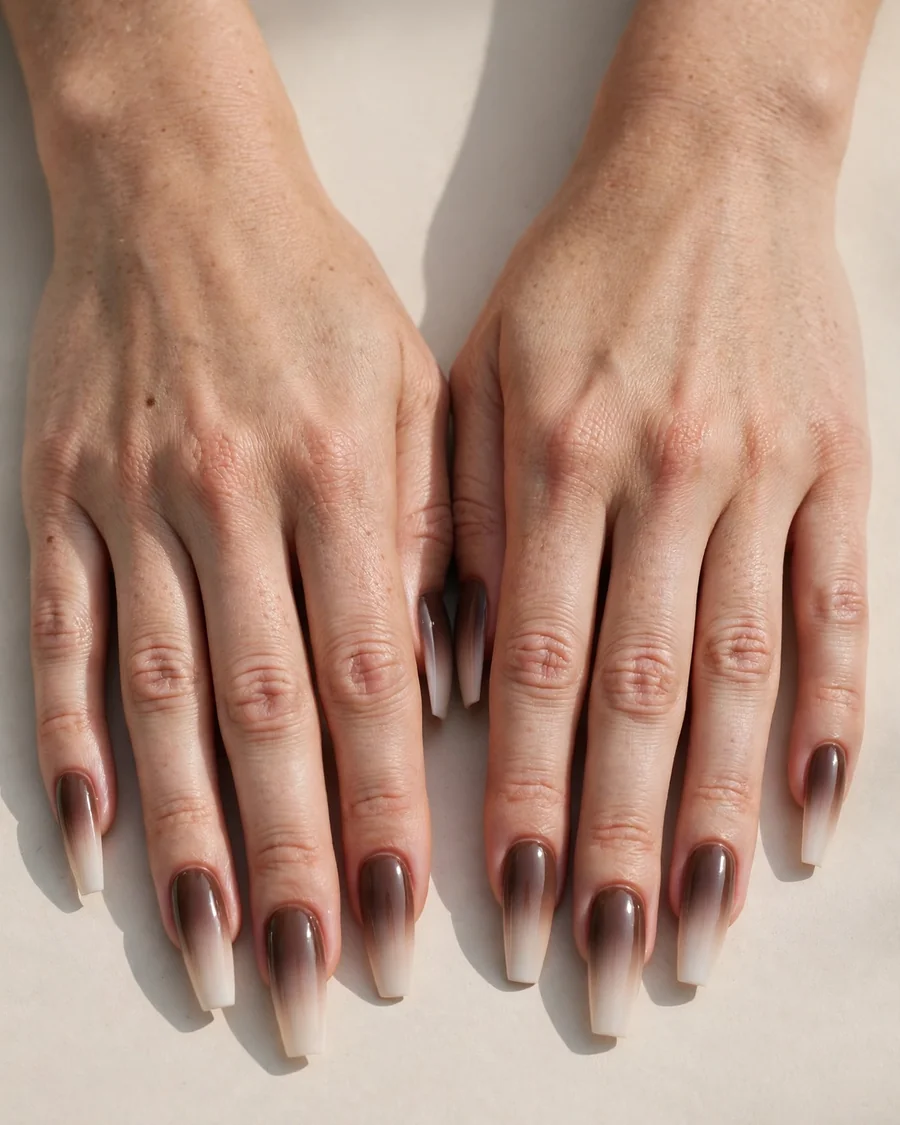
An ombré fade from deep mocha at the cuticle to soft cream at the tip gives fall nails a gentle, coffee-with-cream gradient. The blend is usually sponged on in thin layers, building the transition gradually so there is no harsh line where one color ends and the next begins. This design flatters longer nails most, because the fade has room to travel, but medium nails work well too if the mocha section stays shorter than the cream section. A glossy top coat smooths the sponged texture and makes the gradient look airbrushed rather than grainy. Blend patiently, since rushing the sponge work is what creates a visible stripe. For a softer daytime version, use a light beige cream at the tips; for evening, switch to a warm ivory with a hint of shimmer. Nail techs often finish with a second thin top coat after the first has dried, since sponged polish can feel slightly textured.
9. Mocha Leopard Print Accents
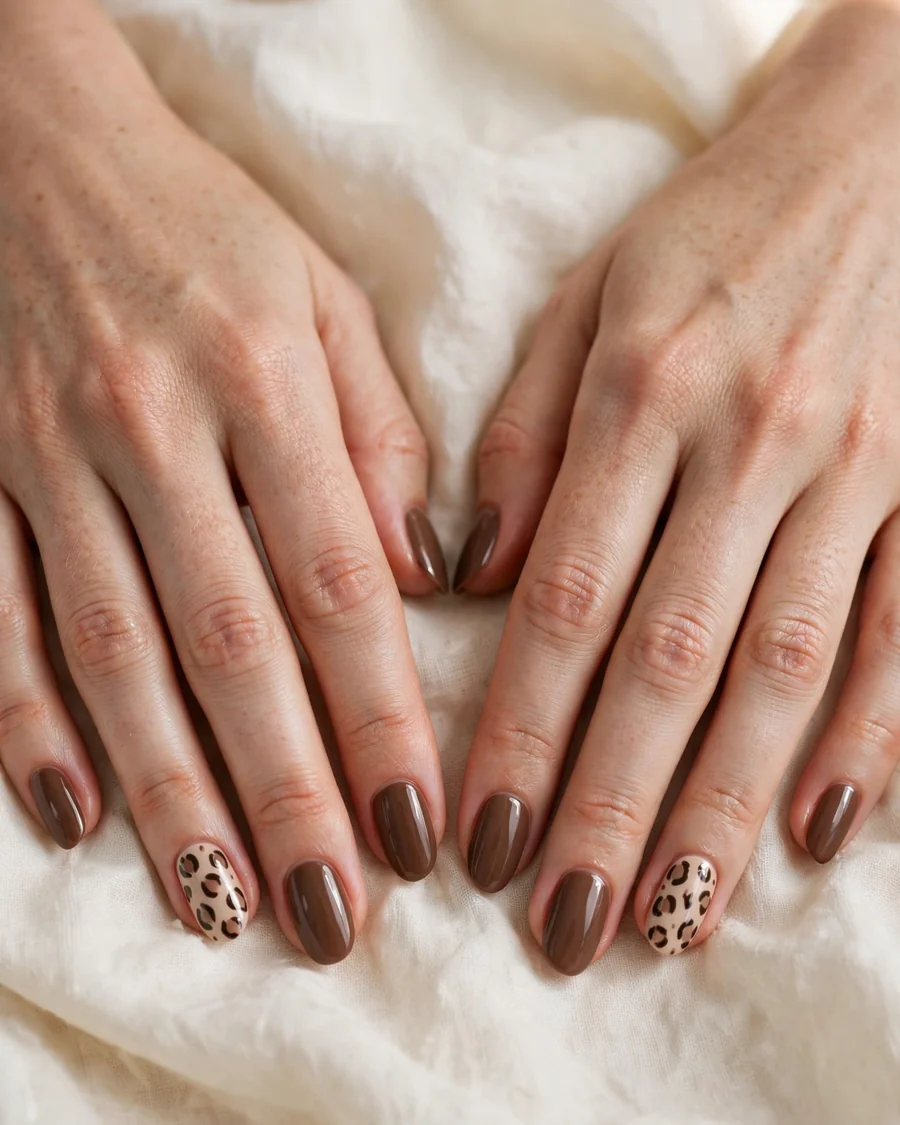
Leopard print in mocha tones is softer than the classic black-and-tan version, and it brings a playful edge to an otherwise neutral manicure. The print is painted over a light mocha or beige base, with irregular mocha spots outlined in a darker espresso, so the pattern reads clearly without shouting. Keeping the print to one or two accent nails per hand is the key to making it feel grown-up; solid mocha on the rest of the hand keeps the look grounded. This design works on short nails too, since the spots can be scaled down, though medium almond nails show the print best. In the salon, ask for hand-painted spots rather than stickers, because the slight irregularity is what makes leopard look real. A glossy top coat seals the detail and stops the thin outlines from wearing off. Keep the spots small and uneven, because perfect circles make the print look stamped.
10. Mocha with Delicate Gold Foil
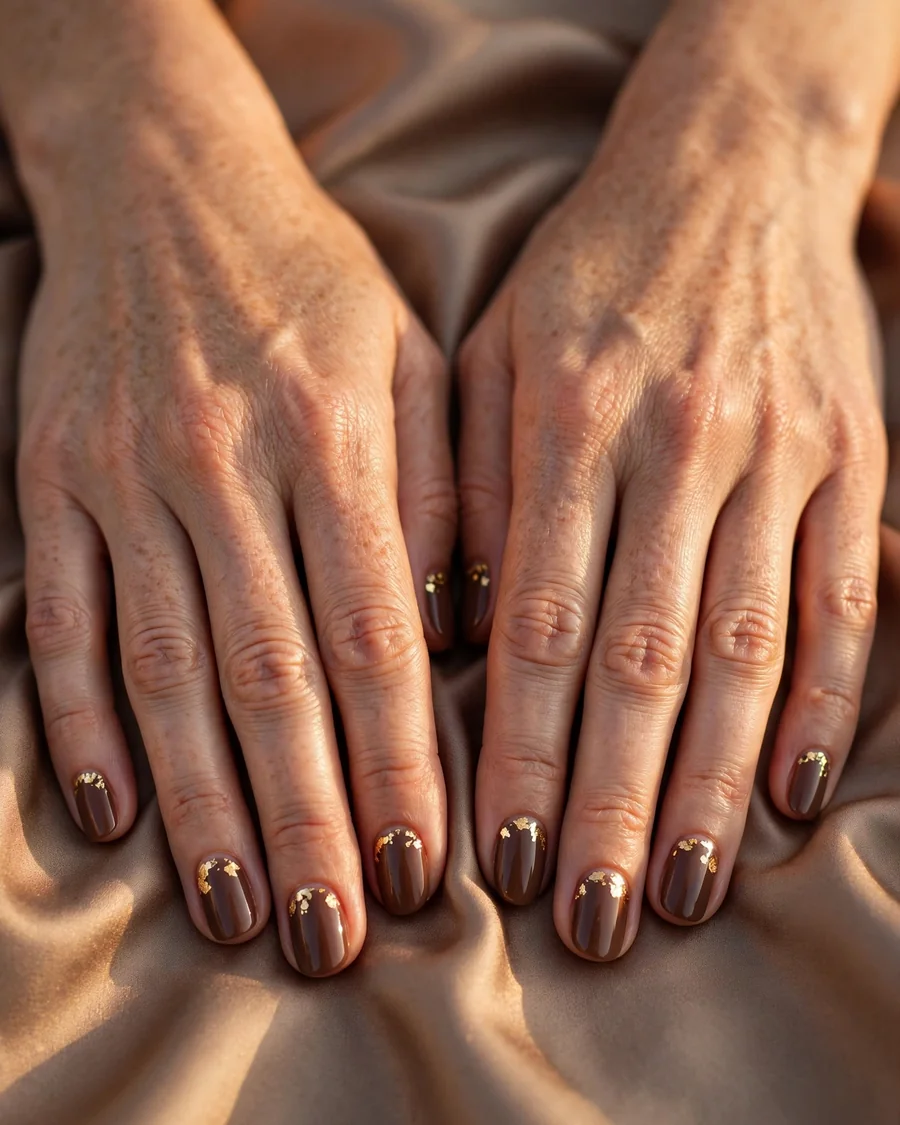
A few flakes of gold foil over mocha nails add warmth and light without turning the manicure into full glitter. The foil is pressed onto a tacky gel layer in small, scattered pieces, usually concentrated near the cuticle or along one edge, then sealed under two top coats so it sits flat and smooth. Because the foil catches light unevenly, each nail looks slightly different, which keeps the design feeling handmade rather than stamped. This is a good choice for fall events, holiday dinners, and photos, since gold reads beautifully against brown in warm indoor light. Keep the foil sparse, no more than a few flakes per nail, and leave at least one or two nails completely plain so the eye has somewhere to rest. If you prefer a subtler version, ask for champagne foil instead of bright gold. A single foil flake on the pinky nail can tie the whole manicure together.
11. Mocha Half-Moon with Negative Space
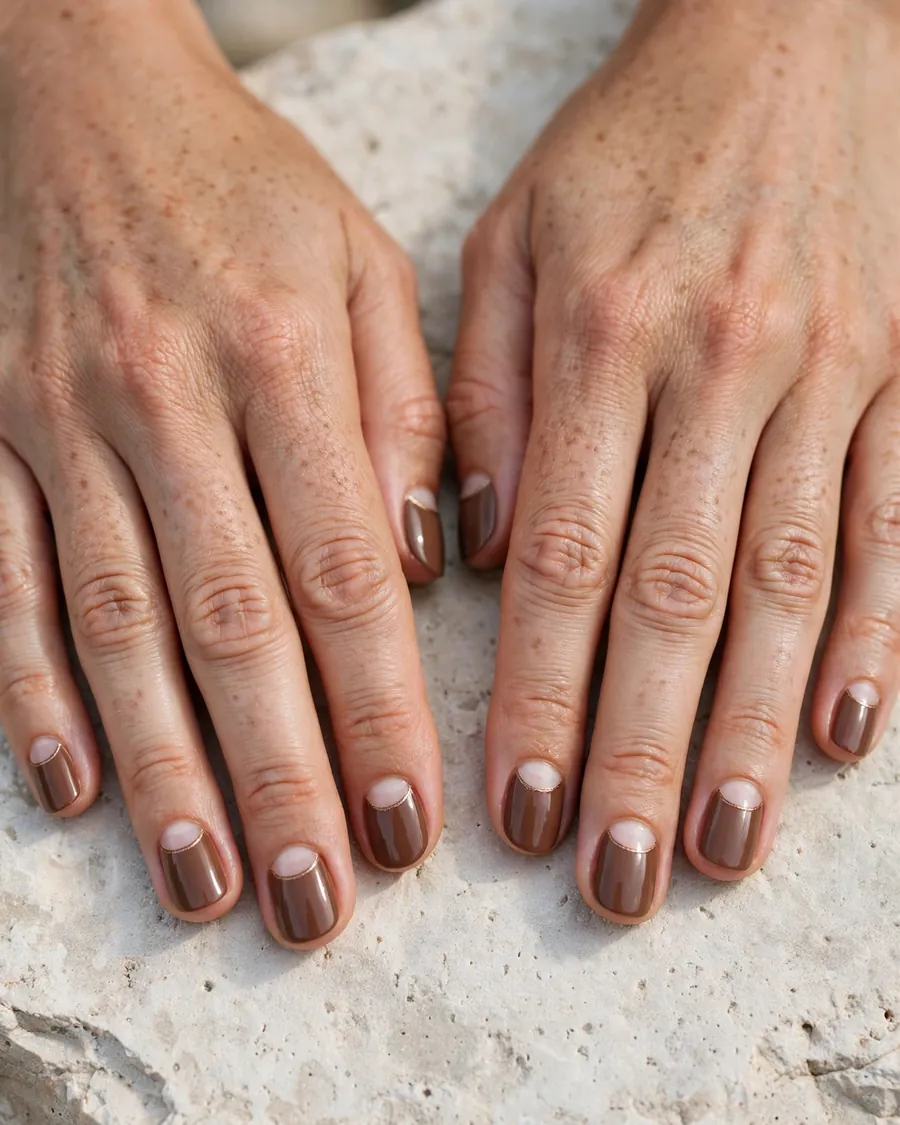
The half-moon design leaves a bare crescent at the cuticle, which makes the manicure feel modern and helps it grow out without an obvious line. A mocha crescent or a full mocha nail with a bare half-moon both work, but the most current version paints the nail mocha and leaves the small moon near the cuticle unpainted, outlined with a thin metallic or espresso line. The negative space breaks up the brown and makes shorter nails look longer, since the eye follows the unpainted curve upward. This design needs a steady hand or a reinforcement sticker as a guide, and the bare area should be sealed with a clear base coat so it does not stain or peel. Reapply top coat every two to three days to protect the exposed edge. Clean the bare crescent carefully during removal so the natural nail stays unstained and healthy.
12. Mocha Glitter Fade for Evening
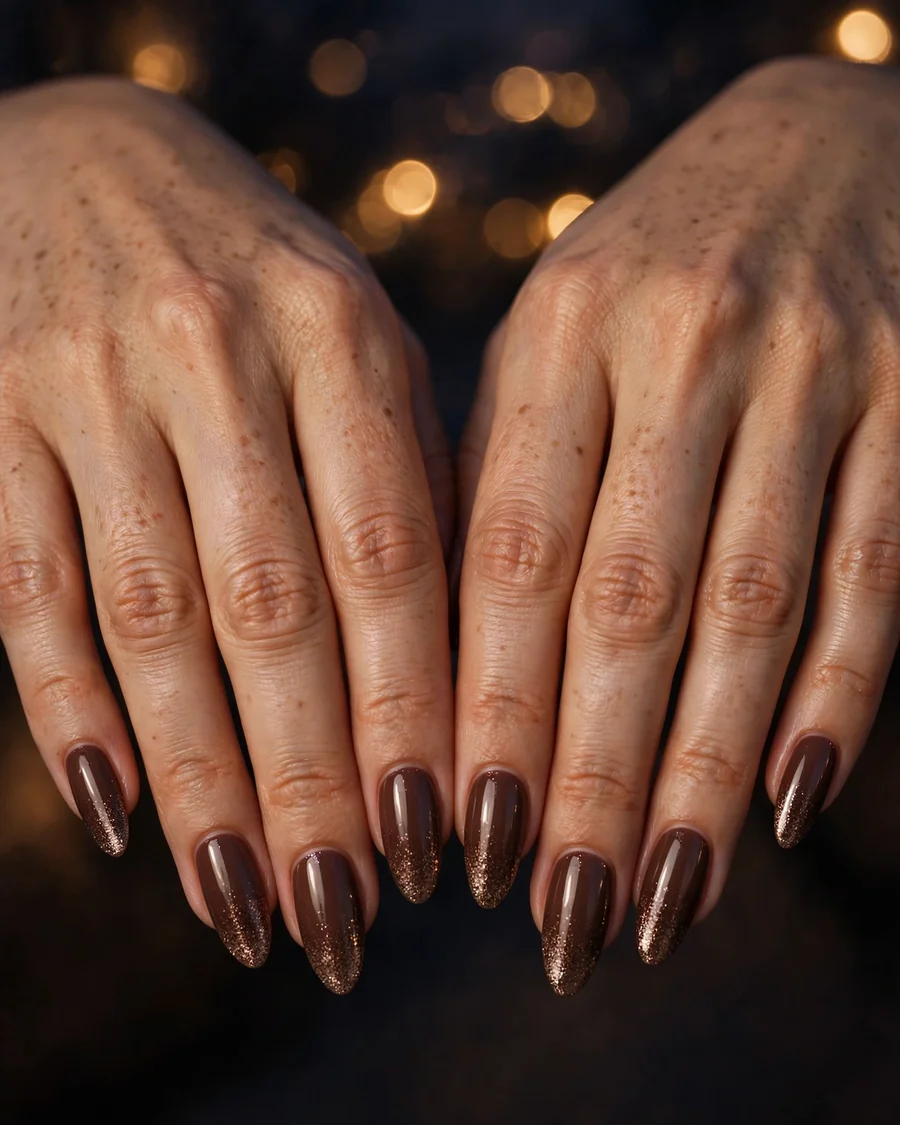
A glitter fade takes mocha nails into evening territory by concentrating fine bronze and gold glitter at the tips and letting it dissolve toward the cuticle. The base stays a rich mocha, so the glitter reads as light rather than color, and the fade keeps the design from looking like a full glitter bomb. This is the manicure to choose for fall parties, dinners, and holiday photos, when you want nails that catch candlelight without competing with your outfit. The glitter is usually sponged or dabbed on in layers, with the densest coverage at the free edge, then sealed under two glossy top coats so the surface feels smooth. Longer nails show the fade best, but medium nails work if the glitter section stays in the top third. Removal takes longer than a crème, so soak with foil wraps and be patient rather than peeling, which damages the nail plate.
How to Apply Mocha Nails at Home
Start with clean, shaped nails and a base coat that suits your nail type, ridge-filling if your nails are uneven, strengthening if they peel. Apply mocha polish in two thin coats rather than one thick one, waiting two minutes between coats so the color levels out without bubbling. Seal every manicure with a glossy top coat, capping the free edge, and reapply top coat every two to three days to extend wear. If you prefer gel, cure each layer fully and avoid flooding the cuticles, which causes lifting. For cozy fall styling inspiration, pair these mocha shades with textured knits and soft layers like the looks in these cozy sweater nail designs to keep the whole outfit feeling seasonal.
Pro Tips
Choose your mocha by undertone, not by the bottle alone: mauve-leaning mochas flatter cool skin, golden mochas flatter warm skin, and a neutral mocha works when you are unsure. Keep your nail shape consistent across all ten nails, because uneven shapes show more with a dark neutral. For salon visits, bring a photo of the exact finish you want, chrome, cat-eye, or marble, and name the finish out loud, since “mocha nails” alone can mean very different things.
FAQ
How long do mocha gel nails last?
With proper prep and a sealed free edge, mocha gel nails usually last two to three weeks.
Do mocha nails suit short nails?
Yes. Mocha is a forgiving neutral that looks neat on short nails, especially in a crème, French tip, or cat-eye finish.
What colors go with mocha nails?
Mocha pairs easily with cream, camel, black, olive, burgundy, and gold.
Is mocha the same as chocolate brown?
Not quite. Mocha is lighter and softer than chocolate brown, with a taupe or coffee-with-milk quality. Chocolate brown is deeper and richer, while mocha sits closer to a warm nude-brown.
Final Thoughts
Mocha nails work this fall because they are both easy and interesting: a neutral you can wear anywhere, with enough finishes and details to make it feel personal. Start with the version that fits your routine, a simple crème for busy weeks or a chrome glaze when you want something more eye-catching, then try one accent design when you feel like experimenting. Save the looks that catch your eye, show your nail tech exactly which finish you mean, and adjust the shade to your skin tone rather than copying a photo exactly. The best mocha manicure is the one you will actually enjoy wearing for two full weeks.