Espresso makeup earns its place in a fall rotation for a simple reason: brown reads softer than black, deeper than taupe, and flattering across a wide range of skin tones. Where black liner can look harsh in daylight, espresso gives the same definition with warmth, pairing well with knitwear, camel coats, and autumn berry tones. The ten looks below move from a sheer daytime wash to a fully smoked-out evening eye, with cut creases, halo shimmer, sharp wings, and lived-in kohl in between. Each one keeps the same warm brown family at its centre, so the collection stays cohesive while the finish, intensity, and placement change. Options below pair with a nude lip for the office, a berry blush for weekends, and a dark red lip for nights out.
Classic Matte Espresso Smoky Eye
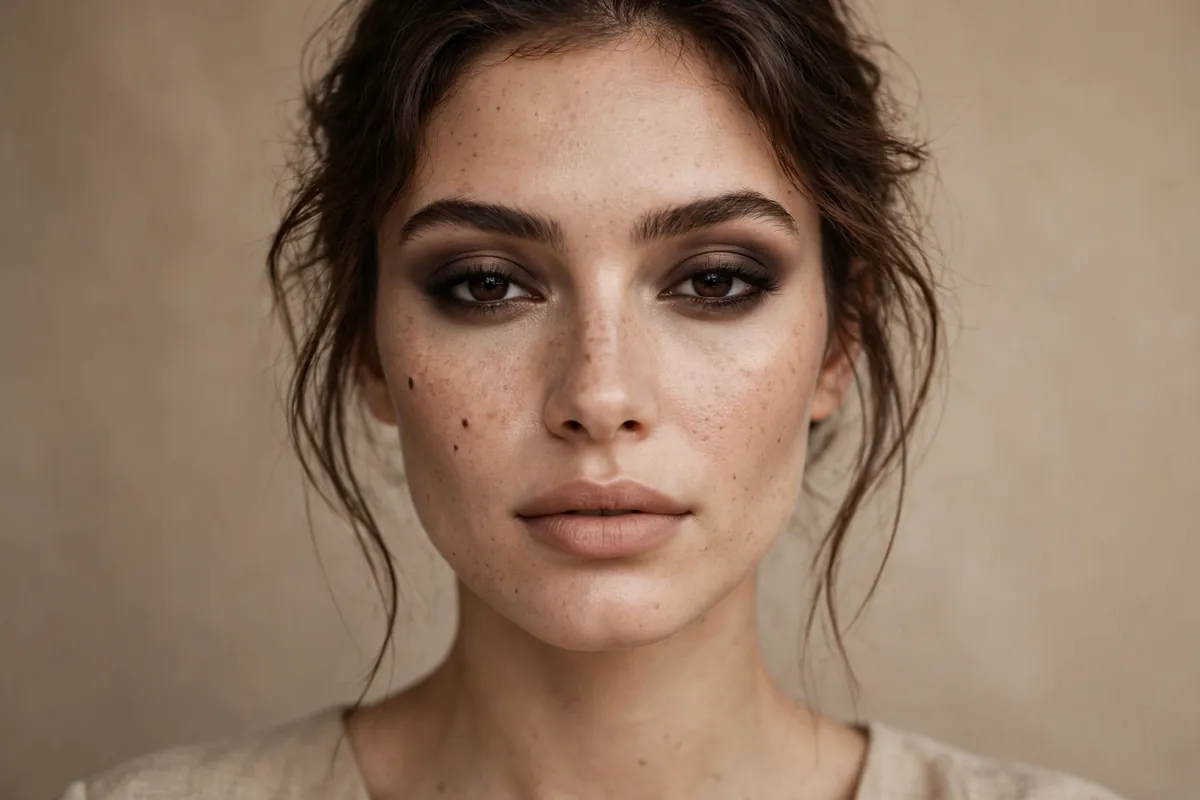
This is the look most people picture when they hear espresso makeup: a matte chocolate brown blended through the crease and across the lid, deepest at the outer corner and along the lash line, with no shimmer competing for attention. The matte finish is what keeps it wearable. Without sparkle, the shape does all the work, so the eye reads defined and polished rather than glittery, and the look holds up from morning meetings to dinner without needing a touch-up. Start with a warm mid-brown in the crease as a transition shade, then press a deep espresso like MAC’s Espresso eyeshadow onto the outer third of the lid and blend inward. Keep the inner corner clean with a touch of concealer or a light matte bone shade. A thin line of dark brown pencil smudged into the upper lashes finishes the shape without a hard edge. This version suits almost every eye shape because the blending creates the lift. If your lids are hooded, carry the crease shade slightly above your natural fold so the depth stays visible with eyes open.

Caramel Cut-Crease with Espresso Depth
A cut-crease sounds technical, but this version stays wearable because the contrast is gentle: a warm caramel shade sits on the mobile lid while espresso defines the crease and outer corner. The crisp line where the two shades meet gives the eye structure, while the caramel keeps the overall effect warm rather than severe. The trick is keeping the cut line soft. Instead of a razor-sharp concealer edge, blend the concealer just enough to sharpen the crease, then set it with the caramel shade so there is no visible line of product. Pat McGrath Labs and Charlotte Tilbury both make warm neutral palettes that cover this caramel-to-espresso range in one compact, which makes the look easier to build in layers. Use a small flat brush for the lid and a tapered brush for the crease, building the espresso slowly so it reads as shadow, not a stripe. This look works especially well for evening plans and photographs beautifully, since the lid shade catches light while the crease adds depth. Pair it with groomed brows and a satin nude lip so the eyes stay the focus.

Sheer Espresso Wash for Daytime
Not every espresso look needs to be dramatic. This daytime version uses a single sheer brown shade swept across the lid and blended up into the crease, like a wash of color rather than a constructed eye look. It takes about three minutes, needs one fluffy blending brush, and gives quiet definition that reads polished without looking made up. The key is choosing a shade close to your skin’s undertone: warm golden browns flatter warm skin, while cooler cocoa browns suit cooler undertones. Apply with a fingertip or a fluffy brush, blend the edges until no line is visible, and add one coat of brown-black mascara. Skip liner entirely or tightline the upper waterline for a little extra definition that stays invisible. This is the look to reach for on days when you want to look put together for work, school runs, or a coffee date without committing to a full eye look. It also layers well: if plans change, you can deepen the outer corner with espresso shadow and turn it into an evening eye in under a minute.
Sharp Espresso Winged Liner
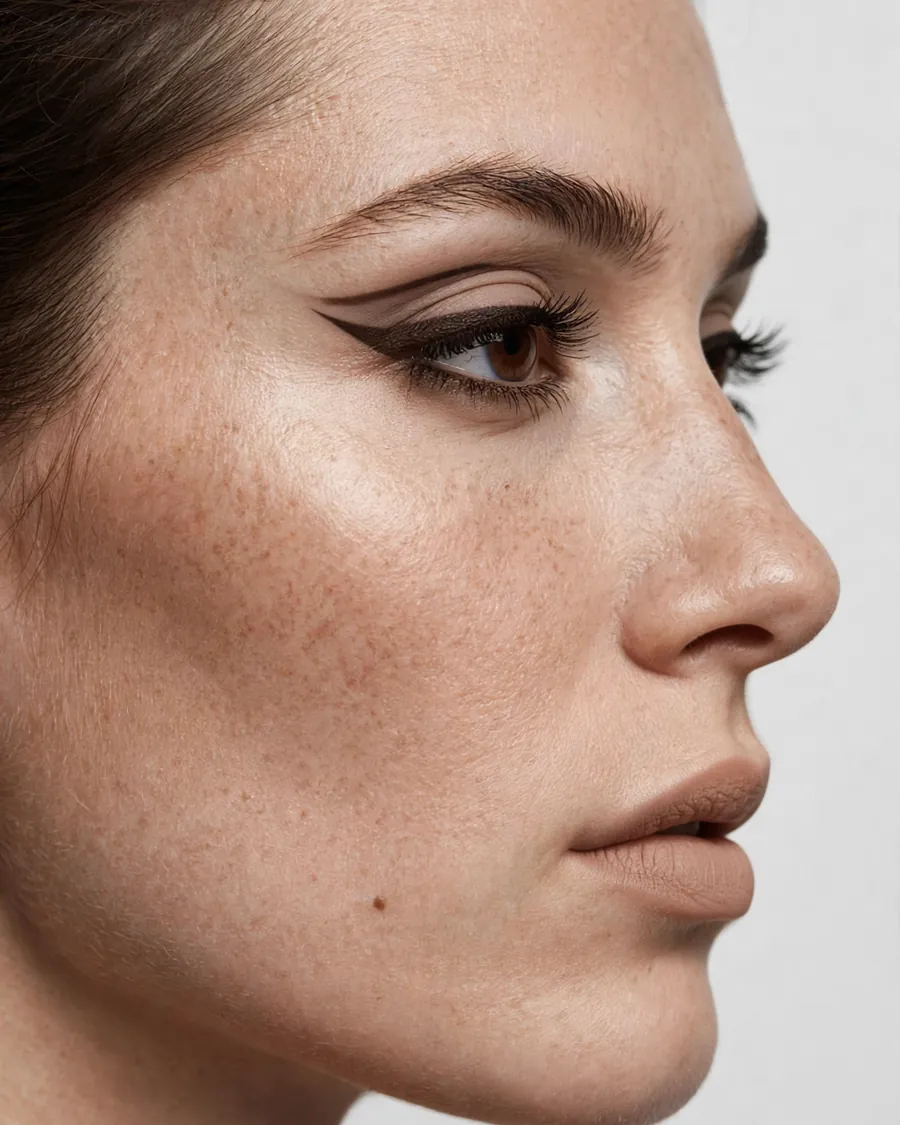
Brown winged liner gives the graphic impact of a black wing with noticeably less harshness, which makes it a strong choice for daytime-to-evening wear and for anyone who finds black liner too severe. The wing itself follows the same geometry as a classic cat eye: the line starts thin at the inner corner, thickens slightly toward the outer corner, and flicks upward following the angle of the lower lash line. Use a dark espresso gel liner or a felt-tip pen in deep brown, and set the wing with matching eyeshadow so it does not smudge on oily lids. Keep the rest of the lid nearly bare, with a wash of warm taupe and mascara, so the wing stays the single graphic element. If your eyes are downturned, angle the flick slightly higher and keep it shorter to avoid dragging the eye down. This look pairs cleanly with a bold lip, since the eyes are defined but not heavy, and it suits almond and upturned eye shapes particularly well.
Halo Espresso Eye with a Champagne Centre
A halo eye places the lightest shade at the centre of the lid, with darker espresso shades on the inner and outer corners, which makes the eyes appear rounder and more open. Here the centre is a soft champagne shimmer, and the surrounding brown is a medium espresso blended outward, so the light-catching middle does the work of brightening the whole eye. Apply the espresso shades first, leaving the centre bare, then press the champagne shimmer onto that patch with a fingertip, which presses shimmer more evenly than a brush. Blend only where the champagne meets the brown so the centre stays bright. This placement suits round and deep-set eyes especially well, since the central light brings the lid forward visually. Keep the lower lash line light, with just a whisper of espresso at the outer corner, to preserve the open effect. A peachy nude lip and a soft cheek finish the look without competing with the lid’s glow.

Espresso and Gold Foil for Evening
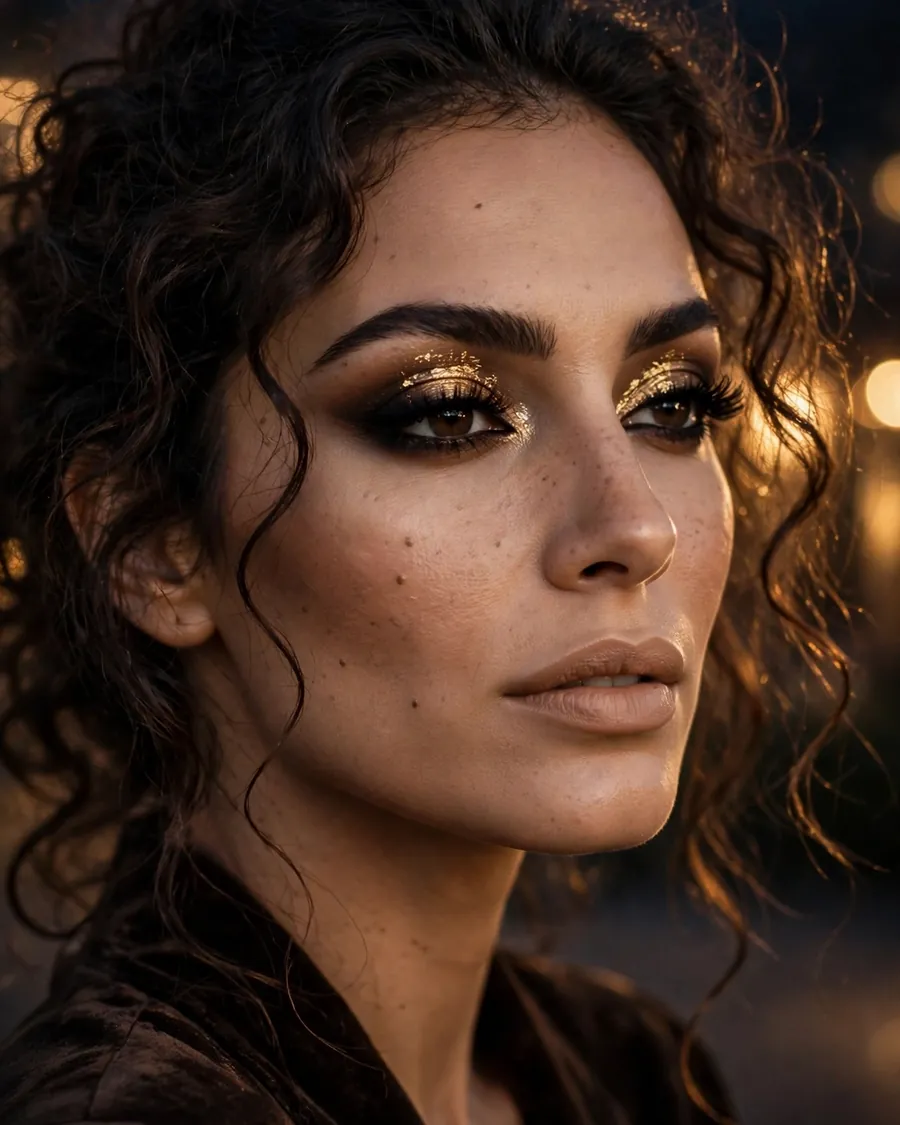
When an occasion calls for more impact, gold foil over an espresso base delivers it without tipping into costume territory. The brown underneath gives the gold something to sit on, so the metallic shade reads rich rather than brash, and the combination suits fall evenings, weddings, and holiday parties. Build the espresso smoky base first, then press a gold foil or metallic cream shadow onto the centre of the lid with a damp flat brush — damp application deepens the metallic finish and keeps the pigment in place. Keep the gold contained to the mobile lid, and leave the crease and outer corner matte brown so the eye keeps its shape. Because the eyes carry this much shine, keep the rest of the face calm: a matte base, a soft contour, and a muted lip. If you want a stronger lip, a dark red lip works here — see these dark red lip looks for fall for pairings that hold up next to gold without clashing. Finish with two coats of volumizing mascara and skip false lashes so the foil remains the star.
Latte-Gradient Espresso Eye
This look borrows the ombre logic of a latte: pale milky brown at the inner corner deepening gradually to dark espresso at the outer corner, with no visible line between shades. The gradient flatters nearly everyone because it mimics natural shadow, and it photographs as soft and dimensional rather than heavily made up. The blending is the whole technique. Work with at least three shades — a pale latte, a mid milk-chocolate, and a deep espresso — and blend each boundary with a clean fluffy brush before moving on. Three well-blended tones give a smoother gradient than a crowded palette. A touch of matte highlight under the brow bone sharpens the shape, and a single coat of lengthening mascara keeps the finish light. This is a strong choice for work events and family gatherings where you want visible effort without a dramatic eye, and it adapts easily: deepen the outer corner for evening or sheer it out further for daytime.

Tightlined Espresso with Full Lashes
Some days the goal is polished, not dramatic, and this look delivers it by putting all the definition at the lash line. Tightlining — pressing dark espresso pencil or gel into the upper waterline and between the lashes — makes lashes look denser from the root without any visible liner on the lid. Add a wash of warm taupe across the lid, curl the lashes, and apply two coats of volumizing mascara, or add individual false lashes at the outer corners for extra fullness. The result reads as naturally full lashes and defined eyes, which is why it works for the office, video calls, and glasses wearers — heavy lid shadow can disappear behind frames while lash-line definition stays visible. Keep brows groomed and filled, since they frame the whole effect, and choose a lip color in the same warm family — a soft brown-nude keeps the balance. The look takes under ten minutes and survives long days better than layered shadow.

Smudged Espresso Kohl, Lived-In Finish
The lived-in smoky eye skips precision on purpose: espresso kohl is smudged around the upper and lower lash lines, then softened with a blending brush until the edges blur into a soft haze. Unlike the classic matte smoky eye, this version embraces a slightly undone texture, which makes it forgiving to apply and easy to wear after dark. The smudging is what separates a deliberate lived-in look from makeup that has simply worn off, so blend with intention: keep the darkest color close to the lashes and let it fade gradually outward, with no hard line anywhere. A creamy kohl pencil, such as Charlotte Tilbury’s Rock ‘n’ Kohl in brown, smudges more evenly than a dry pencil. Set the smudged line lightly with espresso shadow so it lasts, and keep the lid itself mostly matte so the soft edges stay the point. Pair it with tousled hair and a satin berry lip, or keep the lip nude and let the eyes carry the mood. It suits evening plans, concerts, and dinners where a polished look would feel overdressed.

Deep Espresso Outer-V with Bronze Shimmer
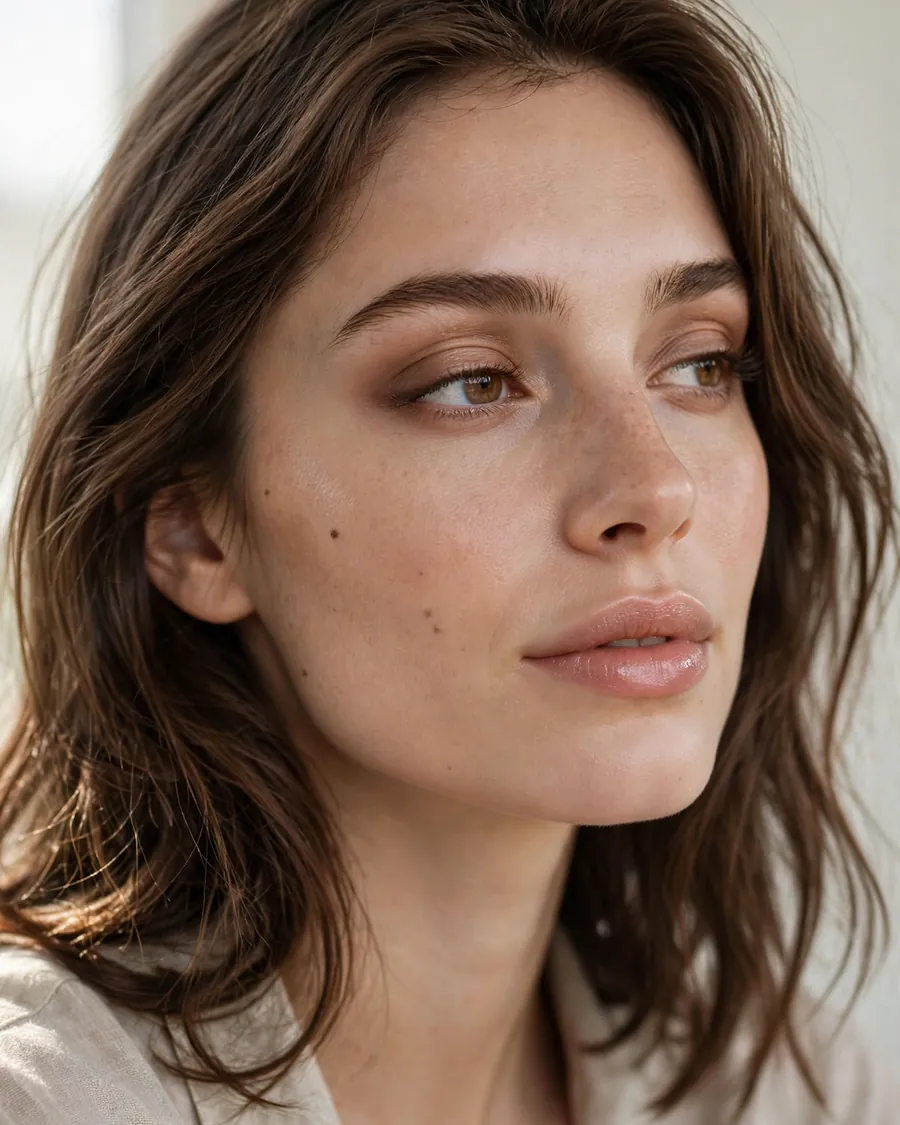
This final look adds structure by deepening only the outer V — the corner where the upper and lower lash lines meet — with the darkest espresso, while a warm bronze shimmer covers the rest of the lid. The contrast between the dark corner and the glowing lid gives the eye dimension and a subtle lifted shape, without the full commitment of a smoky eye. Use a small tapered brush to place the espresso precisely in the outer V, then blend inward just enough to remove any hard edge. Press the bronze shimmer over the lid with a fingertip, keeping it away from the outer corner so the depth stays intact. This placement suits hooded and deep-set eyes well, since the dark corner recedes and the shimmer brings the lid forward. Finish with espresso liner along the outer half of the lower lash line, and a warm blush — a berry blush makeup look for fall layers over this bronze base especially well. A glossy nude lip keeps the overall effect warm and current.

How to Apply Espresso Makeup Step by Step
Start with an eyeshadow primer across the lid and up to the brow bone; primer keeps brown shades from creasing and deepens their color. Next, sweep a warm transition shade — a mid-brown a few tones lighter than your espresso — through the crease with a fluffy brush, using windshield-wiper motions. Then place your espresso shade where the look requires it: outer corner for a smoky eye, crease for a cut-crease, or along the lash line for a liner look. Blend each layer before adding the next, and clean your brush between shades so colors stay distinct. If you use shimmer, press it on with a fingertip or a damp brush rather than sweeping it, which prevents fallout onto the cheeks. Line the eyes after shadow, not before, so the liner sits cleanly over the blended base. Curl lashes, apply mascara from root to tip, and finish with a light dusting of translucent powder under the eyes to catch any stray pigment. Check both eyes in natural light before adding more depth.
Pro Tips
Blend in natural light when possible; warm indoor bulbs make brown shades look darker than they are, and it is easy to over-apply. Build espresso shades in thin layers rather than pressing on a heavy amount at once — brown pigment grabs quickly, and sheer layers blend more evenly. If one eye ends up darker, do not remove product; add a small amount to the lighter eye and blend both to match. Keep a clean fluffy brush on hand for softening edges without adding color. For oily lids, set primer with translucent powder before shadow, and set cream or gel liner with matching powder shadow to stop transfer. Finally, match your espresso’s undertone to your lip and blush: warm golden browns pair with peach and berry tones, while cooler cocoa browns sit better with rose and mauve.
Frequently Asked Questions
Does espresso makeup suit fair skin? Yes. Choose a mid-brown rather than the darkest espresso for the main shade, keep the blending sheer, and let the deeper tone appear only at the outer corner and lash line. The warmth of brown flatters fair skin without the stark contrast black can create.
Can I wear espresso eye makeup with glasses? Yes, and it is often better than black. Keep definition at the lash line with tightlining and mascara, since lid shadow can disappear behind frames, and keep brows groomed.
How do I stop brown eyeshadow from falling onto my cheeks? Tap excess powder off the brush, press shimmer shades on instead of sweeping them, and do eye makeup before foundation so fallout wipes away cleanly.
What lip color pairs best with an espresso eye? A nude in the same warm family is the safest everyday choice. For evening, a berry or dark red lip works well because the brown eye stays neutral enough to let the lip lead without clashing.
Final Thoughts
Espresso makeup works because it gives you the full range of eye looks — soft, sharp, shimmering, or smudged — inside one forgiving color family. Start with the version that matches your comfort level, whether that is the sheer daytime wash or the classic matte smoky eye, and build from there as your blending confidence grows. A single good brown palette covers most of this list. Save the looks that feel most like you, adapt the intensity to your plans, and let the warmth of espresso do the heavy lifting this fall.