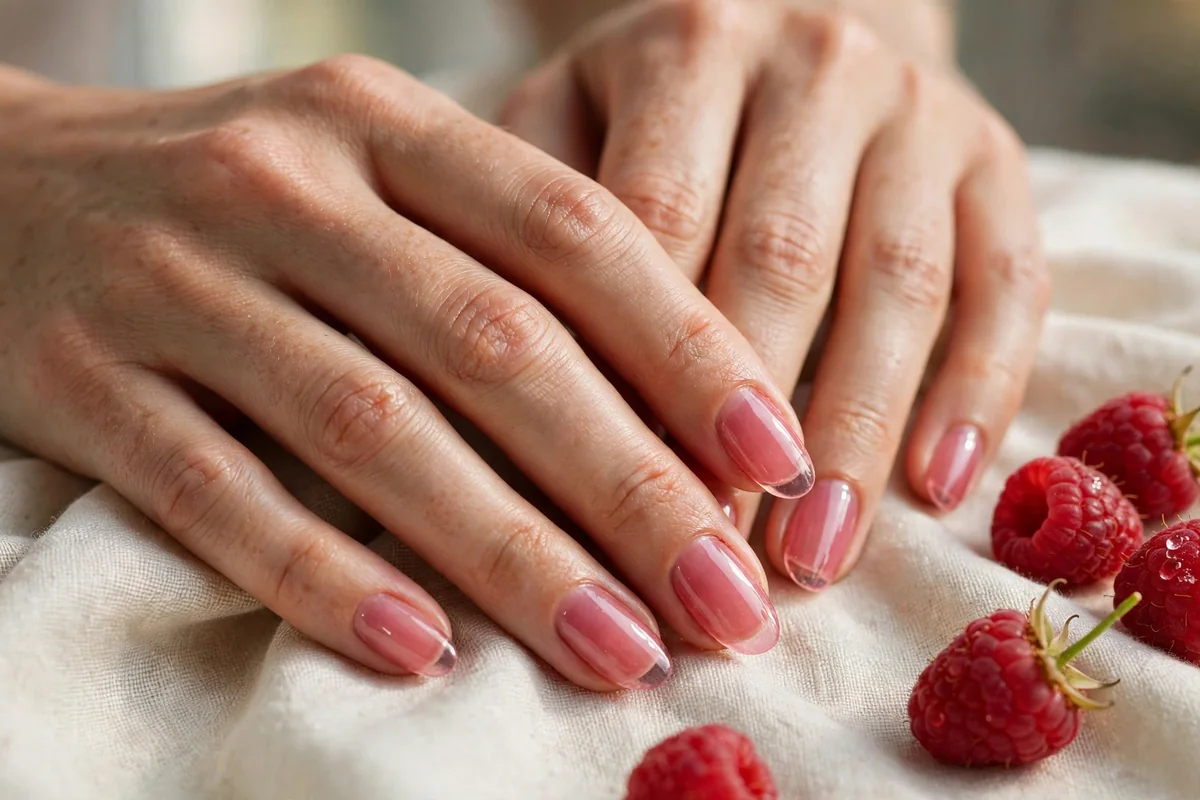
Raspberry jelly nails are fall’s most light-catching manicure: a translucent wash of berry colour like crushed raspberries held up to sunlight, glossy and syrupy rather than flat or opaque. Unlike a solid red, the jelly finish lets the natural nail show through, so the colour shifts with the light and flatters all skin tones. This collection stays in that sheer, fruit-tinted lane, from a classic single-colour wash to French tips, ombré fades, glazed finishes, gold leaf, aura colour, glitter gradients, marble swirls, botanical details, and fine line art. Every design keeps the jelly translucency that makes the trend work, so you can pick a quiet everyday version or a decorative one for evenings out.
1. Classic Raspberry Jelly Wash
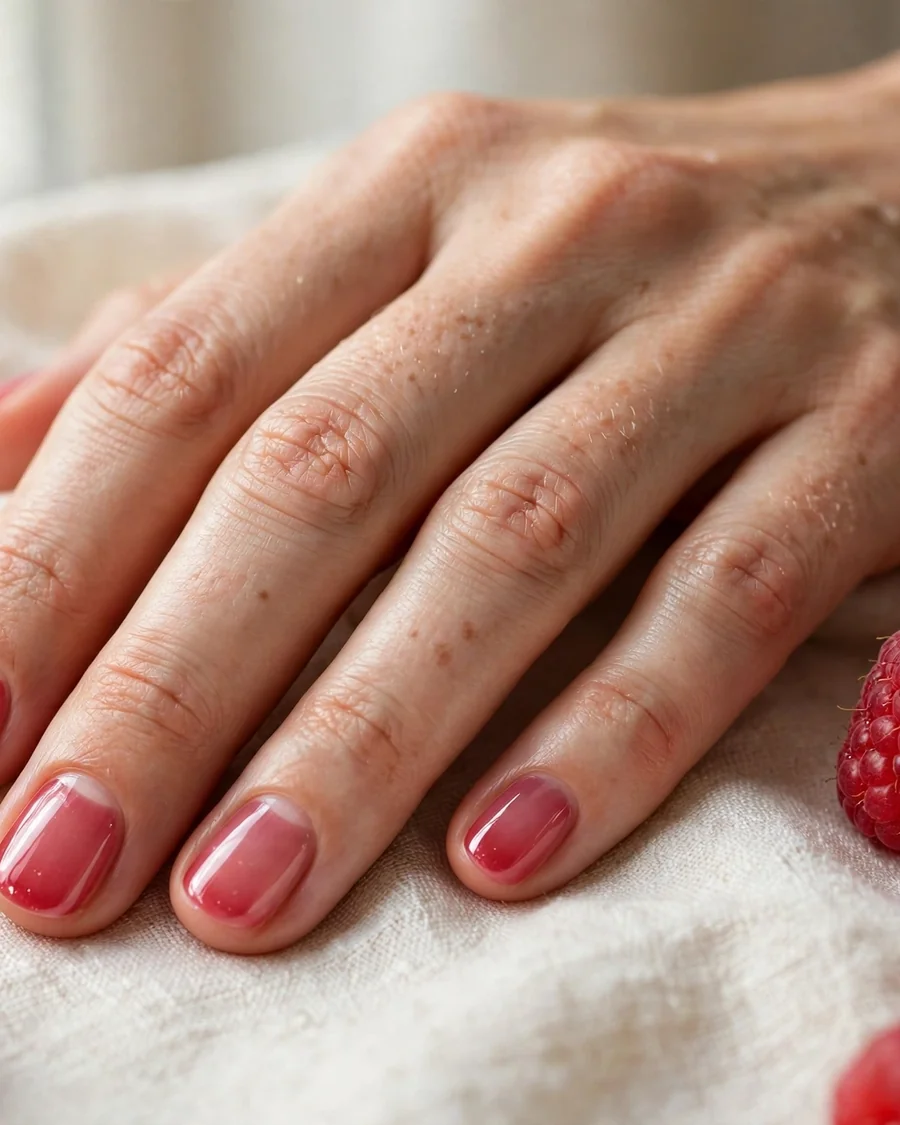
The classic raspberry jelly wash is the purest version of this trend, and the best place to start if you have never tried a jelly polish. Two or three thin coats of a translucent raspberry shade build a syrupy, stained-glass colour over the natural nail, deepening with each layer while never turning opaque. The result reads like berry juice on the nail: glossy, dimensional, and slightly different on every hand because your natural nail tone shows through. It suits every nail length, though short oval and squoval shapes keep it fresh and practical. Jelly formulas from brands like OPI and Essie layer cleanly without streaking, and a high-shine top coat seals the glassy finish. Control the depth yourself: two coats give a light tint, while a third lands closer to ripe berry. This is the design to choose when you want colour that feels special but still goes with everything in your fall wardrobe.
2. Raspberry Jelly French Tips
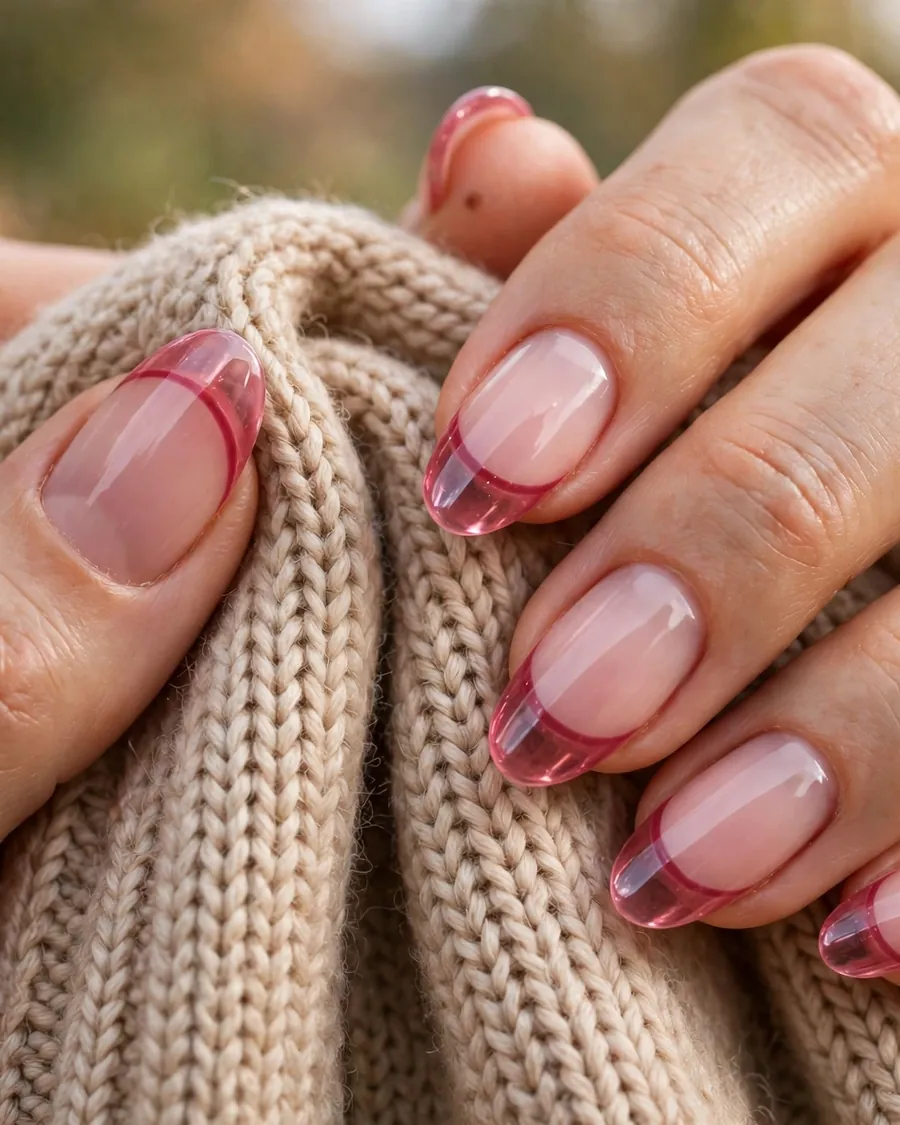
A raspberry jelly French tip swaps the classic white tip for a sheer berry band, giving the French manicure a softer feel for fall. The base stays sheer milky pink, while the free edge carries one or two coats of translucent raspberry jelly, so the tip glows rather than sitting as a solid block. The key is proportion: the berry band should follow the natural smile line and stay slim, roughly a fifth of the nail length, so nails still look elongated. Almond and oval shapes show this design best, and the translucency is more forgiving than stark white on medium and deeper skin tones. At the salon, ask for a sheer pink base with a raspberry jelly tip, not opaque berry polish, sealed with gloss. At home, tip guides keep the smile line neat, and a flat brush dipped in acetone cleans up any wobble. The result reads classic from a distance and current up close.
3. Raspberry-to-Clear Ombré Fade
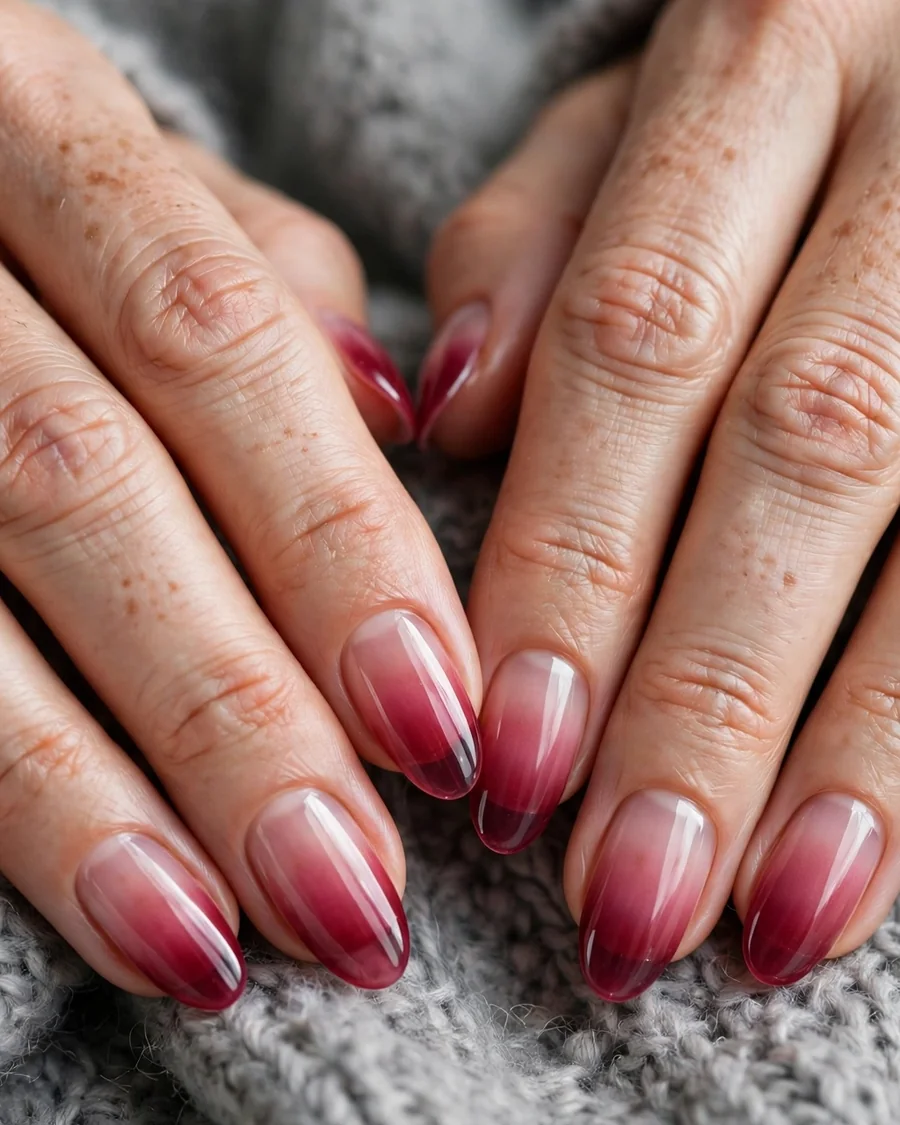
An ombré fade moves from a deep raspberry at the tip to a nearly bare, sheer wash near the cuticle, giving the nail depth without any hard lines. The gradient should be gradual: berry colour gathers gently toward the free edge like syrup settling in a glass, making nails look longer and more slender. This design flatters every nail length, but it shines on medium-length almond or coffin shapes where the fade has room to travel. Salons sponge the gradient on, layering sheer raspberry jelly over a clear base and sealing with gloss; the sponge keeps the transition soft rather than striped. For a do-it-yourself version, sponge raspberry jelly polish from the midpoint outward in thin layers over the clear base, letting each layer dry first. Keep the jelly sheer rather than opaque so the fade stays airy. It pairs well with silver jewelry and deep plum, charcoal, and cream fall outfits.
4. Glazed Raspberry Jelly
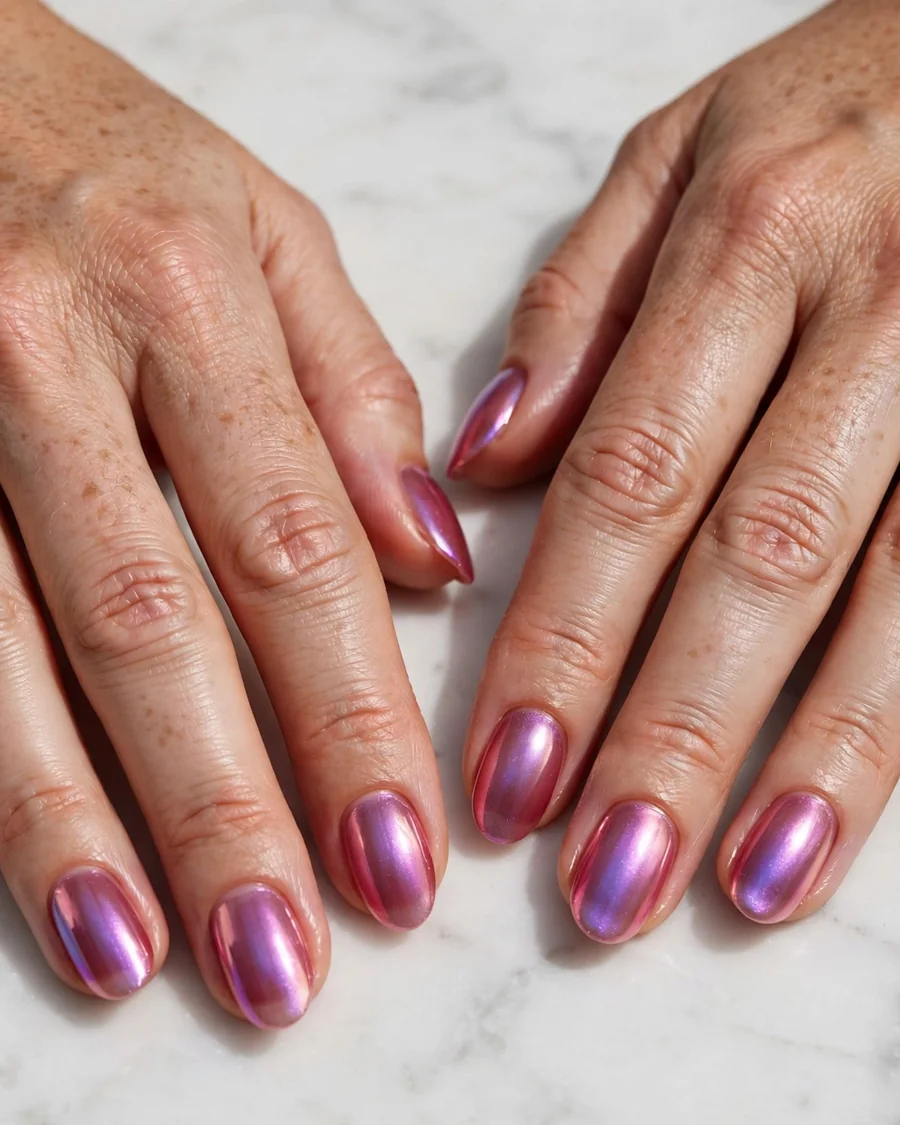
The glazed finish translates beautifully into raspberry jelly: a sheer berry base topped with a pearlescent chrome powder that catches light like sugared glass. The glaze adds dimension without adding colour weight, so the nails still read as translucent jelly while shifting subtly between pink and violet as the hands move. This is a salon favourite because chrome powder needs a no-wipe gel top coat to grip, though gel kits now make it possible at home with practice. The look works best on smooth, well-shaped nails, almond or oval, since the reflective finish highlights every ridge. Ask for a sheer raspberry gel base, a fine pearl chrome dusted over the tacky layer, and a glossy seal to lock in the shine. Keep the rest of your styling simple, since the glaze itself is the statement. It is a strong choice for dinners and celebrations, and it wears well for two weeks in gel.
5. Gold-Flecked Raspberry Jelly
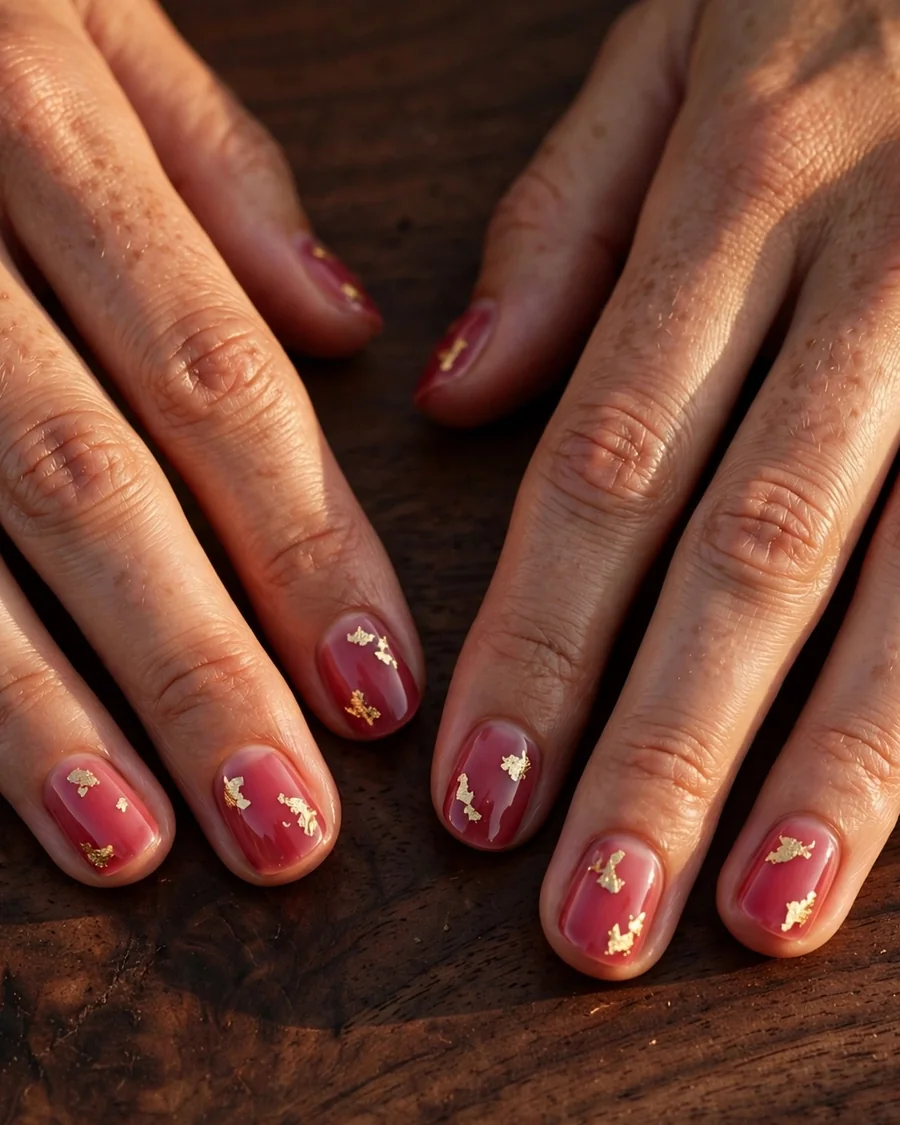
Tiny flecks of gold leaf scattered over a raspberry jelly base turn a simple manicure into something quietly celebratory. The trick is restraint: three to five small flakes per nail, placed off-centre near the cuticle or along one side, read as jewelry, while full coverage reads as costume. Gold leaf works especially well over jelly because the translucent berry lets light pass around each flake, making the gold glow from within. A glossy top coat seals the flakes smooth so they never catch on fabric. This design suits short nails especially well, since the flecks add interest without needing length, and it flatters warm undertones beautifully. At the salon, ask for gold leaf rather than chunky glitter, since the irregular edges catch light more naturally. For a do-it-yourself version, use tweezers to place flakes onto a tacky second coat, then seal twice. It is an easy upgrade for fall gatherings and pairs naturally with gold rings.
6. Raspberry Jelly Aura Nails
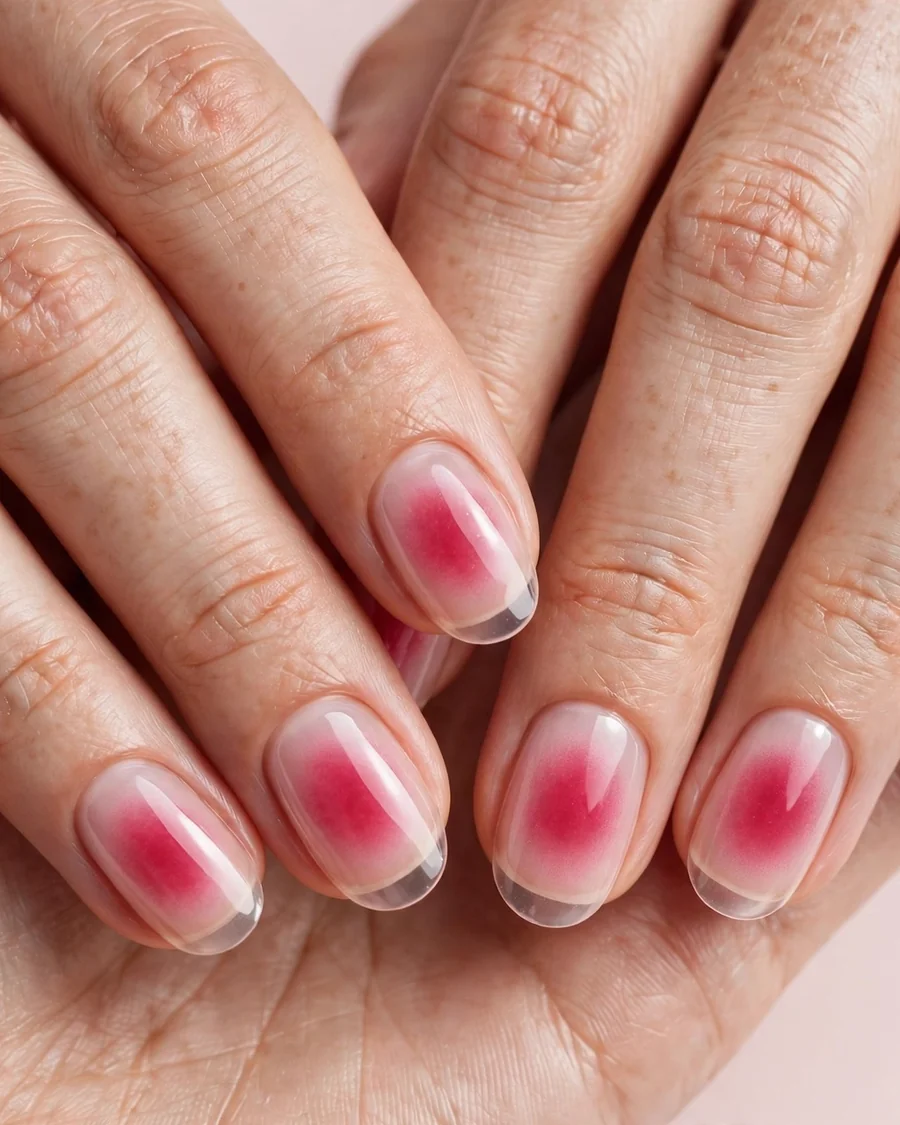
Aura nails place a soft halo of raspberry colour at the centre of each nail, fading out toward the edges like a warm berry glow. The effect is dreamy and modern, airbrushed rather than painted, and it keeps the overall impression light because the edges stay sheer. An airbrush tool or a sponged pigment gives the smoothest blend, with the deepest raspberry in the middle third of the nail. This design looks best on medium to long nails, where the halo has space to bloom, and on almond or oval shapes that echo its softness. Keep the raspberry sheer and fruit-toned rather than dense, or the aura turns into a solid blob. It photographs beautifully and suits anyone wanting nail art that feels current without patterns or motifs. Pair it with minimal jewelry so the soft glow stays the focus, and seal with gloss. Aura nails also grow out gracefully, since the edges are already sheer.
7. Raspberry Jelly Glitter Gradient
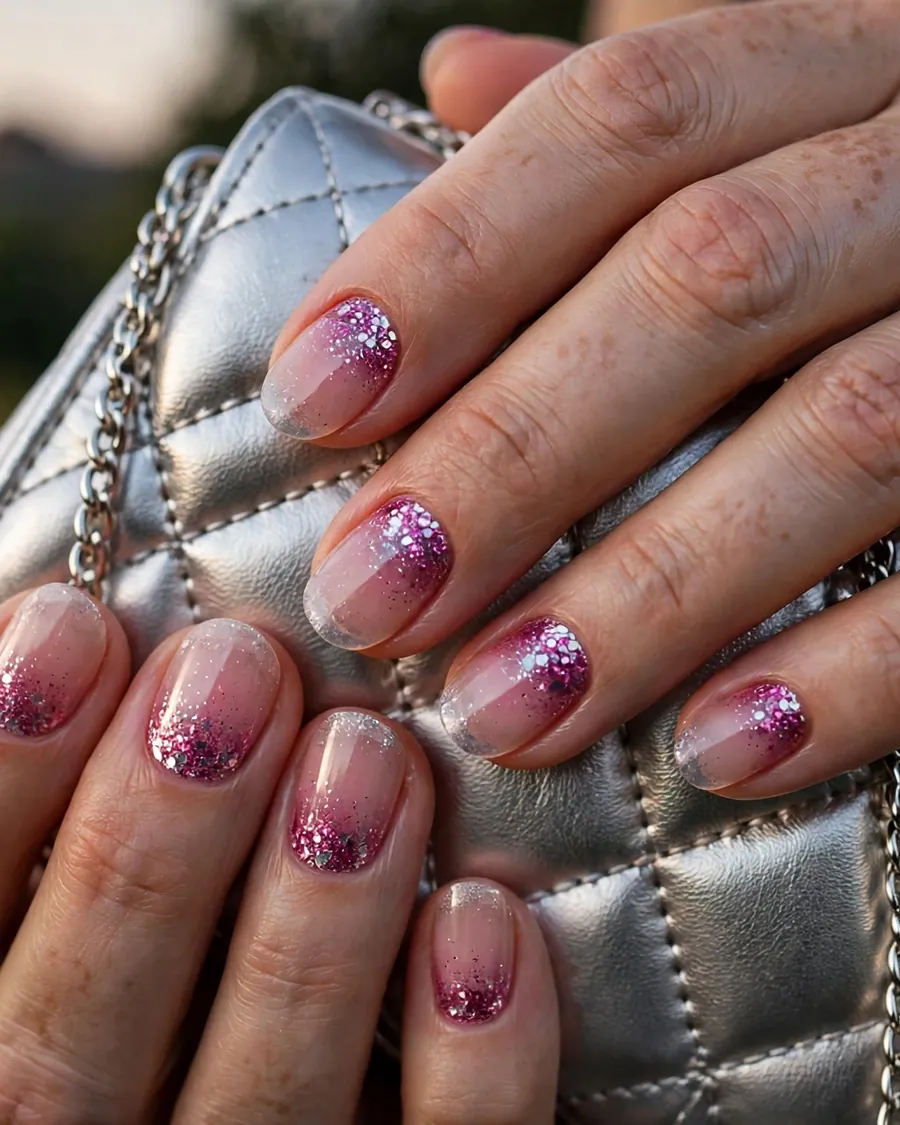
A glitter gradient concentrates fine magenta and silver shimmer near the cuticle and lets it dissolve toward the tip over a raspberry jelly base. The sparkle reads like frost on berries, festive without tipping into party-nail territory, because the glitter stays fine and tonal rather than chunky. This is one of the easiest salon-to-home designs: apply the raspberry jelly base, sponge fine glitter polish over the lower half, and fade it upward with a dry brush before sealing. It works on any nail length, though short nails benefit most since the gradient adds dimension without needing length. The design also hides regrowth well, making it a smart pick if you stretch appointments to three weeks. Keep the rest of your manicure simple, with no extra art, and let the gradient carry the whole look. It transitions easily from office days to fall evenings and flatters every skin tone, since berry and silver suit cool and warm complexions.
8. Raspberry Jelly Marble Swirls
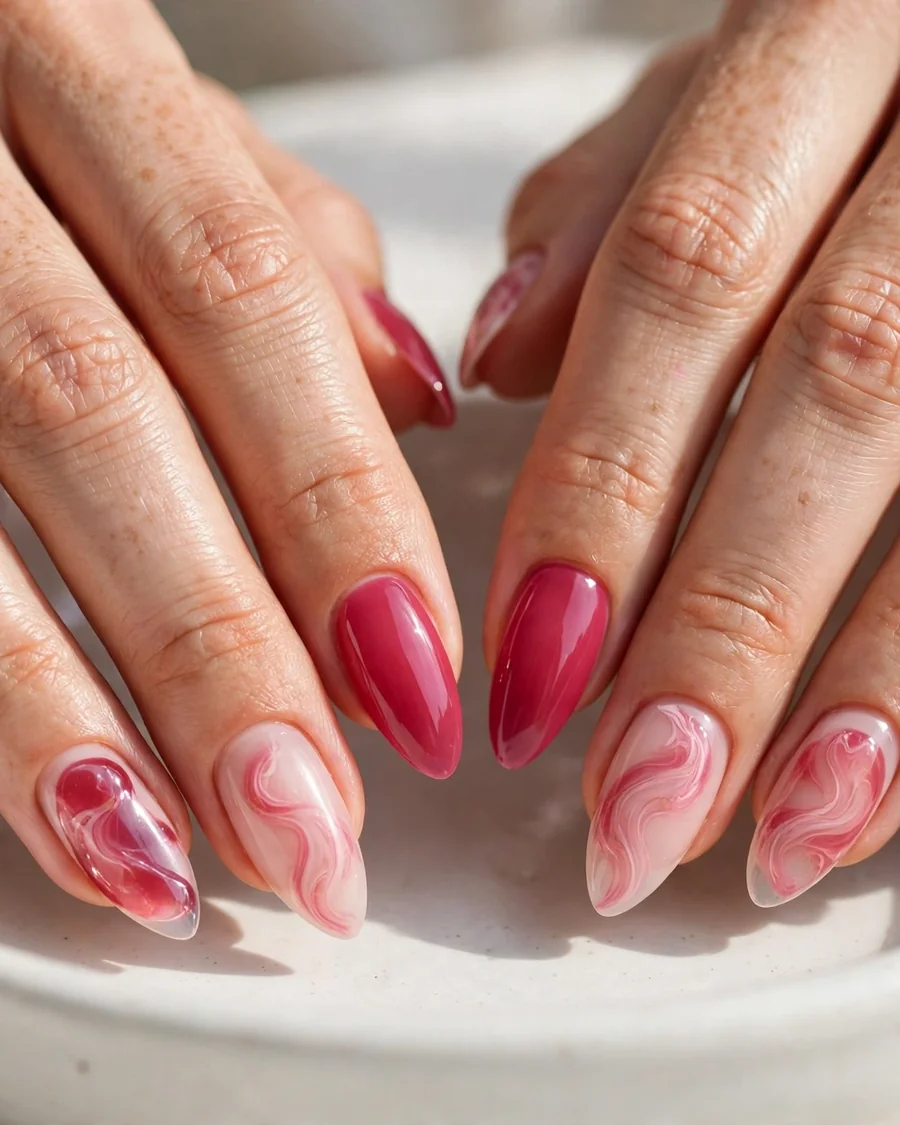
Marble swirls in raspberry jelly and sheer blush bring movement to an otherwise quiet palette. Thin ribbons of translucent berry drift through a pale, milky base, mimicking crushed fruit swirled through cream, and no two nails need to match exactly; the variation is the point. This design works best as an accent: two or three marbled nails per hand, with the rest in a plain raspberry jelly wash, keeps it wearable rather than busy. Technicians create the effect by dragging a fine brush through wet polish, then sealing with gloss so the swirls look fluid. At home, work one nail at a time while the base is still wet, and use a light hand, since too much swirling muddies the colours. The palette stays soft and berry-toned, so it suits casual and formal settings, and anyone who loves nail art but wants something that still reads as grown-up at work.
9. Short Almond Raspberry Jelly
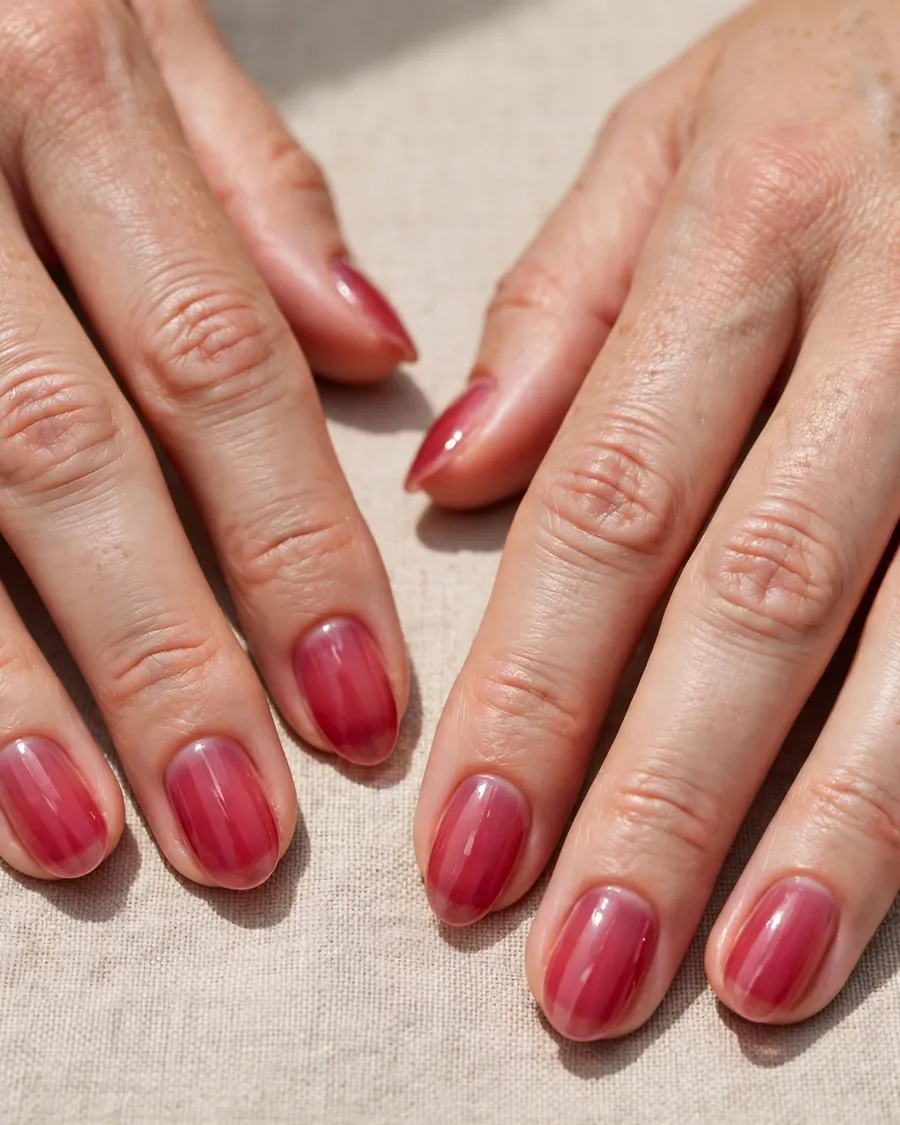
Not every raspberry jelly look needs length. A short almond shape in a single sheer raspberry jelly shade is arguably the most wearable idea in this collection: tidy, practical, and flattering on hands of every age. The almond taper softens fingers and makes even short nails look graceful, while the translucent berry evens out the look of the nail bed and complements both cool and warm skin tones. Choose a jelly formula with true translucency, sheer enough to look like tinted glass, and apply two or three thin coats, not one thick one. Brands like OPI and Essie offer reliable berry-leaning jellies in this range, and a builder gel base adds strength if your nails split or peel. This is the design to pick for typing-heavy workdays, childcare, cooking, and everything else real life demands. A weekly top-coat refresh keeps it looking salon-fresh for two weeks. It is also the easiest length to maintain between appointments.
10. Negative-Space Raspberry Half Moons
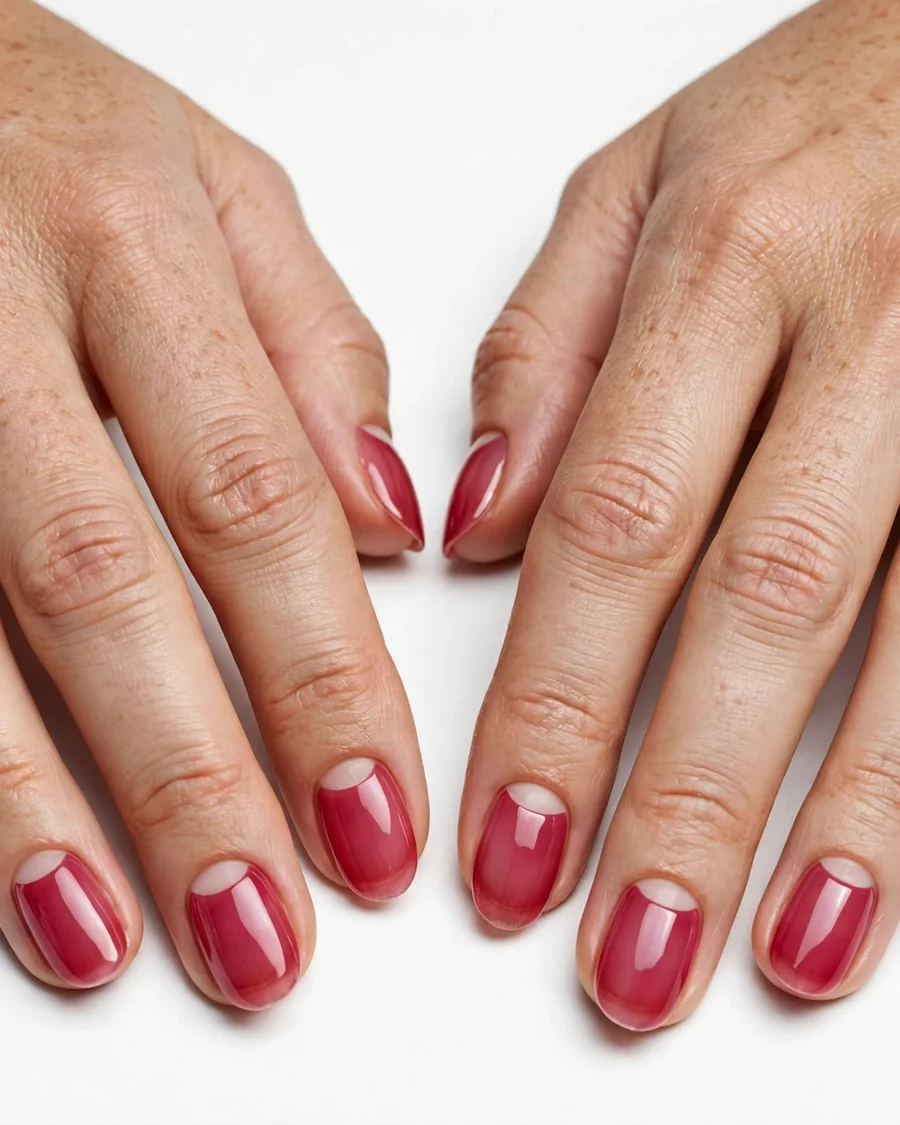
Negative-space half moons leave a bare crescent at the cuticle and fill the rest of the nail with raspberry jelly, creating a graphic yet gentle design. The bare moon adds breathing room, which makes nails look longer, and it has a practical bonus: regrowth is far less visible because the cuticle area is already bare. The crescent should be small and neat, about a quarter of the nail, with a clean curved edge. Use reinforcement rings or a detail brush to shape the moon, and choose a raspberry jelly with enough berry depth to contrast against bare nail. This design suits oval and almond shapes and works on short nails too. It feels modern and slightly architectural while staying firmly in the sheer berry lane, so it fits both creative workplaces and formal occasions. Seal with a glossy top coat to unify the bare and polished areas, and reapply it midweek to keep the jelly shine.
11. Botanical Raspberry Jelly
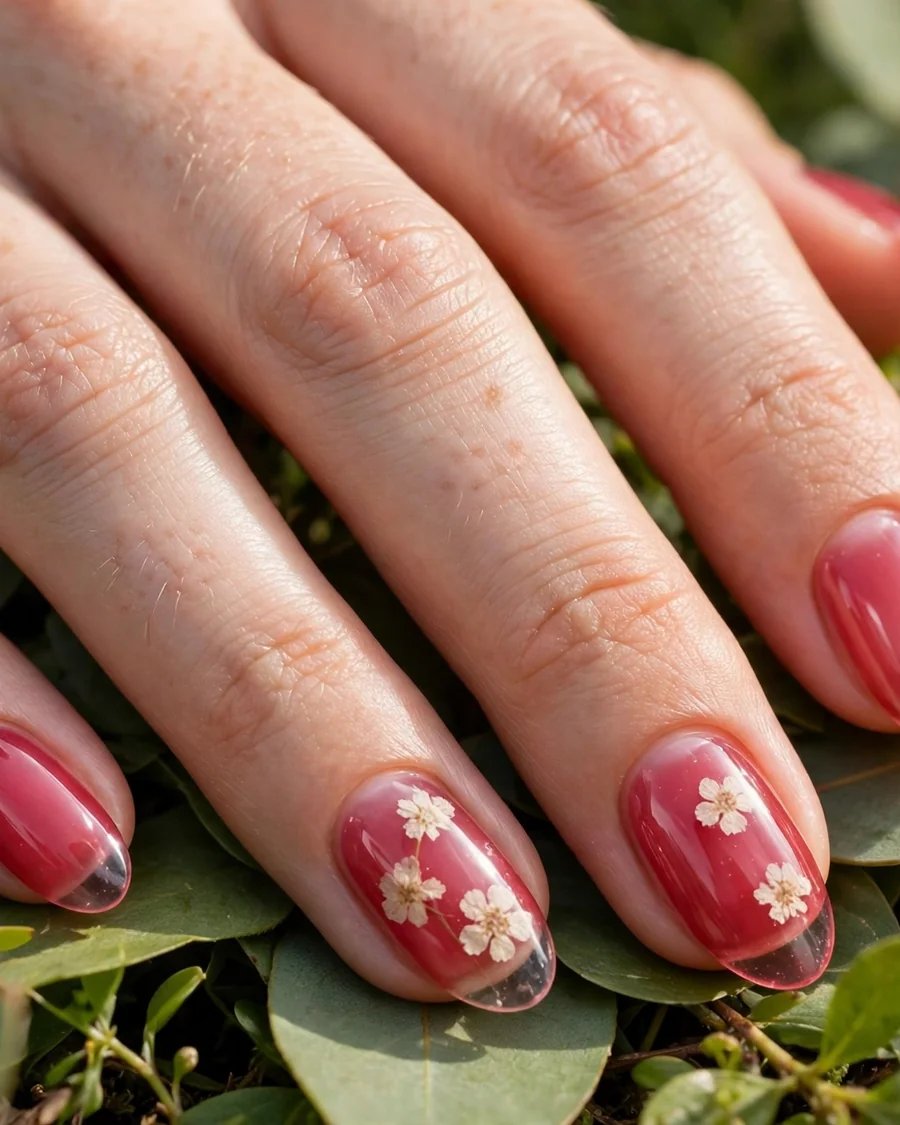
Botanical jelly nails suspend tiny pressed flowers inside the translucent raspberry layers, like petals caught in berry syrup. Small white or pale pink dried blooms, a fern frond, or a single baby’s breath sprig per accent nail are all you need; the jelly coats above and below act as a glass case that keeps the design smooth. Because the raspberry tint is sheer, the petals stay visible rather than disappearing under opaque colour, which is exactly why this idea belongs in a jelly collection. Place botanicals on two accent nails per hand and keep the rest in a plain raspberry wash, so the look stays delicate. Seal with two coats of glossy top coat, since the flower edges must sit flat to avoid catching. This is a lovely choice for autumn weddings and garden-inspired occasions, and it photographs beautifully in natural light. Ask your technician about encapsulated-flower gel if you want it to last the full wear.
12. Raspberry Jelly with Fine Gold Line Art
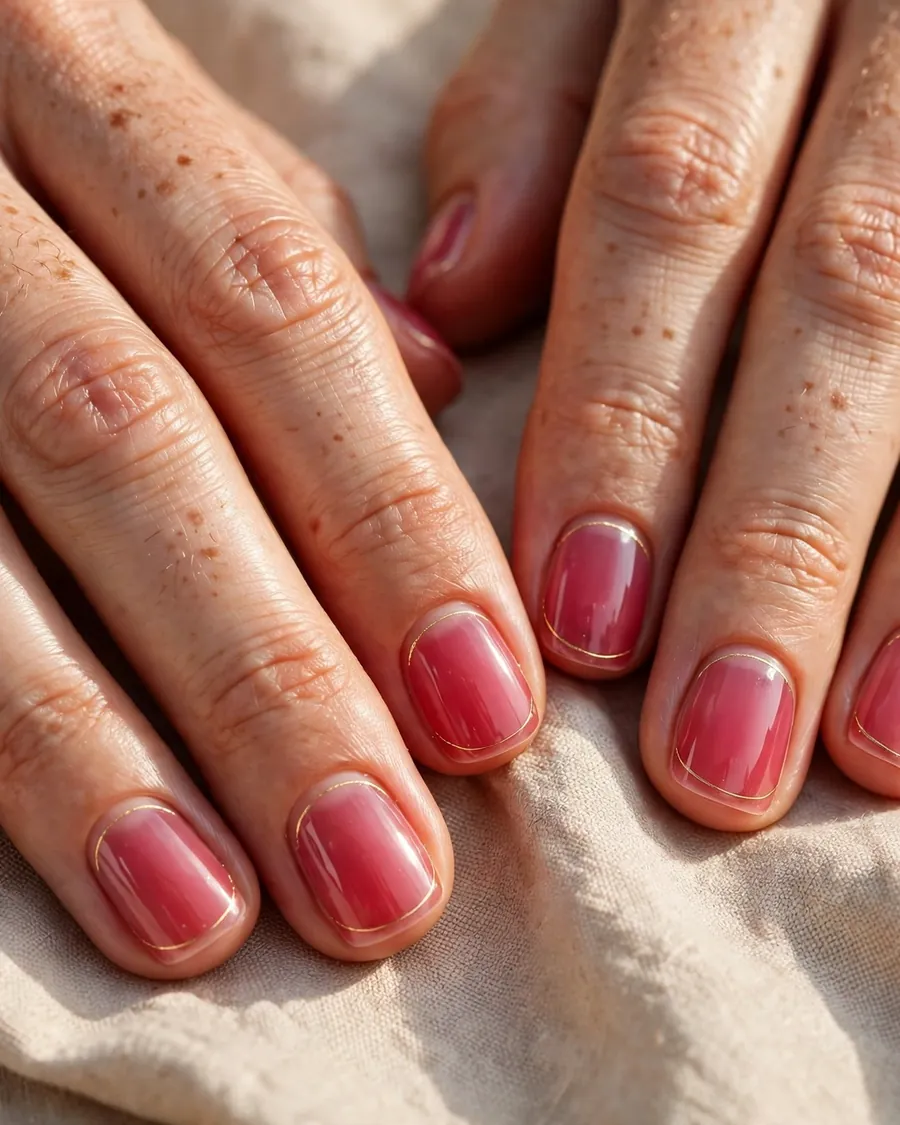
Fine gold line art is the minimalist’s answer to nail art: a single delicate line tracing the cuticle curve, a thin stripe, or a small arch on each raspberry jelly nail. The lines should be hair-thin and metallic, applied with a striping brush or liner pen, so they read as jewelry rather than drawing. Because the jelly base is translucent, the gold sits like a thread of light over berry glass, keeping the whole design airy. This design works on any length and shape, but it is especially striking on short squoval nails where the clean geometry stands out. Keep one motif per nail, or place lines on just two accent nails for a quieter version. A glossy top coat protects the lines and deepens the raspberry beneath. It is the most versatile idea here, equally at home in a boardroom or at a fall wedding, and it takes only minutes longer than a plain manicure.
How to Apply Raspberry Jelly Nails
Start with clean, shaped nails: push cuticles back, file to your shape, and buff lightly. Apply a ridge-filling base coat, or builder gel if nails split or peel. For jelly designs, apply thin coats and let each dry fully; two to three coats reach the right depth; one thick coat turns streaky. Add art while the base is slightly tacky for gold leaf and flowers, or fully dry for line art and French tips. Finish with a high-shine top coat. If you want something softer for everyday wear, sheer caramel nude nails offer the same jelly translucency in a warm golden tone. If you want a fully opaque berry, red nail designs give you that deeper colour instead.
Pro Tips
Match the raspberry to your undertone: blue-leaning raspberries flatter cool skin, while pink-leaning berries suit warm skin. Test a shade on one nail in daylight first. Thin coats are non-negotiable for jelly finishes, since thick coats turn translucent polish cloudy. Keep cuticle oil in your routine; hydrated cuticles make sheer shades look expensive. Soak-off gels hold raspberry jelly chip-free for two to three weeks; regular polish benefits from a top-coat refresh every few days. Photograph your nails in natural light before leaving the salon, to show your technician what to adjust.
FAQ
Does raspberry jelly polish suit short nails?
Yes. Jelly formulas flatter short nails because translucency keeps the colour light. Short almond and squoval shapes with two or three thin coats look polished without needing length.
How is raspberry jelly different from regular berry polish?
Regular berry polish is opaque and covers the nail in one or two coats. Raspberry jelly is translucent, so your natural nail shows through and colour builds with each sheer layer, like tinted glass.
How long do raspberry jelly nails last?
Regular polish lasts five to seven days with a top-coat refresh; gel versions last two to three weeks.
Can I do raspberry jelly nails at home?
Absolutely. The classic wash, short almond, and glitter gradient are the easiest do-it-yourself options, needing only a base coat, one jelly shade, and a top coat. Leave aura and marble to the salon unless you have practised with a sponge.
Final Thoughts
Raspberry jelly nails earn their place in a fall rotation because they do much with little: berry colour without heaviness, shine without glitter overload, and enough variety, from a sheer wash to gold leaf to pressed flowers, to suit any mood or occasion. Pick the finish that matches your week, whether a low-maintenance short almond or a glazed look for a special evening, and adjust the depth by layering sheer coats until the shade feels like yours. Save the designs you love for your next appointment.