
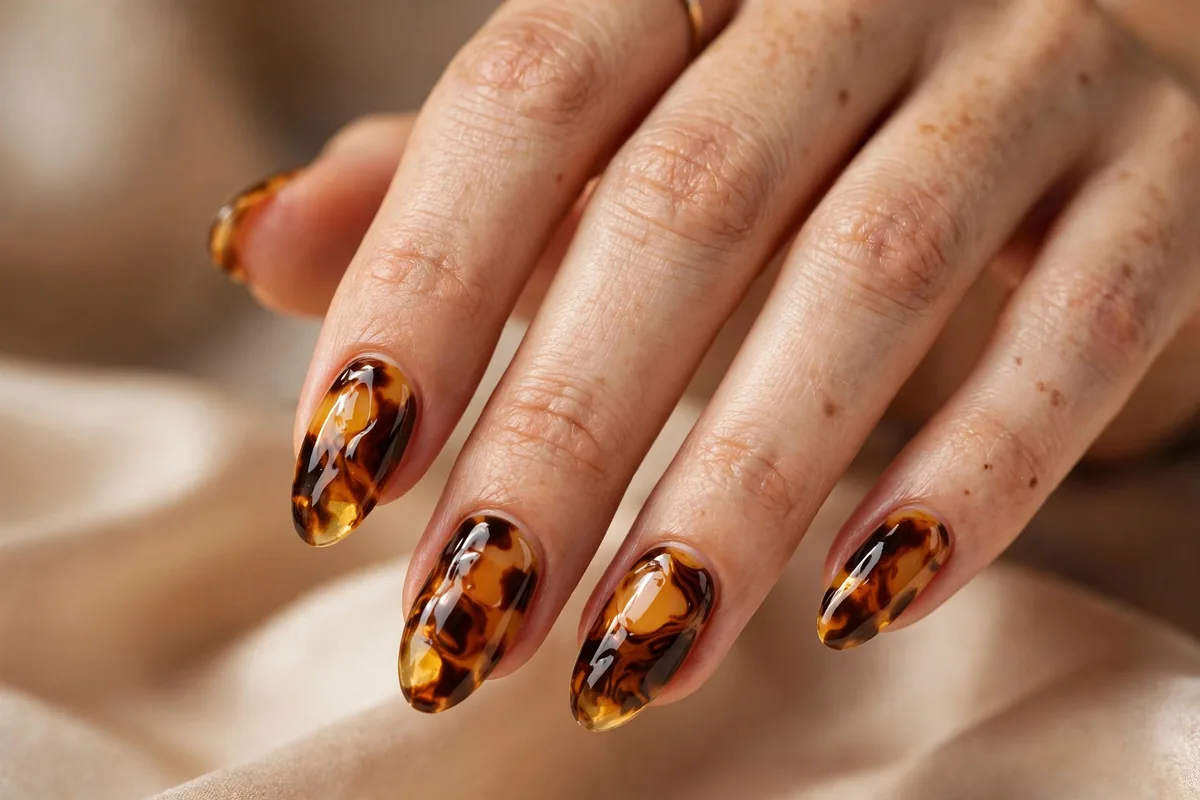
If there's one nail pattern that defines fall 2026, it's tortoiseshell. That warm amber marbling — translucent honey, caramel, and deep espresso blotches suspended in a glossy jelly base — captures autumn without a single literal leaf in sight. It's the rare design that reads expensive on any nail length, pairs with everything from camel coats to chunky knits, and works as well in a boardroom as at an apple orchard. This collection brings together ten distinct ways to wear tortoiseshell this season, from the timeless full-coverage classic to tortoise French tips, blooming-gel diffusion, and negative-space minimalism. Whether you're booking a salon appointment or layering jelly polish at home, you'll find exact color mixes, shape guidance, and pro finishing tips for every look.
The Classic Amber Tortoiseshell
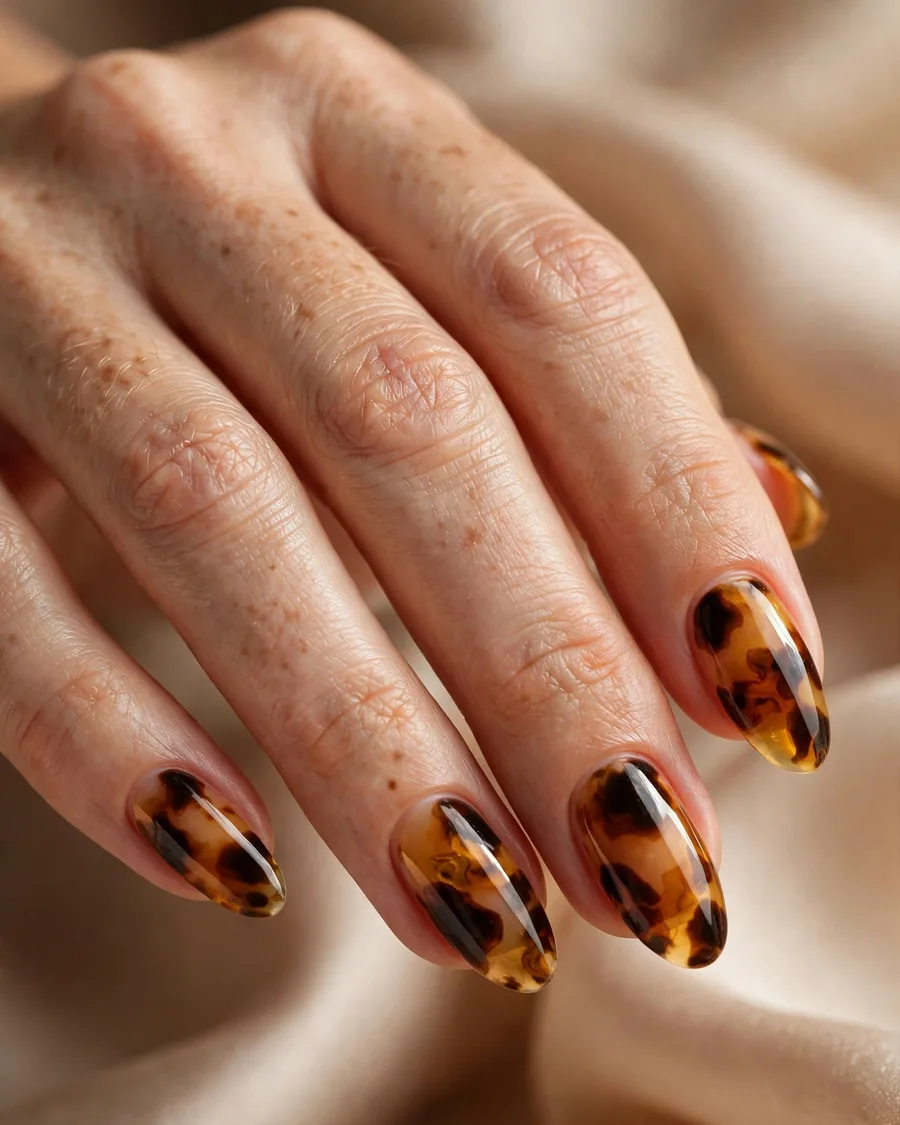
This is the look that started it all: every nail fully covered in rich tortoiseshell, built from layers of translucent amber, warm caramel, and deep espresso. On an almond shape, the pattern stretches out beautifully — the marbled blobs elongate with the nail, so the design feels fluid rather than busy. What makes this classic work is restraint in the color recipe: keep the palette to three warm-toned jellies with similar undertones, and the marbling reads as one continuous, glossy surface instead of a collection of spots. The high-shine gel top coat is non-negotiable here; it mimics the polished resin look of real tortoiseshell accessories and gives the manicure its signature depth. Ask your tech for a jelly amber base, then irregular caramel and espresso blobs bloomed while wet — no two nails should match. This is the most forgiving version of the trend, too: because the pattern is intentionally irregular, minor mistakes disappear into the design, which makes it an excellent first attempt for anyone new to nail art. Wear it medium to long for maximum impact, and keep rings minimal — the nails are the jewelry here.
Tortoiseshell French Tips
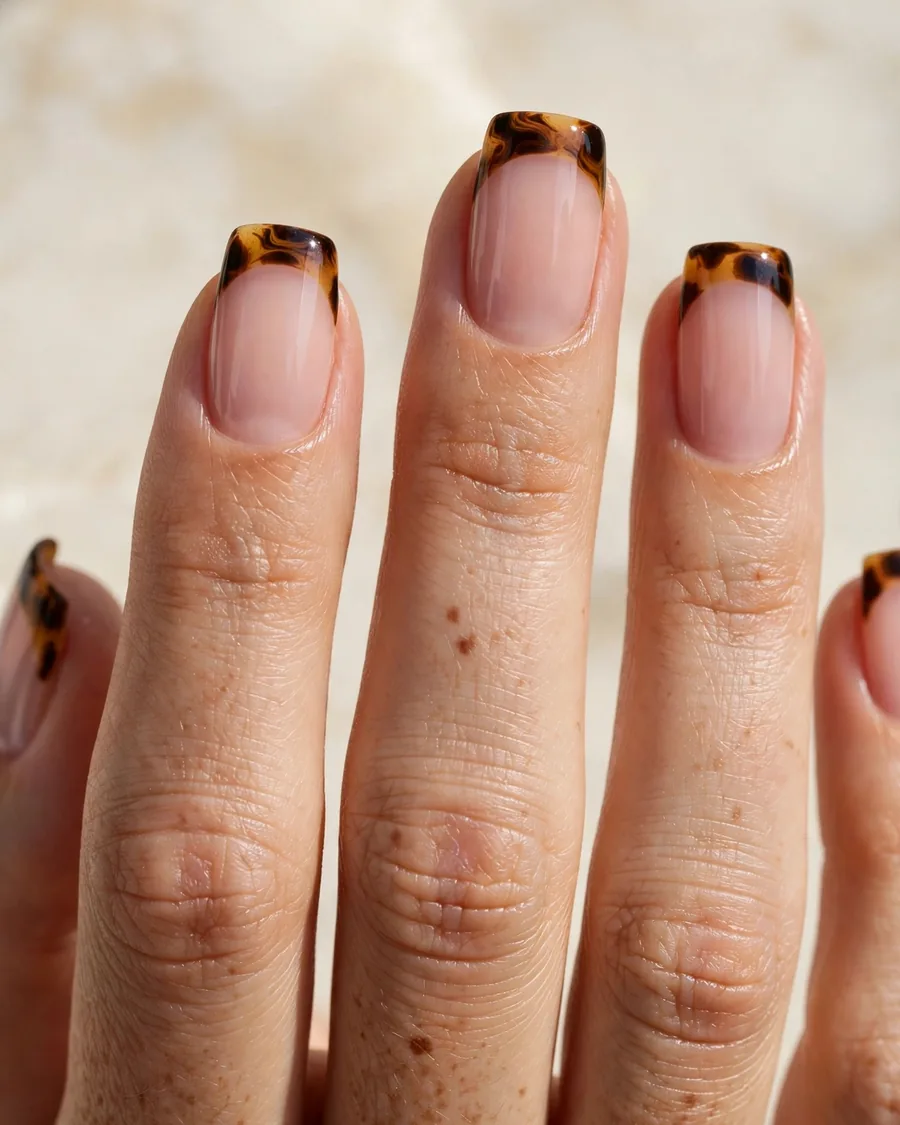
The French manicure gets its most interesting update in years: tortoise tips. Keep the nail bed soft and natural — a sheer nude pink like OPI "Bubble Bath" or Essie "Ballet Slippers" — and let only the tips carry the amber marbling. The contrast is what makes this work: the quiet, polished base makes the patterned tips feel deliberate and graphic rather than busy. It also solves the biggest hesitation about tortoiseshell, which is commitment — if the full-coverage look feels like too much pattern, this gives you the trend in a controlled, wearable dose. Shape matters more than usual here. A squoval or coffin shape gives the tips enough real estate for the marbling to read; on very short nails, ask for a thinner tortoise smile line so the pattern stays crisp. For depth, the tips should be built from at least two jelly layers — a honey base bloomed with espresso — sealed in gloss. This is the office-friendly tortoiseshell, and it pairs especially well with gold jewelry, since the amber tones pick up the metal.
Jelly-Layered Tortoise Glass

Think of this as the stained-glass version of tortoiseshell. Instead of opaque blobs, the pattern is built entirely from translucent jelly layers — sheer amber, diluted caramel, a whisper of espresso — so light passes through the design the way it does through real amber. The technique is all about stacking: cure a sheer honey jelly, add thin caramel strokes, cure again, then float tiny espresso fragments near the cuticle and let a final amber layer unify everything. Each layer adds dimension without adding heaviness, which is why this version feels lighter and more modern than the classic. It's particularly flattering on shorter nails, where dense marbling can overwhelm — the transparency keeps even a short, rounded nail looking elegant. Ask for a glossy finish, since matte would kill the glassy effect, and consider almond or oval shapes that let the light play across the surface. If you're drawn to softer fall textures, the sheer build-up here echoes the plush depth of these velvet nail designs — same dimensional feel, different finish. This is the tortoiseshell for minimalists who still want the trend.
Bloomed Tortoise Diffusion

Blooming gel is the secret behind tortoiseshell's softest, most organic look. The wet gel base lets each drop of caramel and espresso spread outward on its own, creating feathered, watercolor edges instead of hard outlines — the pattern looks grown rather than painted. The result is dreamier than the classic: amber clouds with blurred perimeters, like looking at tortoiseshell through frosted glass. This technique rewards patience; your tech should work one nail at a time, dropping pigment into the wet base and watching it diffuse for a few seconds before curing. The payoff is a design that's nearly impossible to mess up, since diffusion hides hard edges and uneven placement by design. Choose colors with clear tonal separation — a true honey amber against a deep espresso — because blurred edges need contrast to stay legible. Oval or almond shapes suit the softness of the pattern. This is the most artistic version of the trend, and it photographs beautifully in natural light, making it a favorite for anyone who saves nail inspo constantly.
Tortoise Half-Moon Cuticles

Flip the French on its head: this design places the tortoiseshell pattern at the cuticle in a neat half-moon, leaving the rest of the nail a sheer, polished nude. The effect is graphic and unexpected — a reverse French that draws the eye to the base of the nail, where most designs never go. It works because of the strong shape contrast: the curved tortoise crescent against a long, clean nude nail creates a focal point that feels modern and editorial. Precision matters here more than in any other version; the half-moon edge must be crisp, so this is a salon job rather than a DIY first attempt. Ask your tech to map the crescent with a thin brush first, then fill it with bloomed amber and espresso before sealing. Keep the nude portion truly sheer — a milky translucent base like CND Vinylux "Negligee" — so the tortoise crescent reads as the single statement. This design also grows out gracefully, since the pattern sits at the base. For a moodier take on the same warm-brown family, these chocolate brown nail designs pair the same palette with deeper, moodier finishes.
Gold-Flecked Tortoiseshell
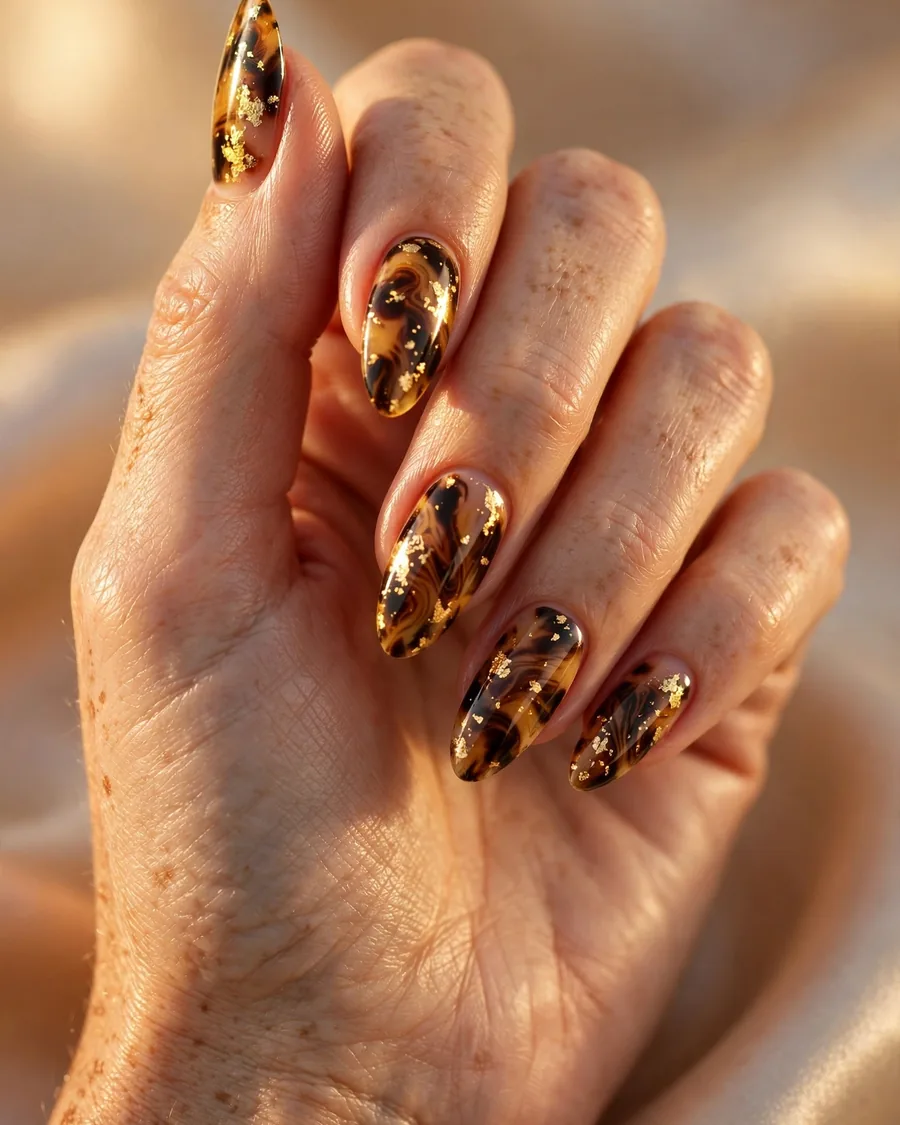
Tortoiseshell plus gold leaf is fall's answer to holiday nails arriving early. The base is the familiar amber marbling, but before the top coat goes on, tiny fragments of gold foil are pressed into the wet gel — catching light at the edges of the caramel blobs and along the smile line. The metal does something clever: it breaks up the pattern's density, so even a full-coverage tortoise looks airy and luminous instead of heavy. Placement is everything. Scatter the flakes sparsely and irregularly; a symmetrical or overly dense application reads crafty rather than luxe. One or two flakes per nail, positioned where the light hits — near the tip or along one sidewall — is the sweet spot. This version shines (literally) on almond and stiletto shapes, where the elongated surface gives the gold room to glint. It's also the dressiest tortoiseshell in the collection, ideal for evening events or the holiday stretch of the season. Seal with a thick glossy top coat to fully encapsulate the foil so the surface stays perfectly smooth. Under warm indoor lighting, the gold picks up candlelight beautifully — this is the manicure for dinner parties.
Negative-Space Espresso Tortoise
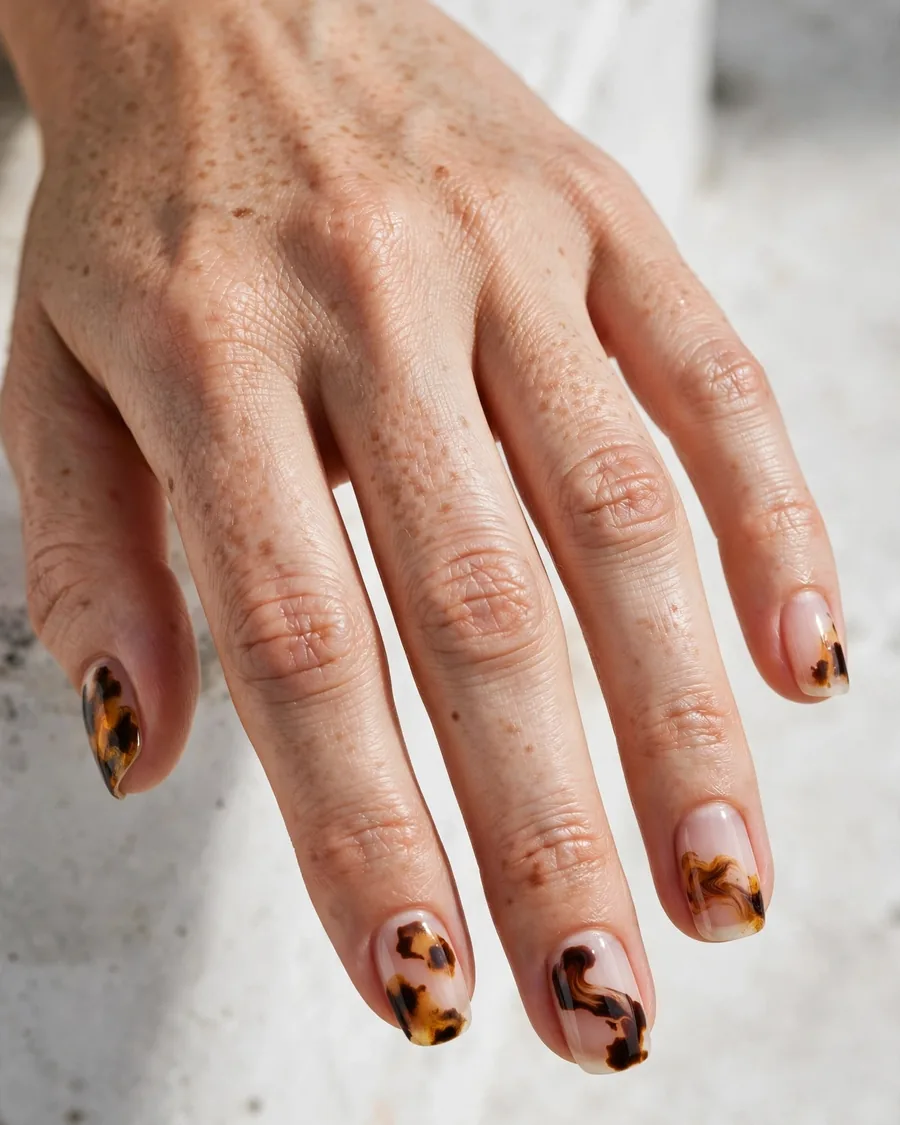
Minimalism meets tortoiseshell: instead of covering the whole nail, irregular swaths of espresso-amber marbling float on a bare, buffed nail, leaving most of the natural nail visible. The negative space is the design — it makes the pattern feel intentional and architectural, like a single brushstroke composition. This is the lowest-commitment tortoiseshell, and paradoxically one of the most striking, because the eye isn't used to seeing the pattern treated with this much restraint. The marbling should sit slightly off-center on each nail, and no two nails should mirror each other; the asymmetry is what keeps it from looking like a mistake. Use a clear base coat only, build the tortoise swath from two jelly layers, and finish with gloss. It works on every length, including very short nails, and it's the fastest version to do — a skilled tech can finish a set in well under an hour. Because so much natural nail shows, keep cuticles immaculate; there's nowhere for dryness to hide. This is the tortoiseshell for people who usually wear bare nails but want in on the season.
Tortoise-to-Nude Ombré
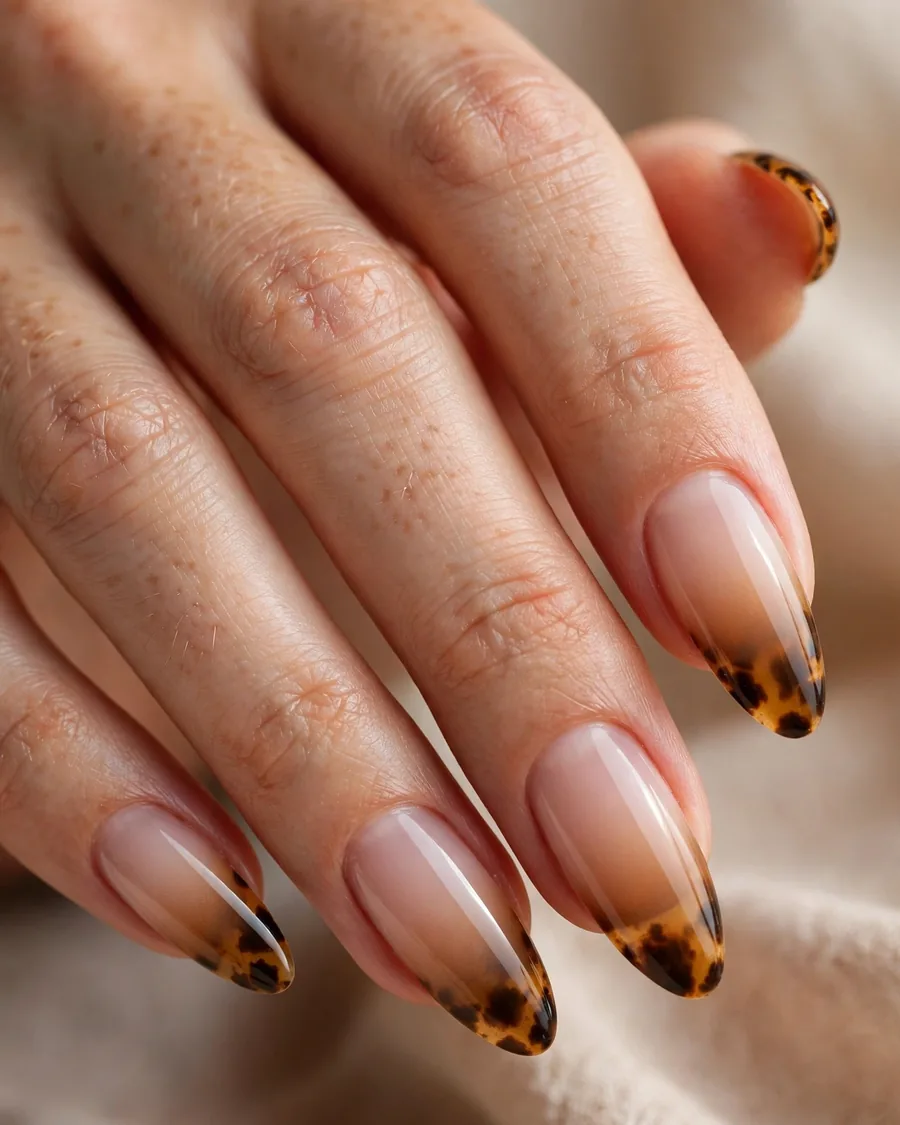
This design fades the tortoiseshell from a dense amber pattern at the free edge into a soft nude at the cuticle — an ombré where the pattern itself dissolves. The gradient does two favors at once: it makes nails look longer, since the eye travels the full fade, and it makes grow-out nearly invisible, since the cuticle area is already nude. The technique blends airbrushing or sponge-gradient work with marbling: lay down the tortoise at the tip, then feather it upward with a sponge loaded in sheer nude, curing between passes so the layers stay clean. The transition zone is the make-or-break detail — it should melt, not stripe, so ask for at least three feathering passes. Coffin and almond shapes show off the gradient best, giving the fade a long runway. Keep the nude end truly skin-flattering: match it to your undertone rather than defaulting to pink. This is the most elongating tortoiseshell in the collection and a strong pick for anyone growing out their nails through the season.
Matte-Finished Tortoiseshell
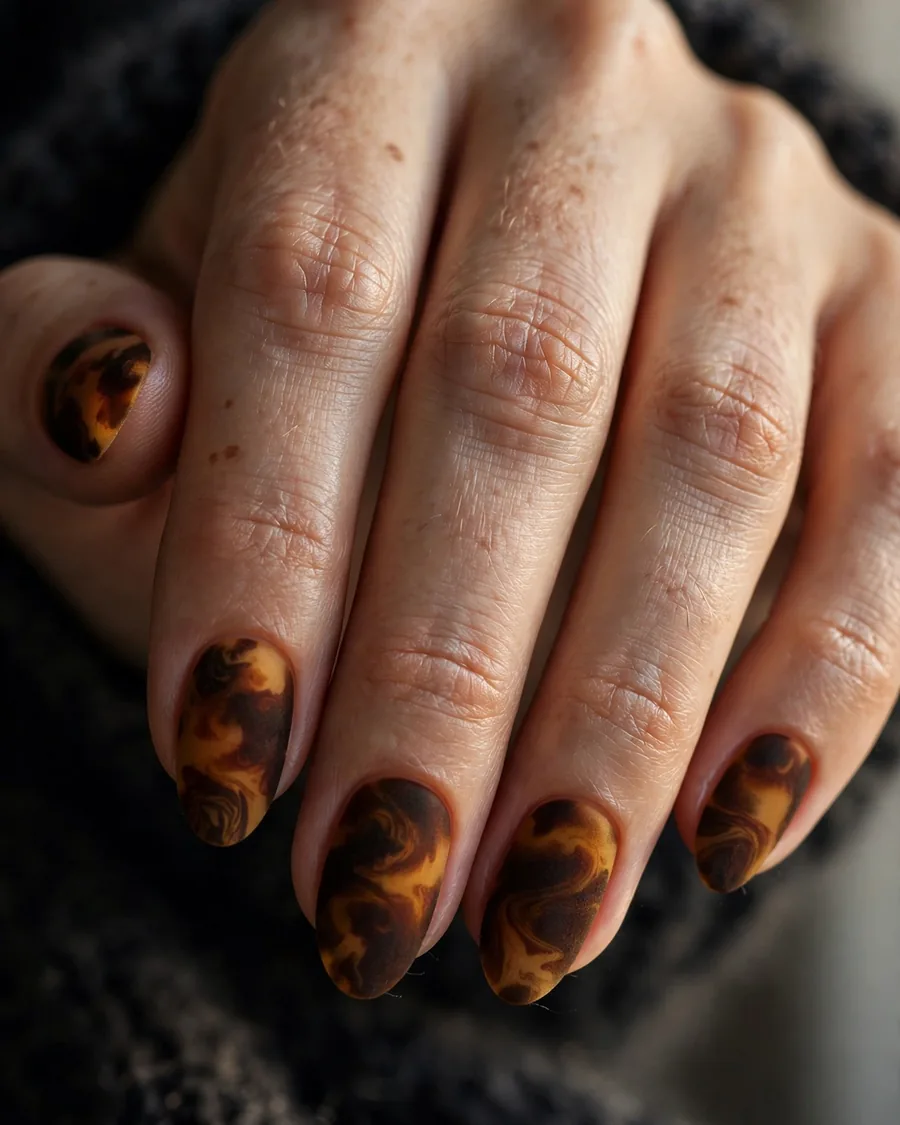
Take the classic amber tortoise and swap the gloss for a velvety matte top coat, and the whole personality changes. Without the shine, the marbling reads as suede — softer, moodier, and unexpectedly modern, like tortoiseshell seen through a soft-focus lens. The matte finish also deepens the espresso tones, giving the pattern a richness that gloss can sometimes wash out. The trade-off is maintenance: matte top coats show oils and lint more readily, so keep a matte refresher coat on hand and reapply every few days to keep the finish even. Application-wise, build the tortoise exactly as you would the glossy classic, then finish with two thin matte coats rather than one thick one for a smoother, more durable result. This version has a distinctly autumnal feel — it sits beautifully against wool, leather, and suede textures in your wardrobe. It also photographs with an editorial softness that gloss can't match. If the high-shine classic feels too polished for your style, this is your tortoiseshell.
Abstract Tortoise Swirls

The most artistic entry in the collection: freeform tortoiseshell swirls painted as loose, wavy ribbons of amber and espresso over a sheer honey base, more abstract painting than traditional marbling. There are no distinct "blobs" here — instead, thin, meandering lines of caramel loop and fold into each other, with espresso accents tracing the curves. The movement is the point; each nail feels like a tiny canvas, and the asymmetry across the set is intentional. This is a hand-painted design that rewards a tech with a confident liner brush, so bring reference photos and ask specifically for linework experience. Keep the base sheer so the swirls stay legible, and resist the urge to fill every gap — breathing room is what separates abstract from cluttered. Because the lines are thin, this version works beautifully on shorter nails where dense marbling would crowd. It's also the most personalizable: swap the espresso for deep olive or burgundy tracing and the design shifts mood entirely while staying in the tortoise family. The fashion-forward tortoiseshell for anyone bored of the classic.
How to Apply Tortoiseshell Nails at Home
You don't need a salon to get convincing tortoiseshell — the pattern is one of the most DIY-friendly nail art techniques because irregularity is the goal. Start with clean, shaped nails and a base coat. Apply one thin coat of sheer amber jelly polish (Beetles "Amber Jelly" or a similar translucent warm brown) and let it dry fully. Next, the marbling: with a dotting tool or the corner of a small brush, place irregular drops of caramel jelly and deep espresso jelly onto the wet amber layer, then drag a clean dry brush lightly through the drops to blur their edges — don't overwork it. The classic salon trick is a drop of rubbing alcohol on the brush, which melts the colors into each other like watercolor. Let each layer dry, then repeat with smaller drops for depth; two to three passes build the richness. Finish with a thick glossy top coat to unify the layers and mimic polished resin. The whole set takes about 45 minutes plus drying time, and the learning curve is gentle — your first nail will look the roughest, and by the fifth you'll have the rhythm.
Pro Tips for the Perfect Tortoiseshell
Color discipline makes or breaks this pattern. Stick to warm-toned jellies in the same family — honey amber, caramel, espresso — and avoid cool browns or blacks, which turn the marbling muddy. For gel users, a blooming gel base (Aprés or Beetles blooming gel) does the diffusion work for you; with regular polish, work wet-on-wet and keep layers thin to avoid bubbling. Shape-wise, almond and oval flatter the pattern most because they elongate the marbling, but tortoise works on short nails too if you keep the blobs small and sparse. If you're shopping shades, OPI's sheer browns ("Espresso Your Style"), Essie's jelly finishes, and CND Vinylux sheer coats all layer well for the DIY method. One caution: tortoiseshell shows chips more than solid color, so cap the free edge with top coat and refresh it every three days. And if a blob lands wrong, don't restart — blur it out and call it depth. The pattern forgives everything except symmetry.
FAQ
Can I do tortoiseshell nails with regular polish instead of gel?
Yes — the DIY method in this guide uses regular jelly polishes, and the results are genuinely close to gel. The key is working with translucent shades rather than opaque ones, since the pattern's depth comes from layering see-through color. Regular polish needs longer drying time between layers (five minutes minimum), and the finished look lasts about a week versus two-plus for gel. Seal with a high-shine top coat like Seche Vite for the glassy finish.
Does tortoiseshell work on short nails?
Absolutely, with one adjustment: scale the pattern down. On short nails, use smaller blobs and fewer layers so the marbling doesn't crowd the nail. The jelly-layered, negative-space, and abstract swirl versions in this collection were designed with shorter lengths in mind and look especially refined on a neat, short oval.
What colors do I need for the tortoise effect?
Three: a sheer honey-amber base, a mid-tone caramel, and a deep espresso brown. All three should be translucent jelly finishes with warm undertones. Black is too harsh and opaque browns kill the depth — the magic of tortoiseshell is light passing through layered sheer color.
How long do tortoiseshell nails last?
A gel tortoiseshell set lasts two to three weeks with proper application; regular polish versions last five to seven days. Because the pattern is busy, small chips are less noticeable than on solid colors, but cap the free edge with top coat and refresh it mid-week for the longest wear.
Final Thoughts
Tortoiseshell endures because it behaves like a neutral with a pulse — warm, dimensional, and quietly interesting in a way flat color can't match. If you're new to the pattern, start with the French tips or the negative-space version to test the waters; if you're already a convert, the gold-flecked or matte finishes give a familiar favorite a new season's energy. Whichever direction you choose, lean into the irregularity — the imperfect marbling is the entire point. Save the looks that caught your eye, show your tech the exact finish you want, and let fall's most wearable pattern do the rest.